August 7, 2019
Why does ISO noise happen?
Why does high ISO noise happen and how do you remove it?

Over the next few weeks, I am going to be photographing performance photography at the Edinburgh Festivals. We aren’t usually allowed to use flash. To get sharp images in low light we usually need to use wide apertures and high ISO values. One of the problems of high ISO is that it can introduce noise into your photographs. Why does this happen and what can you do to remove it?
Why do we need ISO?
Before we look at how ISO works let’s understand why we need to use it? To get a good exposure we need to balance the amount of light being recorded on the sensor. There are three things that affect how much light is recorded on the sensor. Aperture is the size of the hole in the lens. All things being equal, this will change the depth of field with bigger DOF being achieved through small holes and less light. Shutter speed will change how motion is frozen or blurred. Faster speeds will mean less light. If we creatively want to take a photo with more light than the light meter is recording we can add ISO.
How does a sensor work?
ISO doesn’t actually allow any more light to come through the lens. Instead, it uses a complex process called ‘gain’ in electronics. Let’s see how a sensor works in a few simple steps and then see how ISO changes the end photograph.
We know that light is recorded on the camera’s sensor. A camera sensor is made up of lots of tiny receptors that we call pixels. Each pixel records how much light is hitting it every fraction of a second. Light is a combination of red, blue and green colours. In your camera, there are several million pixels and they are all sending the colour values to the sensor along metal wires at the same time. If you think about the size of your camera and the millions of wires that are sending these electrical pulses back and forwards, the wires will be really close together. When wires are so close to each other, they cause interference which is the curly orange line in the animation above.
How does ISO get added?
Let’s imagine we are going to take two photographs. One with a slow shutter speed and a second with faster shutter speed. When there is a slow shutter speed we will have lots of light coming into the lens so we could have a low ISO value. Now, we’ll take one of the pixels and look at how much light is being recorded. There has been 85% of red light, 50% of green light and 70% of blue light. As this information is sent to the sensor, it picks up the interference caused by the millions of wires being so close together. This is also recorded on the sensor as the thin orange line below.
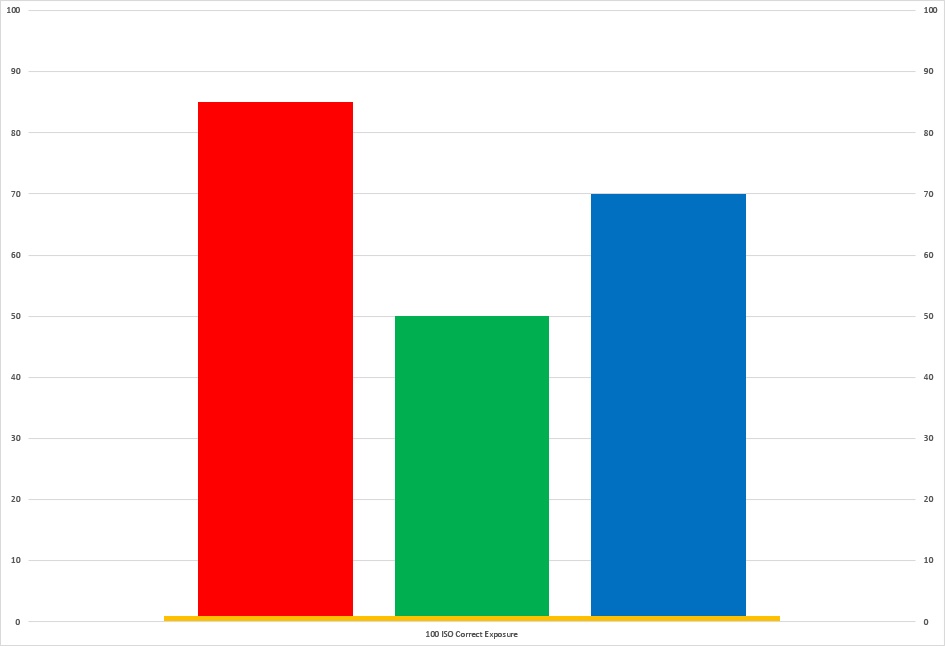
We are now going to change the shutter speed without changing the ISO. In this example, we’ll reduce the amount of light by 4 times. The image is going to appear darker as there is less light hitting the sensor. However, the red, green and blue values will reduce in the same proportions. You’ll see we also have the same amount of interference being recorded as the wires are still just as close to each other.

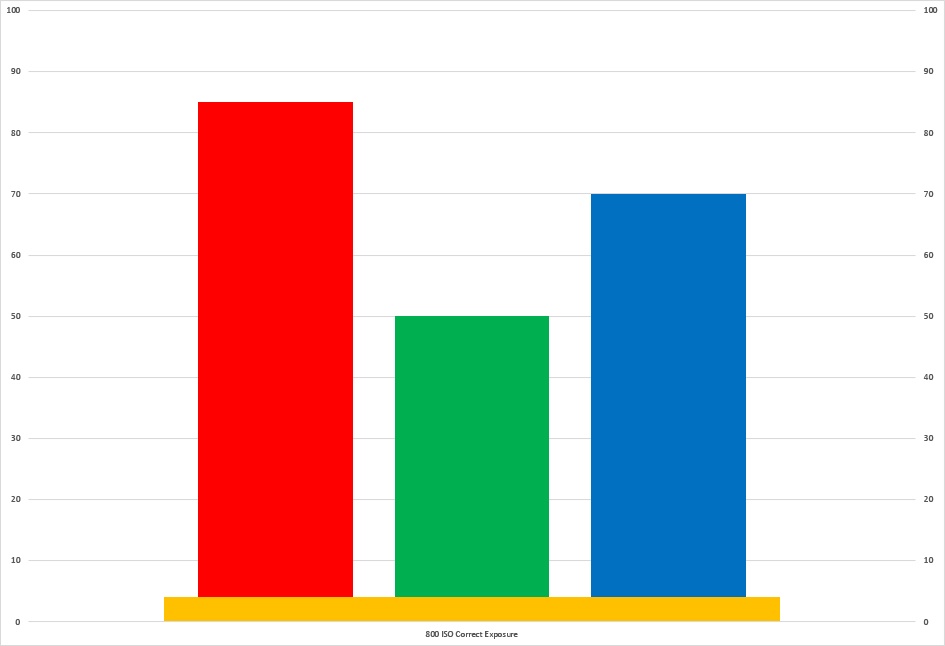
We are now going to add the ISO to re-correct the exposure. We’ll add 4 times the amount of ISO. The process that occurs in the sensors processor is that it will take the values being recorded by each pixel and multiply them by four. The red, green and blue values will all return to their original values. However, look at how the orange line has also been increased. The process of gain hasn’t differentiated the colour values from the interference value and so this has also increased. It is this interference amount that introduces the noise into images.
How can we remove noise?
You’ll see that as we increase the ISO noise is introduced. However, we would love to be able to shoot images at high ISO and then have a more polished ‘noise-free’ image. Within Lightroom, there is a section in the Develop module that allows us to almost do this.
We are going to use the image taken at a recent photo-call for a group called Ockham’s Razor. The shot was taken at 1/80th second, the aperture was f/3.2 and an ISO of 12,800. I’ve purposely shown the image in a small size below. There is hardly any noise visible at this small size. If your photos are going to be viewed mainly on mobile devices, the noise is going to get past most viewers without doing anything.

However, if we zoom into the image at 100% we can see there is quite a bit of noise throughout the image. This is where we are going to use the Detail section in the right-hand panel of the Develop module in Lightroom.
Colour and Luminance Noise Reduction
You’ll see that there are two types of noise reduction available, Luminance and Colour reduction. Colour noise reduction examines the image and tries to predict where similar colours should exist next to each and overwrites the noisier pixels. As a result, it is quite subtle in reducing noise. You can see in the image below where we have moved the Colour noise reduction to 100%, there is hardly any difference.

Luminance noise reduction is far less subtle. It works by trying to smooth out noisier pixels. Whilst it does a great job in removing noise, it can also remove detail in the image. As you can see below where the Luminance slider is moved to 100%, the result is very unnatural.

We are going to get the best possible result by using a combination of Colour and Luminance reduction. In order to retain sufficient detail, we will need to leave some noise in the image. Remember, it’s called noise reduction, not noise removal. This final image uses 35% Luminance reduction and 65% colour reduction. It’s a pretty good job with a lowish amount of noise but sufficient detail to make the image work

The featured image at the top of the page has had a few extra edits applied and a tighter crop. Hopefully, you’ll agree that it’s a very usable image taken at an exceedingly high ISO value. Don’t be afraid to push the boundaries of your sensor a little and see what can be achieved with a few sliders in Adobe Lightroom.
If there are any comments or questions, please drop me a mail. You can also sign up for the Edinburgh Photography Workshop monthly newsletter where you’ll get regular updates on interesting things happening in photography and some great tips. Sign up by clicking here.