July 3, 2019
Freeze and Blur with Shutter Speed
Using a different shutter speed can blur or freeze motion in your subjects.
During the Switch to Manual Workshop sessions, we look at the three elements of exposure that affects the amount of light recorded on a sensor, shutter speed, aperture and ISO. Each of these three things can change the way an image looks by varying the value selected. Shutter speed will change the way movement is either frozen or blurred.
In this week’s blog, we are going to look at three different scenarios to show the effect of different shutter speed settings. These have mainly been taken on a tripod to get consistency in the angle of the images. However, before we start, I am going to give a rule of thumb about how the shutter speed you are using can determine to use a tripod or hand-hold.
The standard lenses used by most photographers are the 16-35mm, 24-70mm and 70-200mm. The longer the lens is, the heavier it is and so it needs more effort to keep the lens steady. The more effort that is required, the more your heart has to pump blood around your body which causes a greater vibration as it flows through your veins. In order to counteract this vibration, you need to choose a shutter speed that is fast enough. If you take the longest focal distance of the lens you are using (i.e 35mm, 70mm or 200mm) and put this under 1 to make it a fraction, you’ll get the shutter speed which will stop camera shake being caused by your heart pumping. If the fraction you have created isn’t available always go to the shutter speed above that is closest. For the 16-35mm, this would be 1/35th (or 1/40th which is usually the closest available speed). The 24-70mm would be 1/70th (1/80th is usually the closest). The 70-200mm would be 1/200th.
Shutter speed for walking pace
In the next few examples you are going to see, I shot the images on the 24-70mm lens with an aperture of F/11. I balanced the exposures using a combination of either ND filters or increasing ISO. You can read more about how filters work in the blog from August 2018.
In the images below, we have taken four different shutter speeds. The model is walking at around the same pace in each of these shots. The first shot is on the left in the top row, the second is next to it, the third on the left on the bottom row and the fourth is the bottom right image.
The first shot is taken at 1/50th of a second and whilst the background is nice and sharp, the subject is clearly blurring.
The second shot is now at 1/100th of a second so, it’s now twice as fast as the first shot. Crucially it’s also a shutter speed that will stop camera shake happening if it was a hand-held shot. However, there is again clear blur being seen in the arms, legs and hair. This shows the difference between countering, camera-shake and freezing motion.
Shot three again doubles the shutter speed to 1/200th. The image is much sharper but there is still some movement being captured particularly in the feet and arms.
Our final shot in the section is taken at 1/320th of a second and now has frozen the movement of the model.
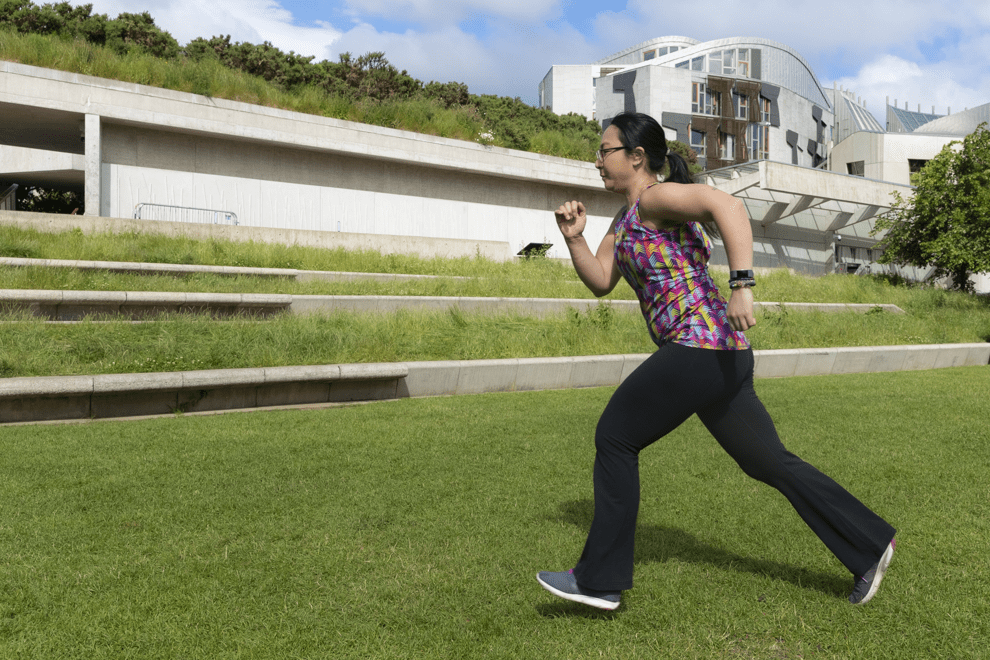
Shutter speed for running pace
These next set of images are going to look at the effect of shutter speed when the subject is running. This time our first image is shot at 1/100th of a second. Due to the subject moving faster, there is significantly more blur than the comparable shot when they were walking.
Our second shot is now faster with a shutter speed of 1/250th of a second. There is still quite a bit of movement visible in the arms, legs and body of the subject.
The third shot takes us up to 1/500th of a second. Even though this is now faster than the walking shot that was sharp, we can still see blurring in the shoes, body and hair.
Our final image in this set is taken at 1/1000th of a second. We have now got to a speed where the models’ movement has been frozen as they sprint past the camera.
Shutter Speed for water
In this final set of images, we are going to see how using a slower shutter speed can give a more pleasing result. The location is a waterfall near to Cramond. This time we will start with a fast shutter speed and gradually go slower.
The first shot is taken at 1/100th of a second. Here we can see pretty much every ripple in the pool at the front. The weir at the back also has lots of detail in it. As a result, the tree branch in the foreground is lost in the rest of the scene.
Shot two is taken at 1/6th of a second. This is four stops slower but the effect on the image is quite slight. The weir now has a smoky feel to it and the pools at the front have slightly fewer ripples. To me though, it still feels a messy scene.
Our penultimate shot has had the shutter slowed down to 2 seconds. There is now a real change in the image. Most of the water has started to smooth out. The shutter speed has retained some of the detail so we can still see it’s flowing water.
Finally, we have changed the shutter speed to 25 seconds. The length of the shutter speed has given a glass-like effect to the image. You can also see that the movement of the water is captured in a much more subtle way, with the shape of the flow being the only hint of water movement. By taking away the distractions of the water ripples the tree branch now becomes a more important element to the image.
The Edinburgh Photography Workshop Landscape and Seascape sessions give you a real opportunity to experiment with different shutter speeds. You can also subscribe to our monthly newsletter which contains exclusive content for subscribers.