April 3, 2019
Star Trail Photography
Shoot and process a star trail image
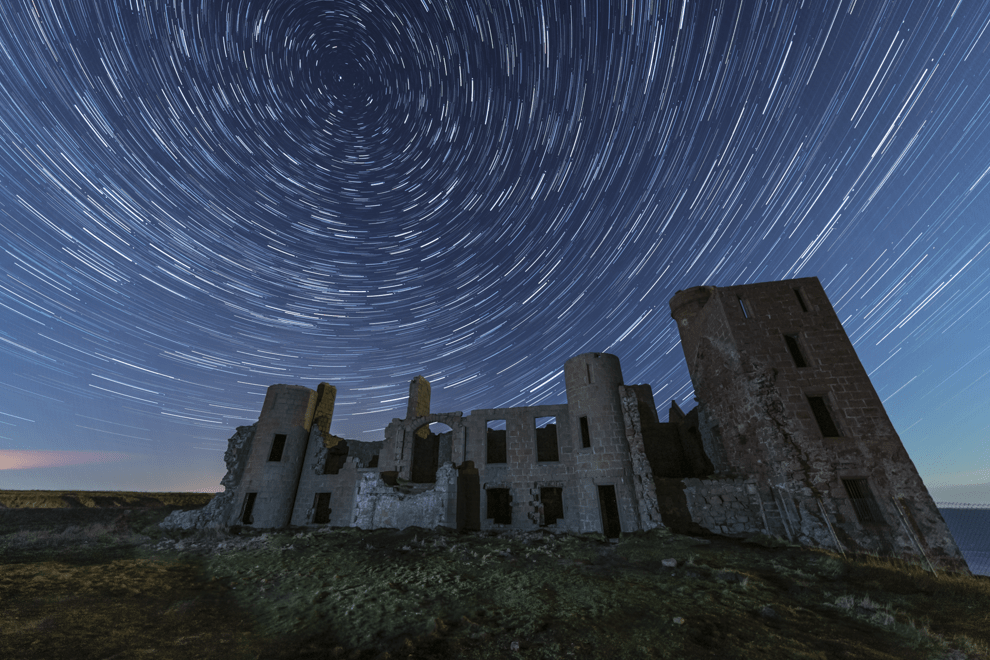
A couple of weeks ago there were articles in the newspapers about a massive aurora storm that would hit. The best area for clear skies was the Aberdeenshire coast. So we headed up to Cruden Bay, the home of New Slains Castle which is said to have inspired the novel, Dracula. Unfortunately, the Northern Lights didn’t appear but the clear skies gave a great opportunity for a star trail image.
Shooting a star trail
There are two elements that you need to have in order to shoot a star trail image. First, the sky needs to be pretty clear to see the stars. Secondly, in the northern hemisphere, you need to point your camera to the Pole star (Polaris). A nice easy way to find it is to use the app Photopills, which I have reviewed in the past. The night augmented reality feature in the planner section, shows you how a star trail will look pointing in different directions.
Once you have found your location, the next thing to do is to set your exposure. I prefer to take many images of 30 seconds and merge them together in Photoshop later. I open the aperture fairly wide, usually around f/4.0. ISO then balances the exposure, in the group of images you’ll see later, I set it to ISO 640.
One of the hardest things shooting at night is to focus well. Many lenses have a Distance Scale window on the top of the lens. If you have one of these, you’ll get a fairly good focus by moving the focus ring until the indicator on the infinity symbol (like a figure 8 on its side). If you don’t have a distance scale window then you could shine a torch onto the subject and manually focus the lens. However, be aware of other photographers that might also be shooting at the same time – we’ll talk a little more about etiquette later.

Now the easy bit, once you’ve got the settings and you’re focused, it’s time to start shooting. The best way to do this is to have a shutter release, this saves you having to press the shutter button every 30 seconds. As my camera is set to back-button focus, the camera won’t try and re-focus every shot. If you haven’t switched to back button focus then ensure you set the lens to manual focus. You may also want to consider if you leave long exposure noise reduction switched on. If you do, there will be a 30-second gap in between each image so the star trail will look more like a dotted line. If you switch it off, then you may see the odd pixel which is red – this is caused by the sensor over-heating slightly. I prefer to have a solid star trail and I can cope with a few hot spots. I also switch the camera to continuous shooting. This means that once I push the lock on the shutter release the camera will keep taking photographs until the lock is taken off.
Photographers Etiquette
Just before we go on to processing a star trail image, it’s worth discussing the etiquette when you are shooting. If it’s a clear night, it’s likely that there are going to be several other people taking photos. They may have been taking star trail images for many minutes when you arrive. Walking in front of their shot wearing a bright head torch is going to at worse ruin their star trail, at best it will cause lots of Photoshop. Be aware and try to walk at the back of people who were there before you.
A big problem at this location was that it was possible to drive almost right up to the castle walls. Lots of photographers arrived throughout the night and shone their full beam onto the scene. There was plenty of room to park a short distance away so again be aware and think about how you can minimise disruption to other photographers.
Processing the star trail
There are a couple of ways to take the 60+ images taken during the night to make them into a single star trail image. A free program called Star Stax is often used by photographers. The issue Star Stax would have with this set of images is that it will also show all the artificial light that was added by people walking through the scene or shining headlights onto the castle. Instead, I am going to use Photoshop to process the file.
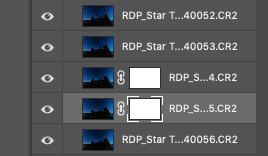
Most of the process will be done in the same way as we process Light Trails. Highlight all the images of the star trail in Lightroom and use Edit In Photoshop as Layers. Then highlight all the layers and change the blending mode to Lighten. This will show the lightest thing in all the layers that have been selected. It’s great for the star trails but not so good for the castle walls that have had headlights and reverse lights on them.

Next, we are going to bring through just one of the shots that had been purposely light painted (after speaking to the other people at the scene). To do this move the layer that has been light-painted to the top and add a layer mask. We’ll then paint out all the extra light by making the pen black and painting into the layer mask. You can see where the mask is taking effect by pressing the Option (Mac) or Alt (Windows) key and clicking on the layer mask. The masked area will be shown in red as below.

We’ve now got a tidier image. However, I noticed that there was some diffraction that had occurred on a couple of frames caused by someone shining a light from the side of the lens.

This was easily fixed by adding a couple of layer masks on the offending frames and painting out the small red smudge.
The end image was then transferred back to Lightroom by taking the option File and Close (or press CMD + W for Mac or Ctrl + W for Windows). I made a few small changes back in Lightroom using the Adjustment Brush to darken some of the foreground light and produce the image at the top of the page.
We always try to include a Star Trail image on the three day West Highland Landscape workshop if the weather is with us. The 2019 trip will take place on 25th – 27th October. If you have enjoyed this blog please sign up to our monthly newsletter, where you can catch up on past blogs, receive interesting photography news and access special members-only content.