October 3, 2018
Light-trails that will stand out
Impressive light-trails that make your night-time images look stunning
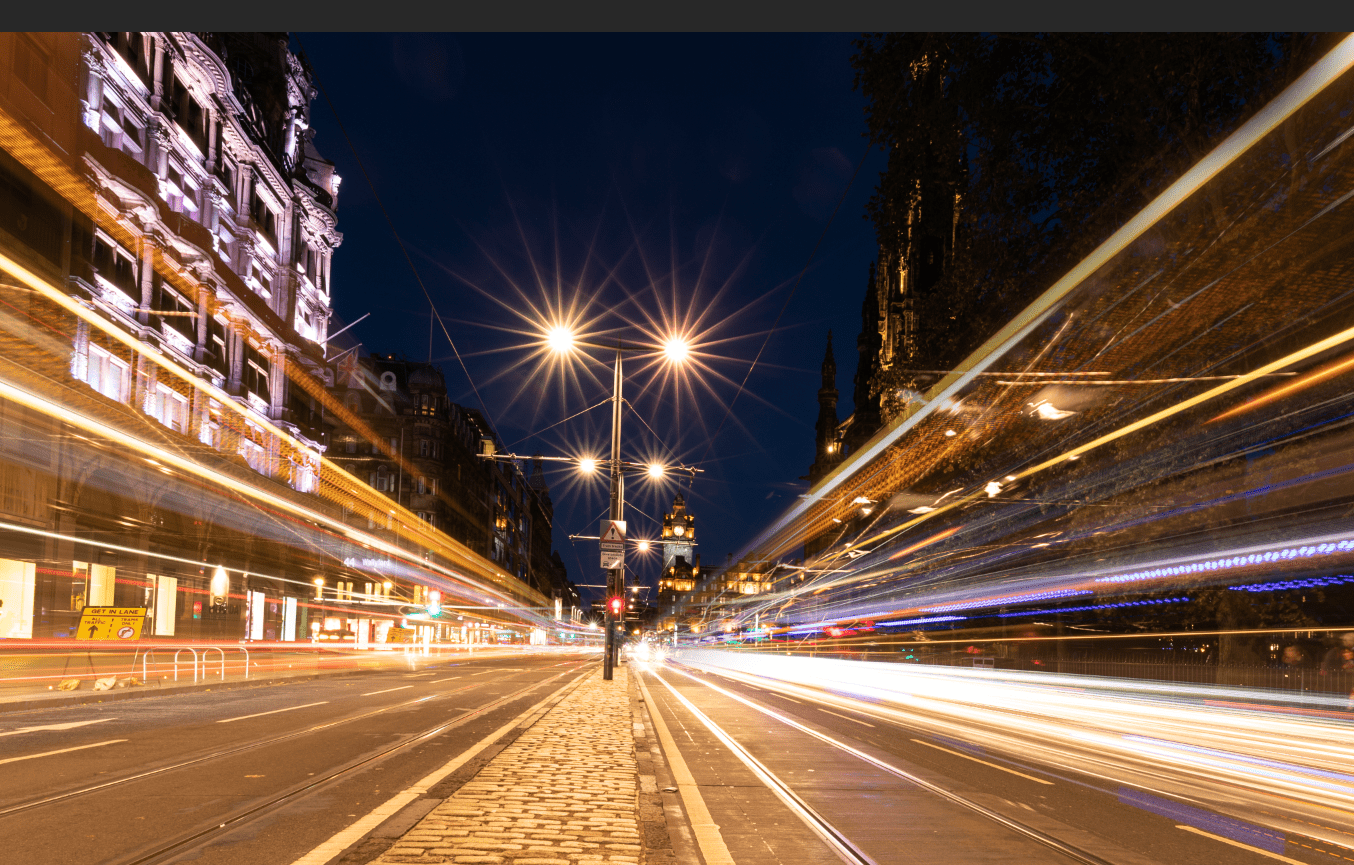
The dark nights are starting to draw in here in Edinburgh. They are perfect for capturing light-trails. Cars, buses and trams whizz along Princes Street and there are some iconic buildings which make a great back-drop. The best time of the evening to capture light-trails is during the Blue Hour. However, that may not be the time when the road is at its busiest so here’s a very simple way to use Adobe Photoshop to create a bustling street scene.
Shoot your light-trails
The key to getting a stunning light-trail shot is to take multiple exposures which we will blend together later. I always like to have a clean image which is taken at the best part of the blue hour which will be my base image. I then take a number of additional photographs where I push the exposure to 30 seconds, so we get plenty of lights captured in the set. The first image in the group below is the base image.

The next thing we need to do is to move the photographs into Photoshop so that we can combine the light-trails together. We are going to use layers and there is an easy way to transfer them over. Highlight all the photographs that you are going to use and then right-click any of the photos. Take the option Open as Layers in Photoshop in the Edit In menu and they will be opened in a single document in Photoshop.
Photoshop Layers
To understand the next stage, it’s good to know how layers work. We have stacked all the images and the one you can see on the screen is the one at the top of the stack. As we start to blend these images it will be like we have cut holes through each layer, so we can see what is in the layers below.
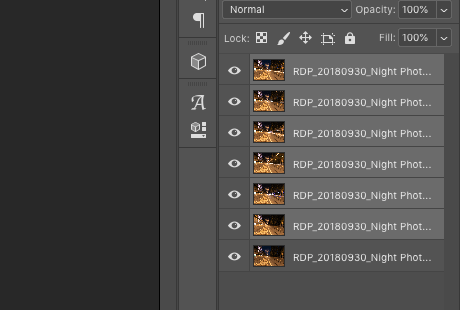
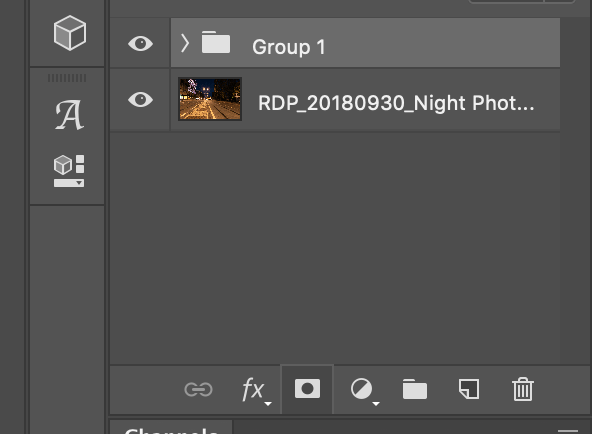
You can see all of the layers on the right-hand sidebar. The first thing we are going to do is to move the base image to the bottom of the stack by clicking and dragging it downwards.
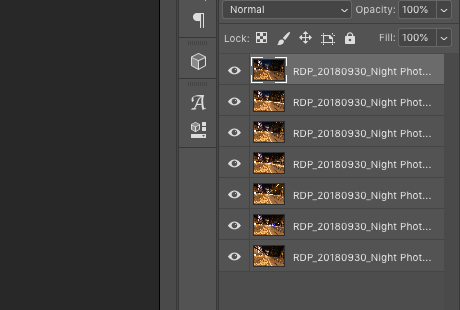
The next thing we are going to do is to allow Photoshop to show us all the light-trails that are in all but the base layer image. In the sidebar, highlight all the light-trail layers by clicking on the top one and then hold shift and click on the last (take care not to highlight the base layer image).
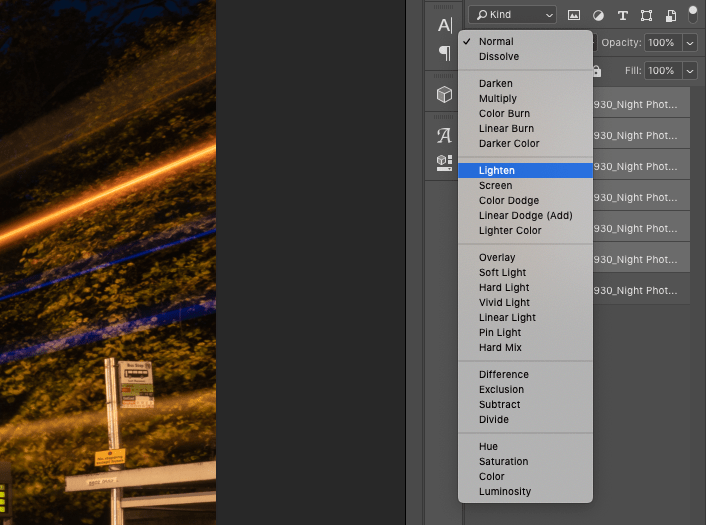
We are now going to use a blending mode which will show the lightest thing in all of the layers that are highlighted. Click where it currently says normal and a drop-down menu will appear. Take the option Lighten and you will see all the light-trails from the layers appear.
Layer-mask
We now have a much busier light-trail scene; however, the longer exposures have brought out a lot of flares into the image at the top of the image so now we have to show the best parts of the base layer to give us a great photo. To do this we are going to use something called a Layer Mask.

Ensure that all the light-trail layers are still highlighted and then click on the folder shape at the bottom of the list of layers (or alternatively click CMD on a Mac or CTRL on Windows and the letter G). This will group the light-trail layers.
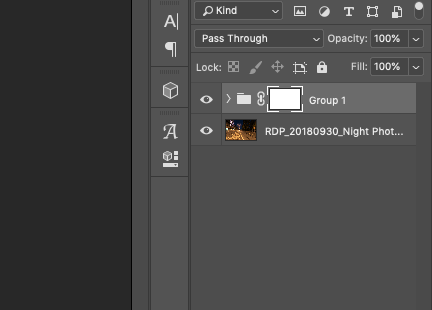
Now we are going to add a mask to the group so that we can decide which parts of the layer group to show and which part of the base layer to be visible. With the Group highlighted click on the Layer Mask button which is a rectangle with a hole in the middle.
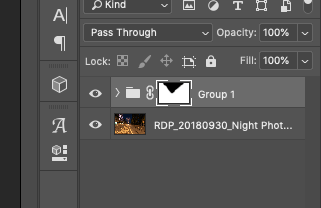
In the layer group, you will now see a white rectangle next to the group name. When there is a white line around the rectangle if you paint black onto the picture it will reveal the base layer. If white is painted it will bring back the light-trail layers.
Select the Brush tool by clicking B. I am going to paint black onto the area at the top of the screen where the night sky is visible and there aren’t any light-trails. This will give us a much cleaner image with the base layer giving us a nice blue sky and the light-trail layers giving us the spectacular sense of movement. You’ll see that as the black is painted onto the picture, the layer mask will show the area that is being revealed. Don’t worry if you make a mistake when painting black. Simply switch your brush to white by clicking on the black and white square (you can also use shift and X) and you can paint back in the light-trail layers.
Back to Lightroom
When you are happy with the layered image click on CMD or CTRL and W. Take the option to Save and the blended image will be available in Lightroom. To finish the image, I’ve reduced the White Balance slightly, straightened the image and made some slight adjustments to highlights and shadows.
If you’d like to learn more great techniques when the daylight disappears, the Night Photography Workshop is running from September to April.