January 22, 2020
Focus Stacking
Want to get front to back sharpness in your photographs? Focus stacking is an easy way to extend the Depth of Field
Very often landscape photographers want to try and achieve a sharp image from front to back. You can use the hyperfocal distance technique which will mirror how we ‘see’ a scene. Our eyes don’t see everything sharp from front to back – test it for yourself – hold your finger in front of your face about 30 centimetres away and you’ll see that the background is blurry. To get this incredible depth of field you can use a technique called focus stacking.
What is focus stacking?
Focus stacking is an editing technique. In order to use it, you will need to take several images of the same scene. Each photograph would use a slightly different focus point. When these pictures are brought into an editing tool, such as Adobe Photoshop, they are merged together taking the sharpest part of each frame so that it creates a photograph sharp from front to back.
There are two main uses for focus stacking. One is where landscape photographers want to achieve an artificial sharpness. The second is used in either product or macro photography. If you’re photographing small objects you will either need to be very close to a subject or use a loner zoom. If you refer back to The Truth About Depth of Field blog, you’ll know that both these things will reduce the DOF. Using focus stacking can help to take photographs that show every detail of the subject.
Focus stacking for landscape photography
Let’s first look at how we go about taking photographs in the landscape that we can use later for focus stacking. The first thing you will definitely need is a very stable tripod. It is really important that the series of images you are going to take are aligned.
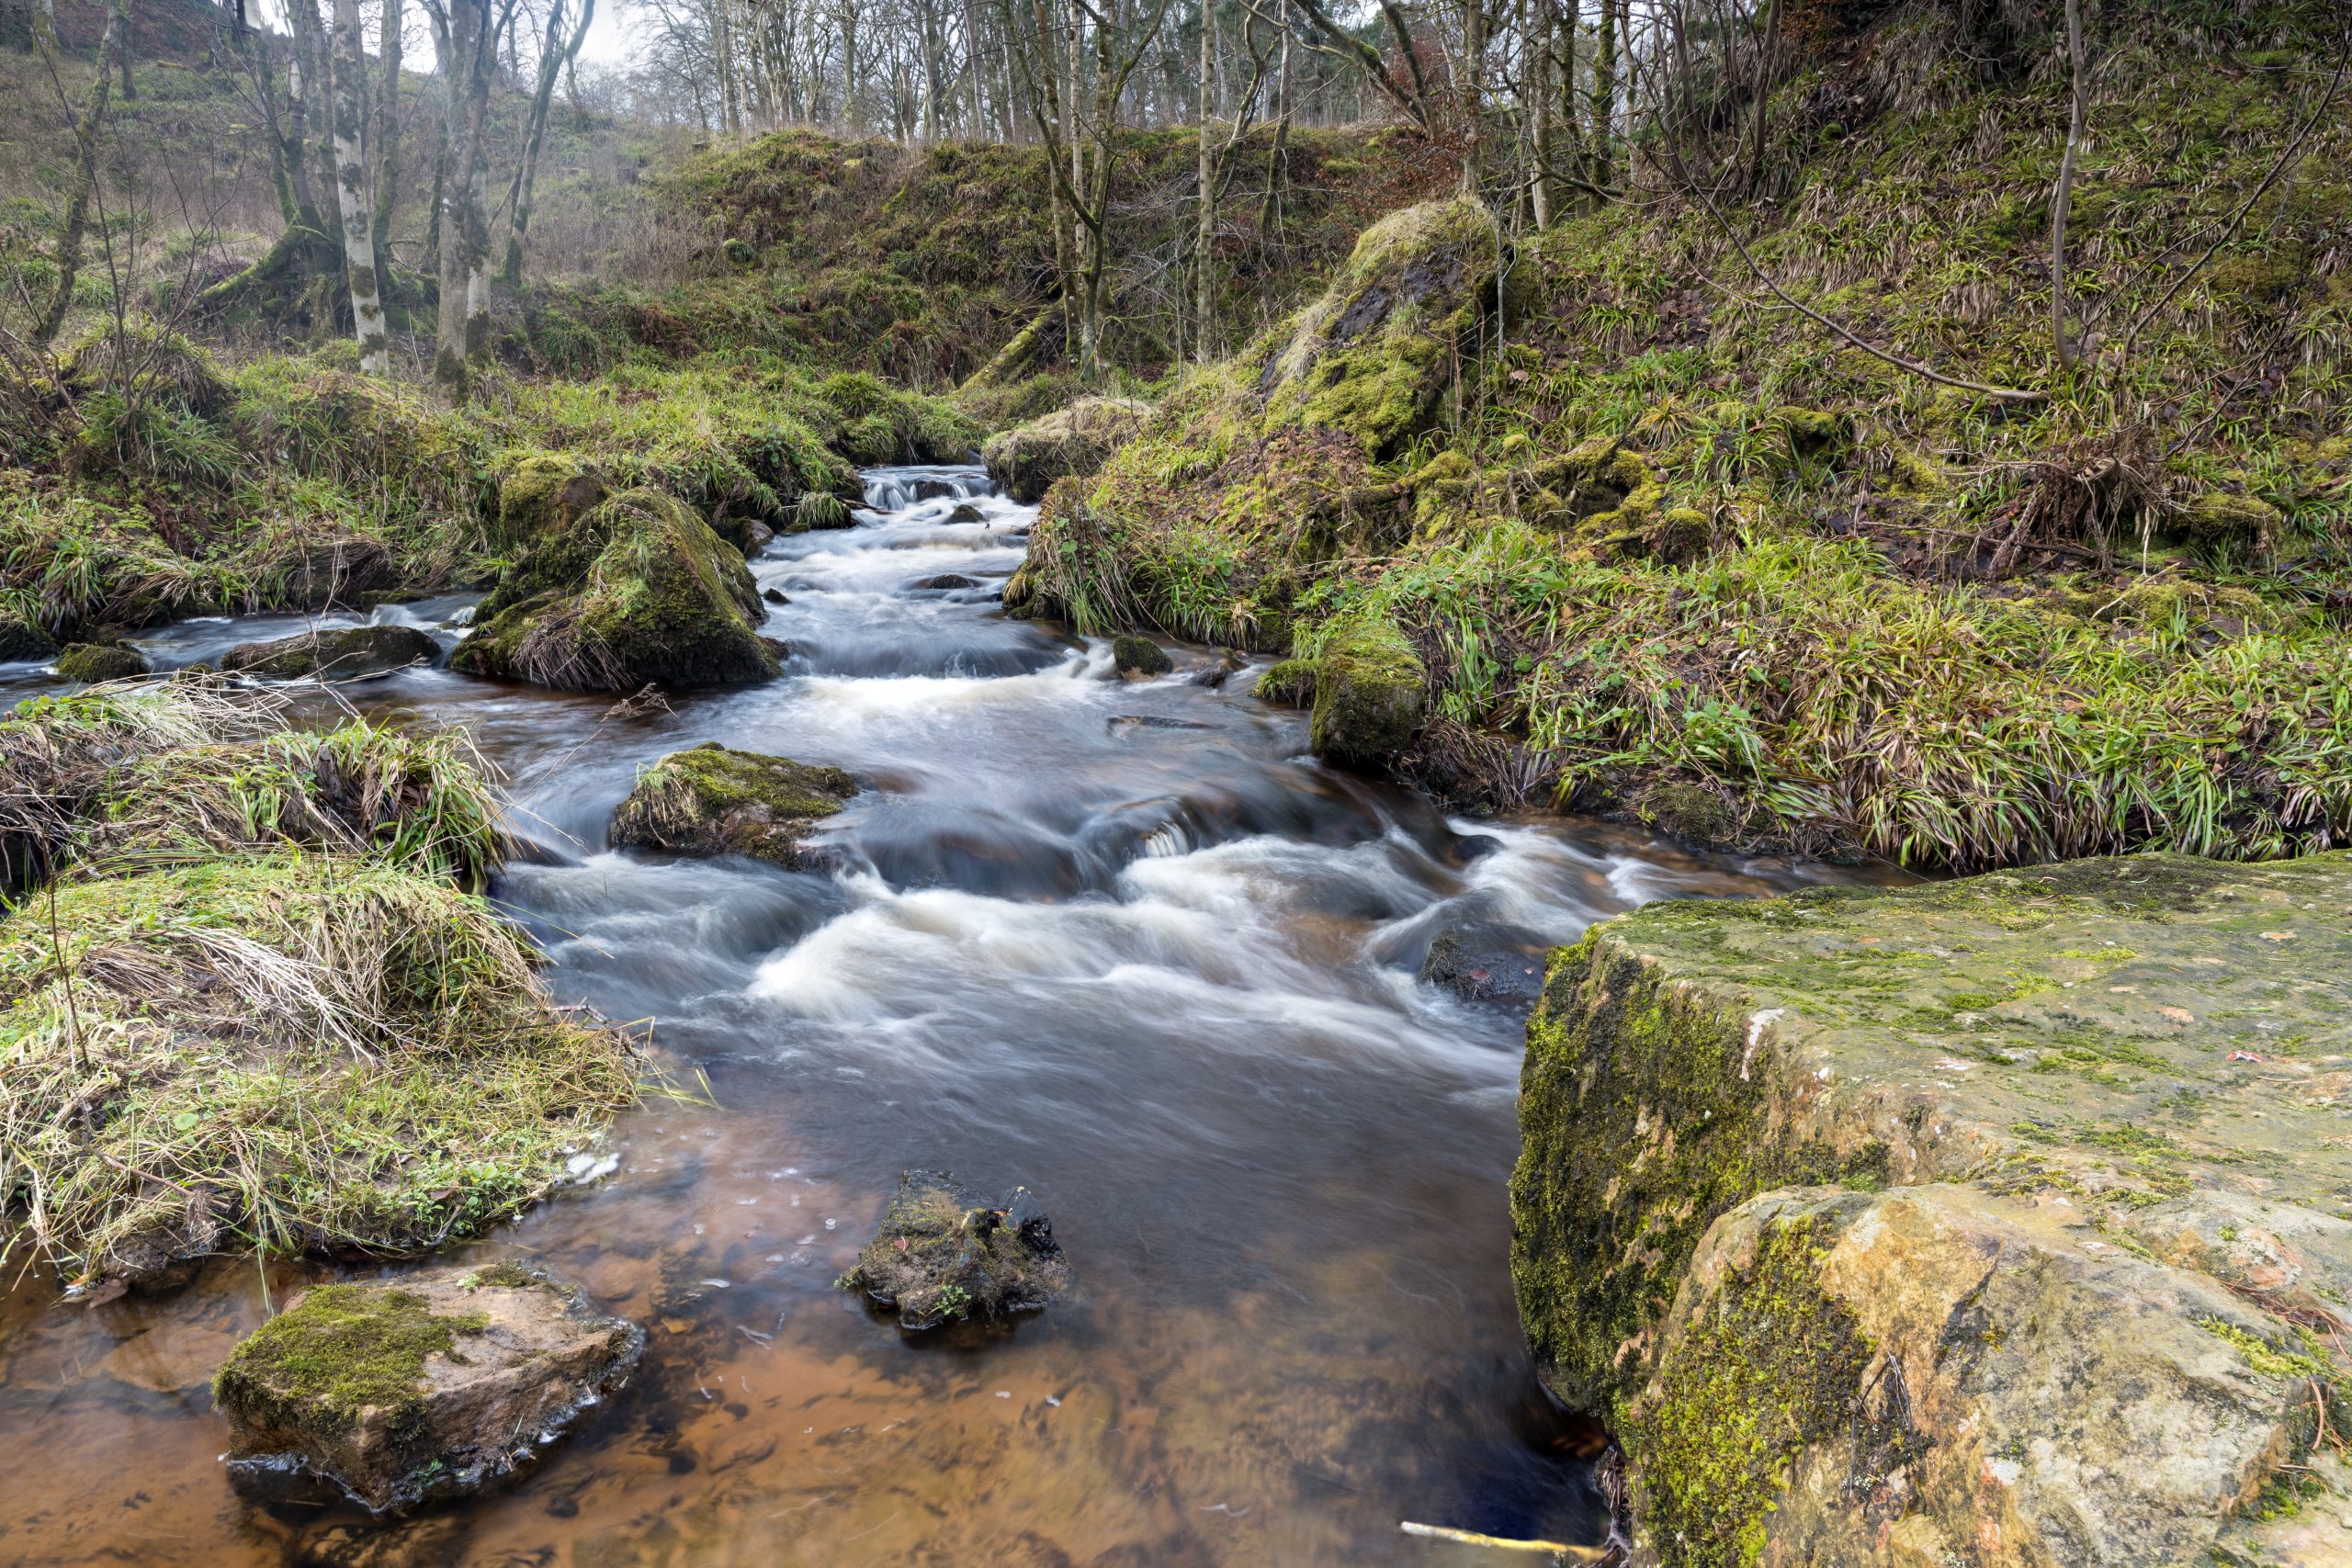
The scene, I am going to demonstrate with is just outside Edinburgh. I have chosen it as there is foreground interest with the rock at the front. The river has some nice rocks in the middle of the scene. The rear of the scene has some trees with lots of detail in them. This is a perfect scene to use focus stacking. To create the end image I have taken three photographs, focusing at different points. I’ve added a green square at the point of focus.


Whilst these pictures all look very similar if you look closely at the top photograph, the rock at the front is very sharp but the trees at the back are slightly soft, despite using the hyperfocal technique. The bottom image, however, is the reverse and the trees at the back are sharp but the front rock is soft. You’ll also notice that as you change the focus point the area being captured changes very slightly, even when the tripod has remained absolutely static. You can see this in the image below where you can move the slider to see the difference between the top and bottom photographs.
Editing focus stacking photographs
I use Adobe Lightroom and Photoshop for editing so I’ll demonstrate how to stack the photographs in these tools. Other editing programs will have a similar way to achieve the same results.
In the Lightroom Library module, select the photographs that you have taken using the different focus points. Hold the shift key and click on the first image. Keep the shift key held down and click on the last photograph. When they are all selected, right-click on any of the photographs and take the option Open as Layers in Photoshop in the Edit In menu.

When the photographs have been taken into Photoshop you will see the three images have been added as separate layers on the right-hand side of the screen. The photograph visible in the main panel will be the one that is at the top of the stack of layers.
To merge the three images with the sharpest elements of each photograph selected we are going to use some Adobe magic! Select all three of the layers by clicking on the top one and then holding the shift key to select the bottom one. Click on the Edit Menu and take the option Auto Blend Layers.
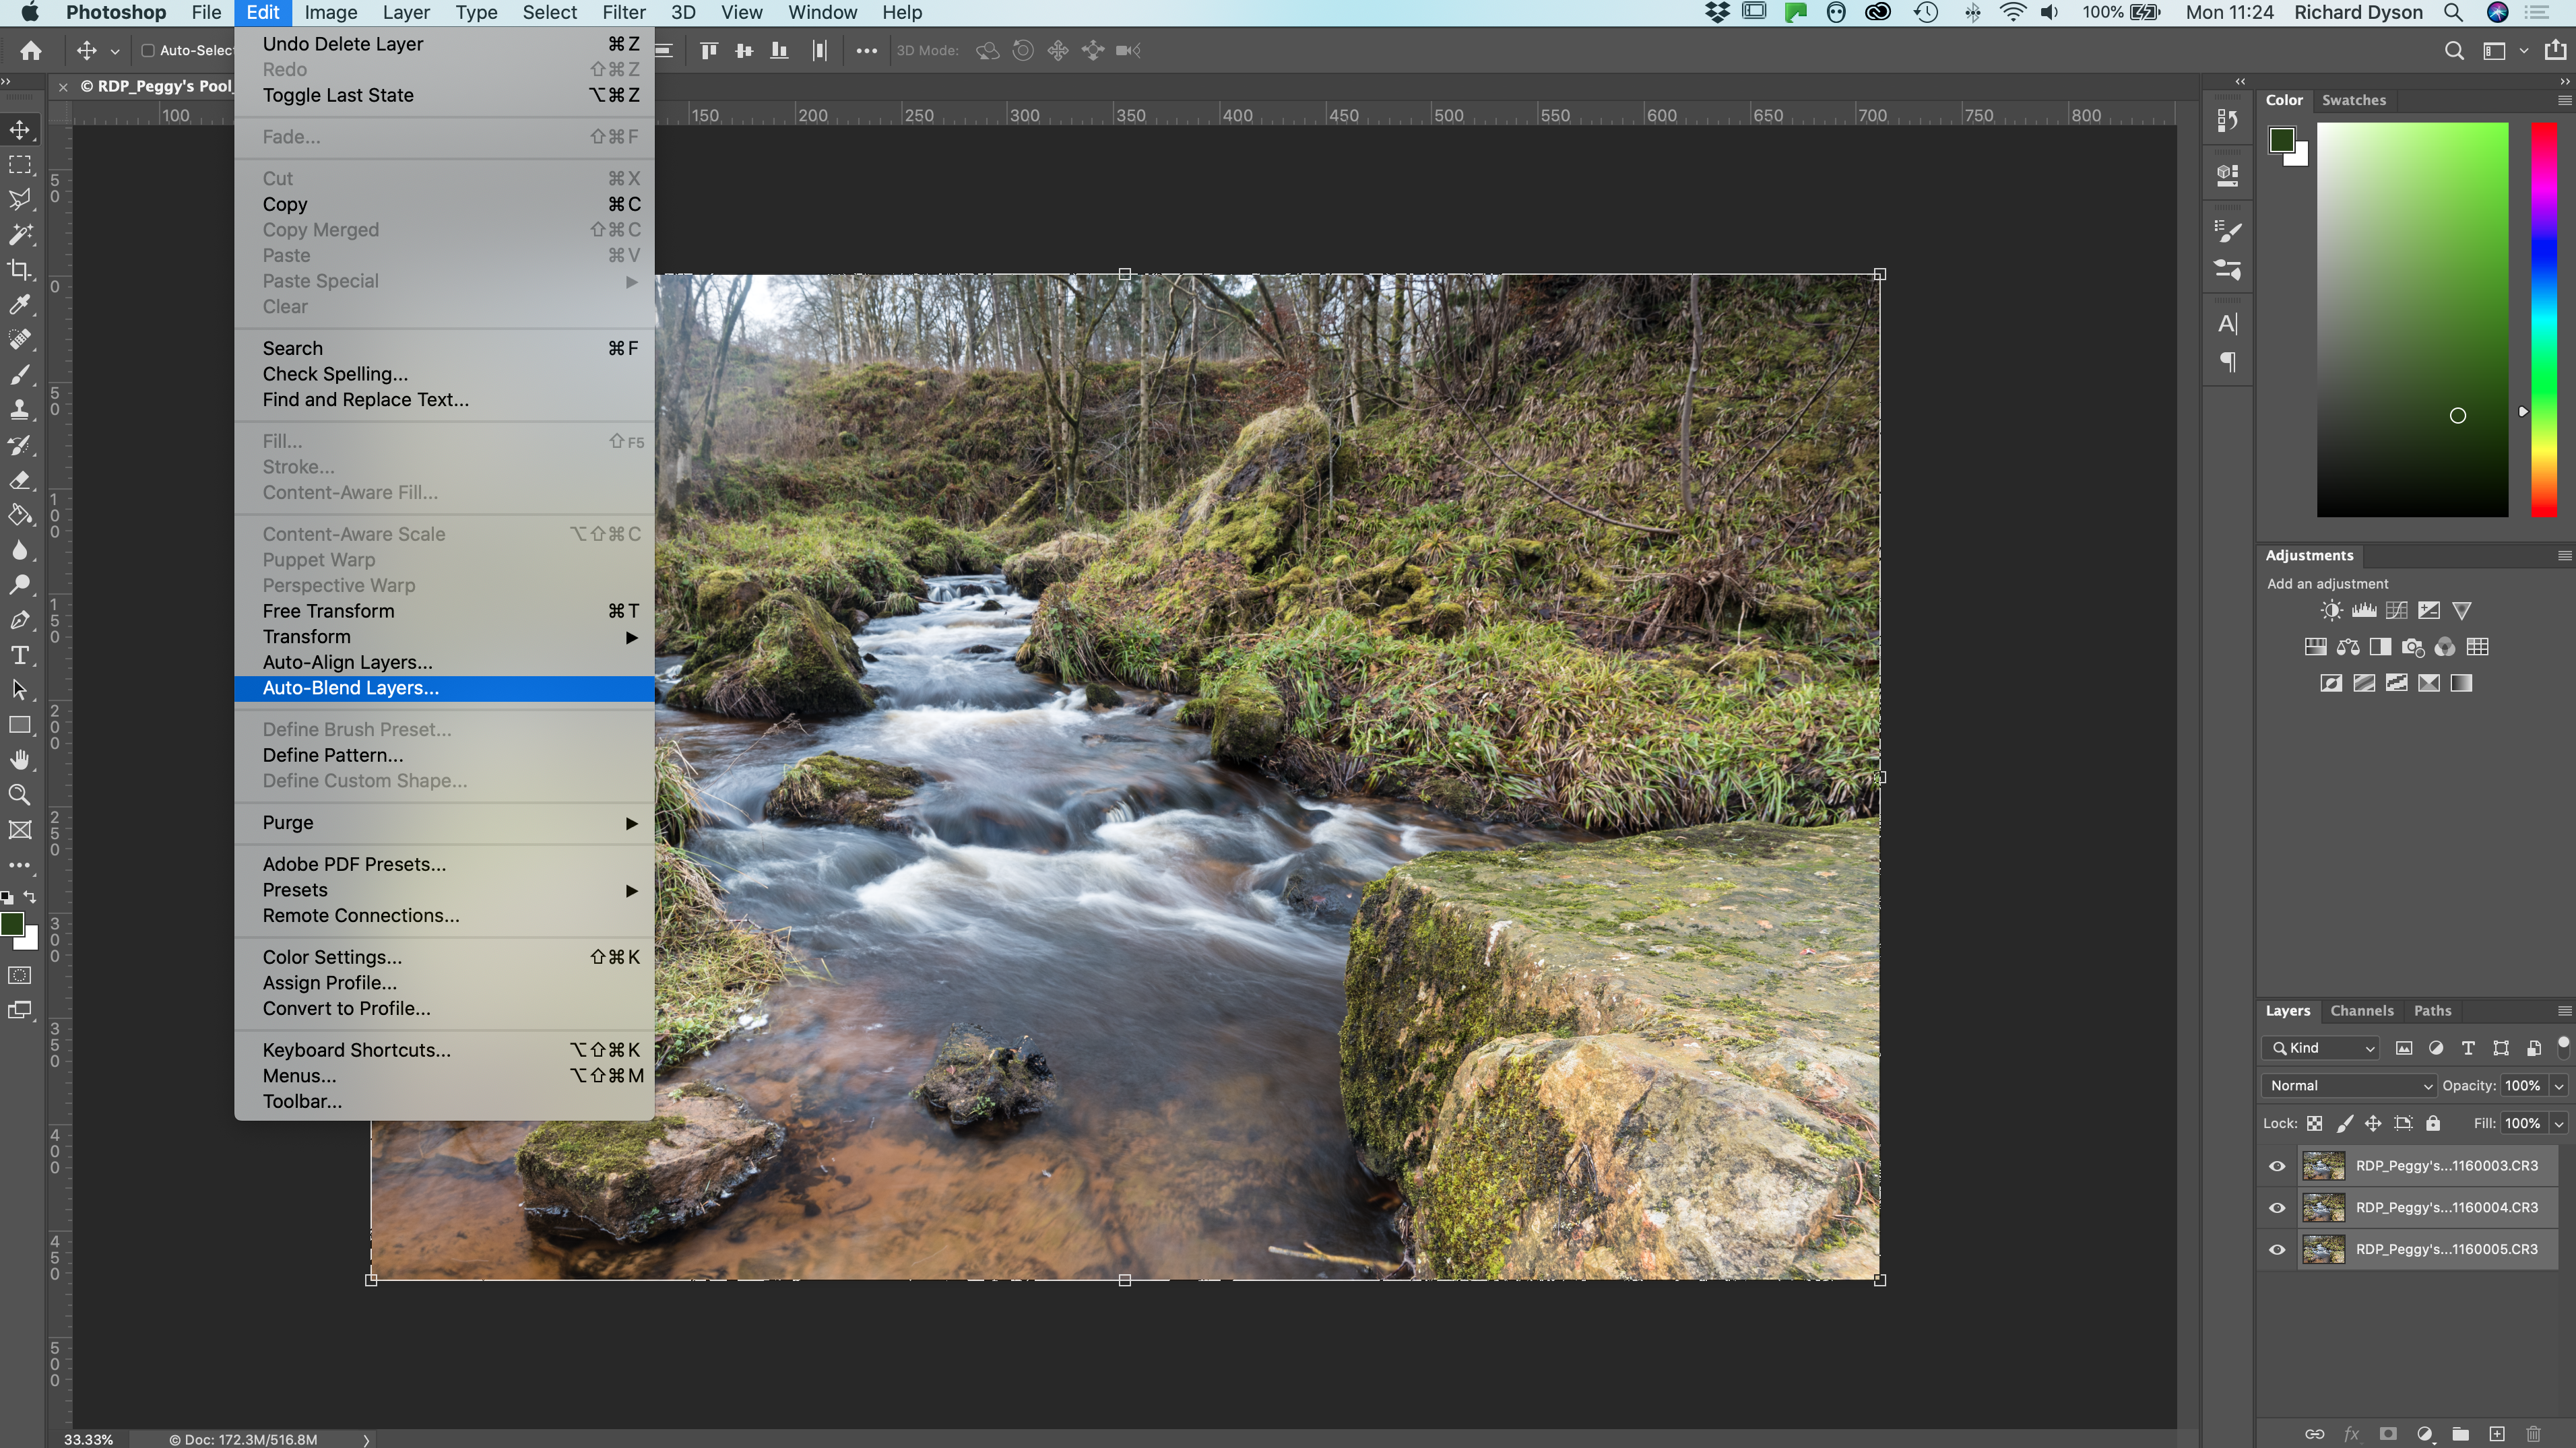
A pop-up box will be displayed. You need to ensure that you have selected the Blend Method of Stack Images. Also, tick the two boxes below the blend method box and then click OK.

After a few seconds, the focus stacking process will complete. In the layers panel, you can see the areas in white that have been used in the combined image. There is a slight problem with end photograph. If you look at the small stick at the bottom you‘ll see that it has been duplicated. This is probably because it moved slightly due to the flow of the water between the first and last shot. However, it can be easily corrected whilst you are in Photoshop using the Clone Stamp tool.

When you have completed the editing you can use the option File and Close then click Save to take your focus stacking image back into Lightroom.
Give us your feedback
If you’ve got any questions or comments, leave them below. You can sign up for the Edinburgh Photography Workshop monthly newsletter where you’ll get regular updates on interesting things happening in photography and some great tips. Sign up by clicking here.
![]()