May 18, 2022
Tethered Shooting with Lightroom
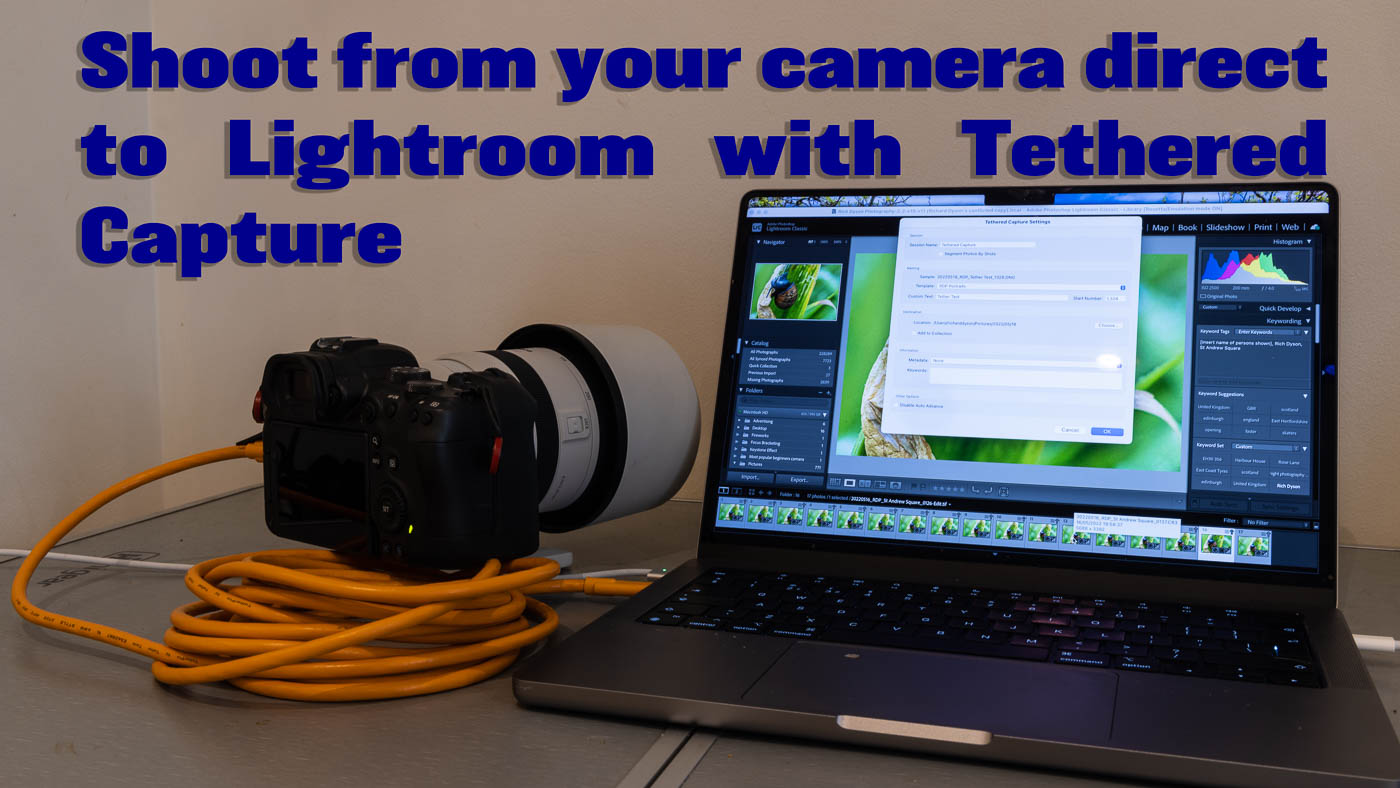
Shoot direct from your camera straight into Lightroom with Tethered Capture.
Over the last few weeks, I have been shooting many corporate portraits. I like to be able to show the client what I am taking while they are in the room. It helps because they get a feel for how the edited shots look and give the sitter confidence that they’re looking good! However, it doesn’t look great if I need to take the memory card out of the camera every time I want to show a group of photos. That’s where using tethered capture can make you look professional and automate the process of uploading to Lightroom.
What is tethered capture?
The tethered capture functionality in Lightroom allows you to connect your camera to your computer using a cable. You can then import photographs straight into Lightroom, apply presets and add metadata almost as soon as you press the shutter.
You’ll need to buy a cable that goes from the port on your camera into your computer. The better the quality of cable you use, the more reliable the connection. I would recommend using a Tether Tools cable, and you can use their online cable finder to get the right cable for your camera/laptop combination.
Setting up tethered capture
Once the camera is connected to the computer, open Lightroom and go to the File Menu. A third of the way down is the option Tethered Capture, and then click on Start Tethered Capture…

In most cases, you’ll then be taken to a set-up screen. However, if you are using one of the latest M1 chip MacBooks, Lightroom needs to be restarted in Rosetta emulation mode. You’ll know if this is the case as a pop-up box will appear asking to Relaunch to Access Tethered Capture. Click on the relaunch button, and Lightroom re-opens. You can tell if Lightroom is using the emulation mode in the right hand of the toolbar at the top of the screen.
The pop-up box has several options to allow you to set up tethered shooting exactly how you want it;
Session Name: This is the name given to the session you are shooting. You can also check the box below to segment photos by shots which creates subfolders inside the session folder when you press OK.
Naming: Here, you can rename the photos as they come into Lightroom. If you use a template that inserts Custom Text in the filename, you can also add this information.
Destination: This section allows you to state where the image files will be saved. In addition, you can add the photos to a Collection if required.
Information: A couple of years ago, I mentioned the importance of adding Metadata to your photos. It helps to protect against people stealing your pictures and using them for commercial purposes. A dropdown box allows you to add metadata templates. You can also add keywords relevant to the entire session in this section.
Disable Auto Advance: Lightroom will display the most recent photo taken by default. If you’d prefer not to see the latest image, check the box and Lightroom remains on the last picture selected.
Once all the options have been taken, click the OK button, and Lightroom will detect the camera.

Shooting with tethered capture
When Lightroom detects the camera, a floating bar appears showing the type of camera connected. In addition, you can see and change the shutter speed, aperture, ISO and White Balance and add a preset to be applied during import.

You can either use the camera handheld so that every time you press the shutter button, the photograph will import into Lightroom. Alternatively, you can also control the camera within Lightroom by pressing the circular button at the right of the floating bar. Clicking on the word ‘Live’ in the floating toolbar shows what your photo will look like, albeit there will be a delay between the camera and computer. This is great for shooting still life subjects, food photography, for example.
There is a limitation with tethered capture in Lightroom. It can only be used with selected Nikon and Canon cameras. However, there are programs such as Smart Shooter 4 that add support for Sony cameras as well as provide additional functionality for Nikon and Canon cameras.
Please give us your feedback.
If you’ve got any questions or comments, leave them below. You can sign up for the Edinburgh Photography Workshop monthly newsletter, where you’ll get regular updates on exciting things happening in photography and some great tips. Sign up by clicking here.
About the author
 As well as running Edinburgh Photography Workshop, Rich Dyson is a professional photographer. His photographs are regularly used in newspapers such as The Times, Guardian and Daily Telegraph. He also had two solo exhibitions and was featured in a members sponsored exhibition in the Scottish Parliament. You can see and buy his photography at richdysonphotography.com.