January 9, 2019
Symmetry – Composition Part 3
Finding symmetry in your shots helps to give a graphic design feel to your images
In this next part of our look at how composition can help to improve your photography, we look at symmetry. During my workshops, students can sometimes think this goes against some of the other composition elements such as the rule of thirds. However, it is important to think of each of the composition techniques as another tool in the tool-box that can be used for a specific task. You don’t need to use all the tools for every job but it’s good to have them for the time you need it.
Symmetry is a really good way to emphasise the subject by repeating it in the shot so the viewer switches between one side and the other. This keeps their view inside the image and so achieves your aim as a photographer to keep them interested.
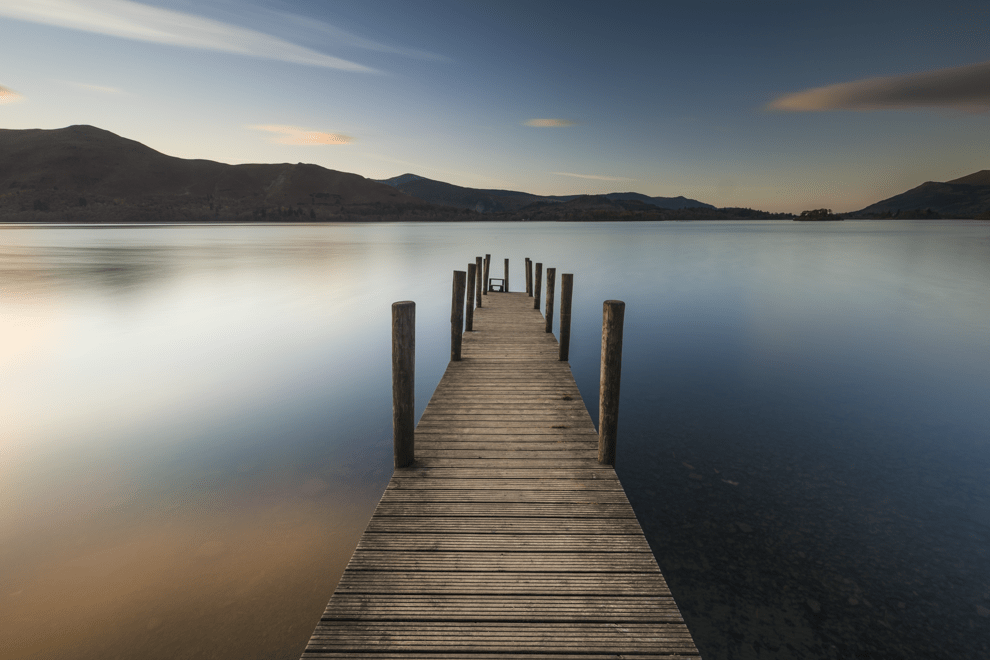
Symmetry in the subject
A well-used technique in landscape photography is to take a symmetrical subject and use this as a central element of the image. This pier in the Lake District is a staple image for photographers. The pier itself appears to be symmetrical at first glance. As the viewer moves into the image, they start to see that some of the upright staves sloping at a slightly different angle. The steps at the end of the pier also break the symmetry. All of these elements have used the initial feeling of symmetry and then created a tension which draws the viewer into the image.
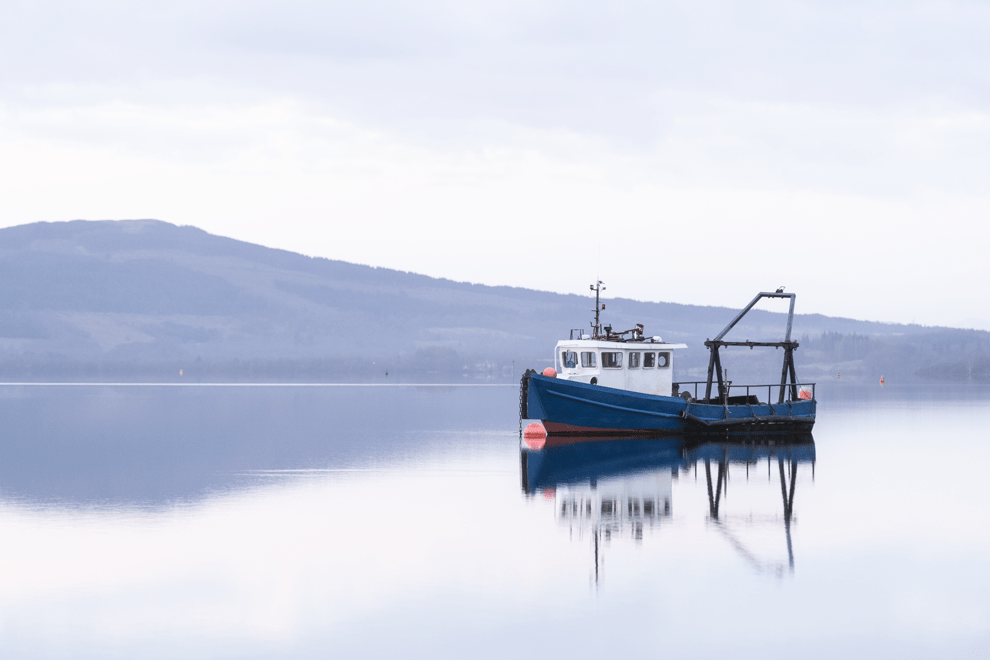
Symmetry in reflections
Another way to create a feeling of symmetry is in reflections. By using water or glass we can create appealing images that emphasise the subject. In this first image, a simple scene shows a boat on a lake. By taking the photograph when the waters were still, we have created a second image in the lower part of the frame. Both the boat and hills have created a symmetrical image along the horizontal plane.
The next image challenges the view of symmetry by twisting the plane where they symmetry has been created. This shot was taken during a recent corporate shoot. The person in the image undertakes a ‘techy’ role. By including the reflections on the computer screens he works with, we have created an interesting image.

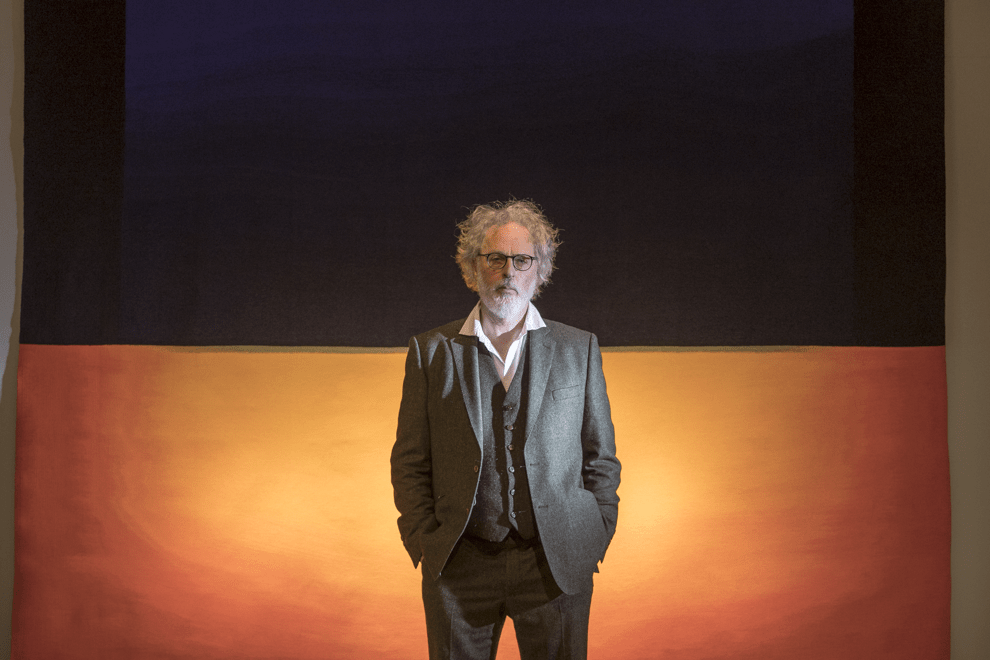
Symmetry in multiple planes
So far, we have looked at symmetry being used in either the vertical or horizontal plane. In this next image, I directed the subject into the middle of the tapestry behind him. The tapestry already had symmetry in the shapes used with two horizontal blocks. I then asked him to stand with both hands in his pockets to create a relaxed feel. By doing this we have created a symmetrical feeling along the vertical plane. The result is, hopefully, an engaging image.
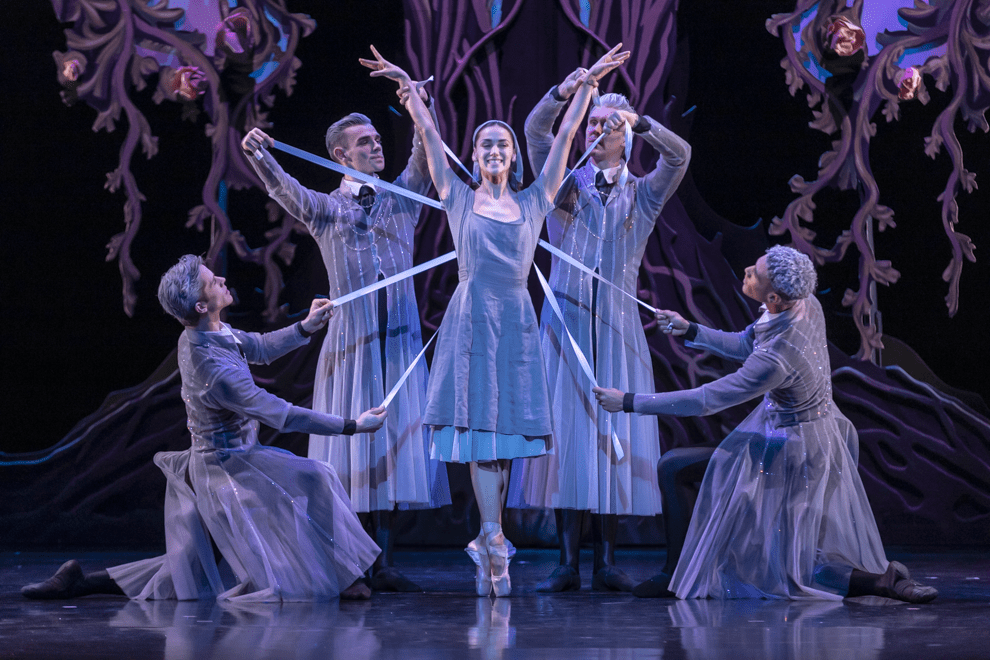
Symmetry in performance
Performance photography is extremely difficult with often fast-moving subjects in low light making exposure difficult. In these conditions, it is even more important to try and ensure good composition. In this image, taken at a recent Scottish Ballet performance of Cinderella, I could see that dancers were creating a shape that was going to be broadly symmetrical. By waiting for the moment when the ribbons were all at the same position on the vertical plane the emphasis is drawn into the subject, Cinderella herself.
Hopefully, this has given you some ideas on how you can use symmetry to give your photographs more impact. I have recently launched a private Facebook group. We will set monthly challenges to help improve your photography. You can apply to join in the challenges by clicking here.
You can also sign up to our monthly newsletter where you’ll receive a summary of articles from Edinburgh Photography Workshop. There is also other interesting news and reviews that can help your photography.