December 9, 2020
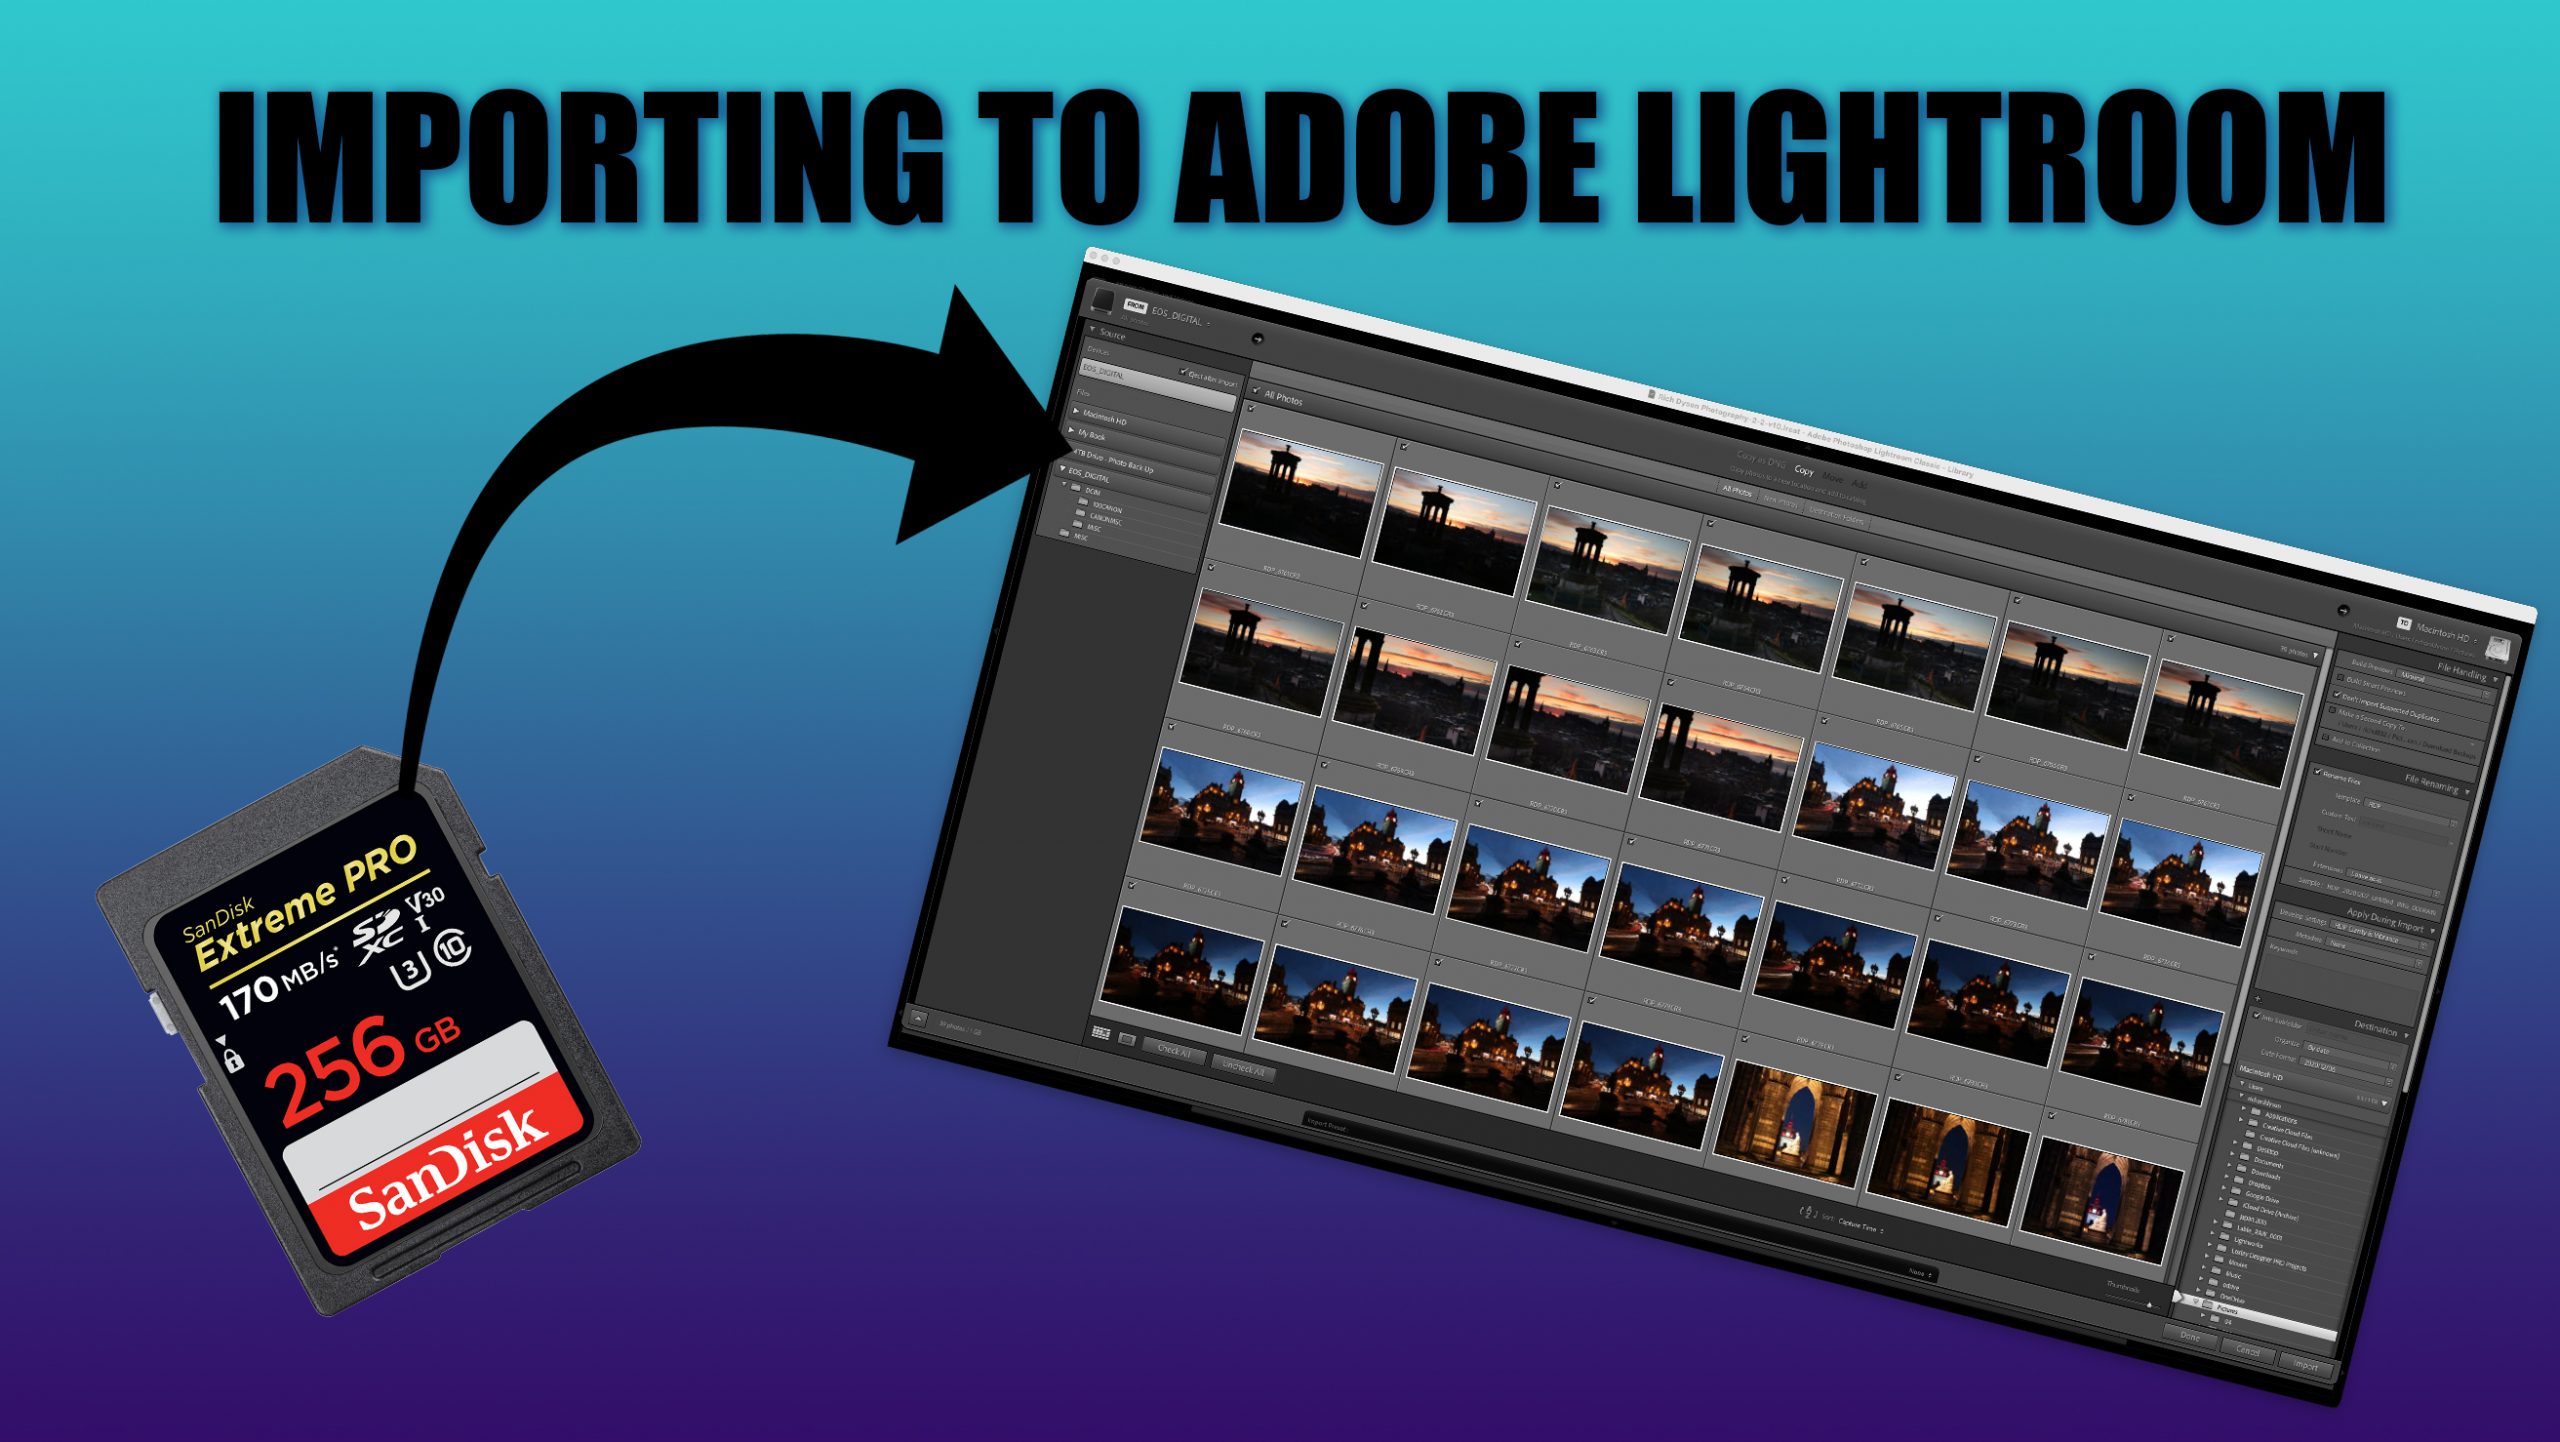
Import into Adobe Lightroom
A deep-dive into the process to import your photographs into Adobe Lightroom
This week I ran one of my Virtual Classroom workshops with someone who wanted to know how to import photographs into Lightroom. As I have been using this software for a number of years, I’d perhaps forgotten the complexity to someone new. I thought it would be worthwhile to step back and explain all the elements of the import process.
Opening the Import Module
To import new photographs into the Lightroom catalogue, you can either click on the File menu at the top of the screen and then take the option Import Photos and Videos. There is also a keyboard shortcut to make it slightly quicker. To do this, press the following keys together. On the left are the shortcut for Windows keyboards and a Mac keyboard on the right.
This will open the Import Module window below.

The Import Module
On the left-hand side of the screen, we need to tell Lightroom the location where we are going to get the photographs. If you are importing your pictures from an SD Card with a Card Reader, Lightroom will usually select this by default. If it hasn’t, just click on the location where your photographs are stored.
Type of Import
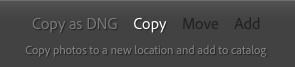
Next, we need to tell Lightroom what we want it to do with the photographs. There are four options at the top of the screen.
The four options do slightly different things, although generally, you will only use Copy most of the time.
Copy as DNG This will copy the photographs from your memory card onto your hard drive. As it does this, it will convert the files from whatever format you took them into a format called DNG. This is the format that Adobe has agreed to support forever. In principle, this should mean that there will never become a point that it isn’t possible to open this file type. In practice, if you are taking pictures with a camera from a large manufacturer such as Canon, Nikon, Sony etc. they are highly likely to continue supporting the various formats of RAW files for many years to come.
Copy This option will simply copy the photographs in the format taken to the location you specify shortly.
Move I would not recommend using this option when taking photographs from a memory card. It will delete the pictures from the memory card and move them to the location specified. There are lots of reasons why this isn’t good for the long life of your memory cards. The only time when you may want to use Move is if you were tidying up your existing file structure.
Add The final option will leave the photographs at the location and simply add them to the Lightroom catalogue. If you are importing from a memory card, this would mean that you’d have to leave the memory card attached to the card reader all the time. For this reason, you would only use this option when adding a new external hard-drive to Lightroom.
In general, you will only use the option, Copy. Whatever option you select, will be the default option the next time you import so you should only need to do this once.
Destination Location
Our next decision is at the top right-hand side of the Import Module. We need to tell Lightroom where we want the photographs to be copied or moved. This is another option that once set Lightroom will remember the location. So, you should only need to do this once and forget about it.
The default location is shown at the top of the screen.
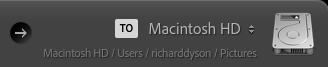
However, if you want to change the location, click on the up and down arrows to the left of the picture of a hard drive.
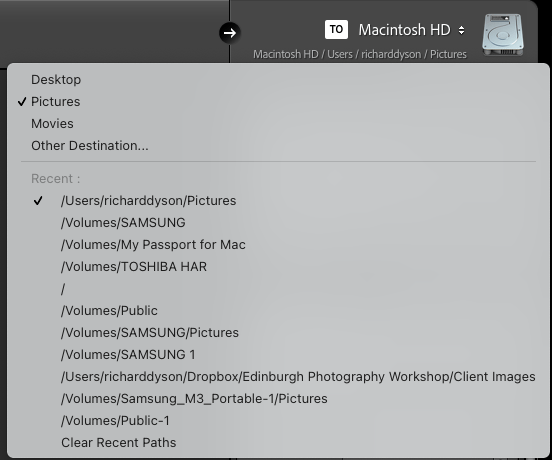
You can then select the location by clicking on it. If it isn’t shown, then you can take the option Other Destination, and you’ll be able to navigate to the location in File Explorer (Windows) or Finder (Mac).
Remember, this is will be saved for the next time that you import photos into Lightroom, so you should only need to do this once.
There are many more options on the panel on the right-hand side of the screen for us to explore, again most of the time they will stay as they were the last time photographs were imported so most of them you’ll be able to leave as they are once you’ve used them once.
File Handling
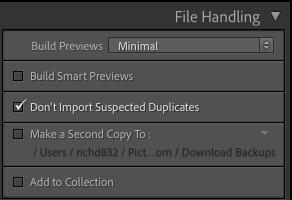
If you can’t see the box above, then click on the arrow pointing to the left next to the words File Handing and it will appear. This is a standard convention in Lightroom. If there is something hidden, there will be an arrow pointing to the left or right depending on the side of the screen it’s on. Just click on the arrow, and the item will be made visible, and the arrow will now point downwards. To close the item, just do the reverse and click on the downward arrow and the item will be hidden.
Build Previews The options inside this dropdown box are minimal, embedded and sidecar, Standard and 1:1. The various options determine how quickly you will be able to zoom into your photographs when viewing them in the Library module as well as the Book and Map modules (note, the Develop module where we edit photos uses a different type of preview). However, there is a warning here, the bigger you make the preview, the more space the Lightroom Catalogue takes up on your hard-drive. I’ll describe the four options and then recommend the best one depending on the type of photographer you are;
Minimal – The minimal option stores the least amount of information and is an excellent option to use if you want to import photos quickly. However, if you do want to zoom into your images in the Lightroom module, then it will take longer as Lightroom will have to build the preview. When I am working as a Press Photographer, this is the option I’ll use as I want to get the pictures into Lightroom as quickly as possible, then head straight to the Develop module to edit.
Embedded and sidecar – Inside the information taken with a RAW file is a JPEG file. This is what you see on the back of the camera. That information is brought in when you import the photograph to your hard drive (or external drive). By using this option, Lightroom will display the JPEG version of the file in the Library module. It gives a reasonable quality of view as long as you won’t want to zoom into tiny details while in the Library module. For general use, this is a great option to use. It will take up less room in the Lightroom Catalogue and allow you to see quite an OK quality preview.
Standard – The standard option will take slightly longer to build as the import process takes place. However, in the Library module, you would be able to use the Loupe view and see a reasonable level of quality in the preview image. This option will take up slightly more space but does allow you to get a better preview. Use this option if you are likely not to take thousands of photographs, and you want to examine your photos quite closely before working on them.
1:1 The final option takes up a lot of room in your Lightroom Catalogue. Let’s say you take a photograph that is 15Mb. This option will also build a preview that is 15Mb in size as well—effectively doubling the amount of disk space that is being used on your hard drive. As a result, you will be able to zoom as much as you like into an image in the Library module. But, it will take quite a while to import each picture into Lightroom. The only time that you may want to use this is if you are a working Commercial photographer and would like to look at tiny parts of a photograph before deciding to edit it.
File Renaming
Most camera manufacturers automatically create a format for the filename. They’ll usually have a set of numbers of letters and then a number that increments upwards. The file names don’t give you any indication what is in the photographs. Lightroom allows you to update the filename as you import to something more user friendly.
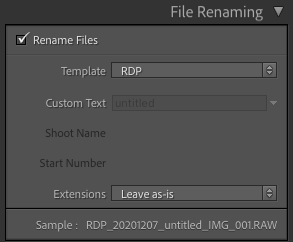
To create your Template, click on the up and down arrows on the right-hand side where it says Template. A box will appear and take the option Edit… at the bottom.
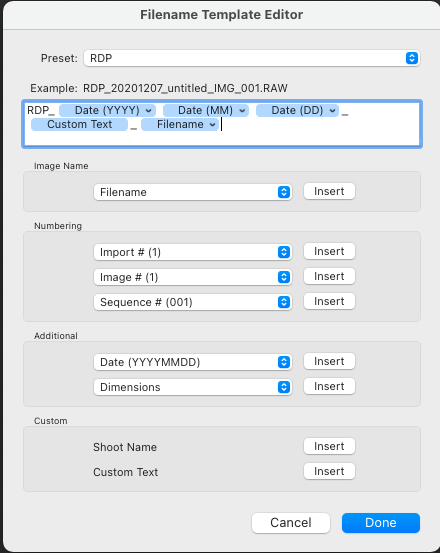
The Filename Template Editor will appear, and you can create your own preset by typing into the area surrounded by a blue box in the image overleaf. You can type freehand text; for example, I have typed RDP (the initials of Rich Dyson Photography). You can add date information by using the Dropdown box in the “Additional” section. Select the option you want and then click the Insert button next to the choice, and it will appear in the blue box. Remember the date that will be applied is the date your camera is set to, so make sure that you have set it correctly. I also added a field called Custom Text which is done by pressing the Insert button in the bottom section and then finally, I have kept the original filename added by the camera.
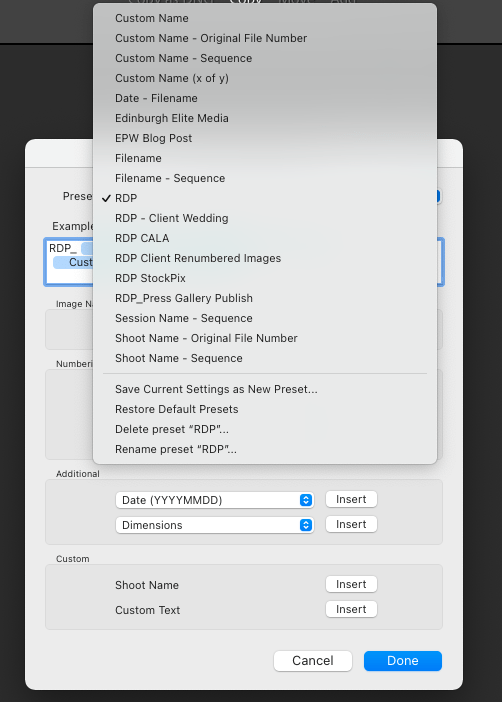
To save the Filename template as a new preset, click on the dropdown box at the top and take the option Save Current Settings as a New Preset… Name it however you like and then press the Create button. Click on Done, and all future imports will use this preset until you change it.
To customise the filename, in the original File Renaming section type in a generic term of what your photographs contain in the Custom Text box and it will be included in the filename. This is the only field that you’ll need to update each time that you import photographs into Lightroom.
Apply During Import
The next section allows us to add extra information to the photograph to make it easier for people to know who took the picture and for us to find photos in the future. It also helps us to speed up the editing process in the future. We’ll look at this in a bit more detail when it comes to the Develop Module.
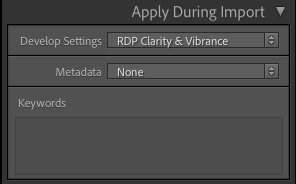
Develop Settings – The options chosen here allow a preset created in the Develop module to be applied as the photograph is being imported. To select a Develop Setting, click on the up and down arrows and pick the Develop Preset from the options available.
Metadata – The section here allows information to be attached to the photograph to tell people who took the photograph as well as additional data such as how a photograph can be used. To create a metadata template, click on the dropdown box and take the option New… The box opposite will appear.

Give your preset a name by typing it into the top box. Any information you add into the rest of the boxes will be attached to the file. As a minimum, it is worth adding your name, address and contact information. This means that if someone sees your photograph online, then they’ll be able to find out who owns the copyright to the picture. If you’ve taken a photo that someone wants to use then why shouldn’t you get a bit of money for it?
Keywords – The last part of this section allows you to add a description of what is in the pictures being imported. Take care only to add information that applies to ALL the photographs. You can add more than one keyword by adding a comma after each one.
You can add more information later to be more specific. As an example, when I add Keyword information taken during a Switch to Manual workshop, I’ll add information such as Edinburgh, Workshop, Old Town, Scotland. However, I wouldn’t add keywords such as Castle, Royal Mile etc. as they won’t be in all of the photos.
Destination
The final part of the Import Module allows us to save the photographs in a more organised way. At the moment, all the pictures are going to go into one folder specified at the top right of the import box. Click on the Organize box, and there are two options. Into one folder and By date.
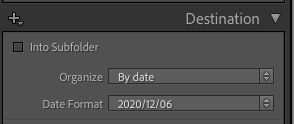
If you use the option By date, then Lightroom will create a series of folders based on the date that the photograph was taken (or at least the date your camera was set to!)
We can then be more specific as to how the folders will be created. Clicking on the Date Format dropdown allows us to determine the way the structures will appear. I prefer to use the option YYYY/MM/DD. This will create a folder inside the top-level folder for the year, inside of that will be another folder for the month and then inside that one a folder for the day. I think this is a very logical way of being able to know where your photographs are.
Again, as long as you stick with the same folder structure, once you’ve set these options, you shouldn’t need to touch them again.
Click on the Import button and you’re photographs will start to be added to the Lightroom catalogue and your photos transferred to the hard-drive. That’s the end of the introduction to the Import Module. In the next blog, we’ll look at how we can use this information in the Library module as well as enhancing the metadata that we have already created.
Give us your feedback
If you’ve got any questions or comments, leave them below. You can sign up for the Edinburgh Photography Workshop monthly newsletter where you’ll get regular updates on exciting things happening in photography and some great tips. Sign up by clicking here.
About the author
As well as running Edinburgh Photography Workshop, Rich Dyson is a professional photographer. His photographs are regularly used in newspapers such as The Times, Guardian and Daily Telegraph. He also had two solo exhibitions as well as being featured in a members sponsored exhibition in the Scottish Parliament. You can see and buy his photography at richdysonphotography.com
![]()