June 16, 2021
Photographing Puffins
Three hours on Scotland's Isle of May capturing puffins. How the Canon R6 and Lightroom's latest update helped capture great pictures
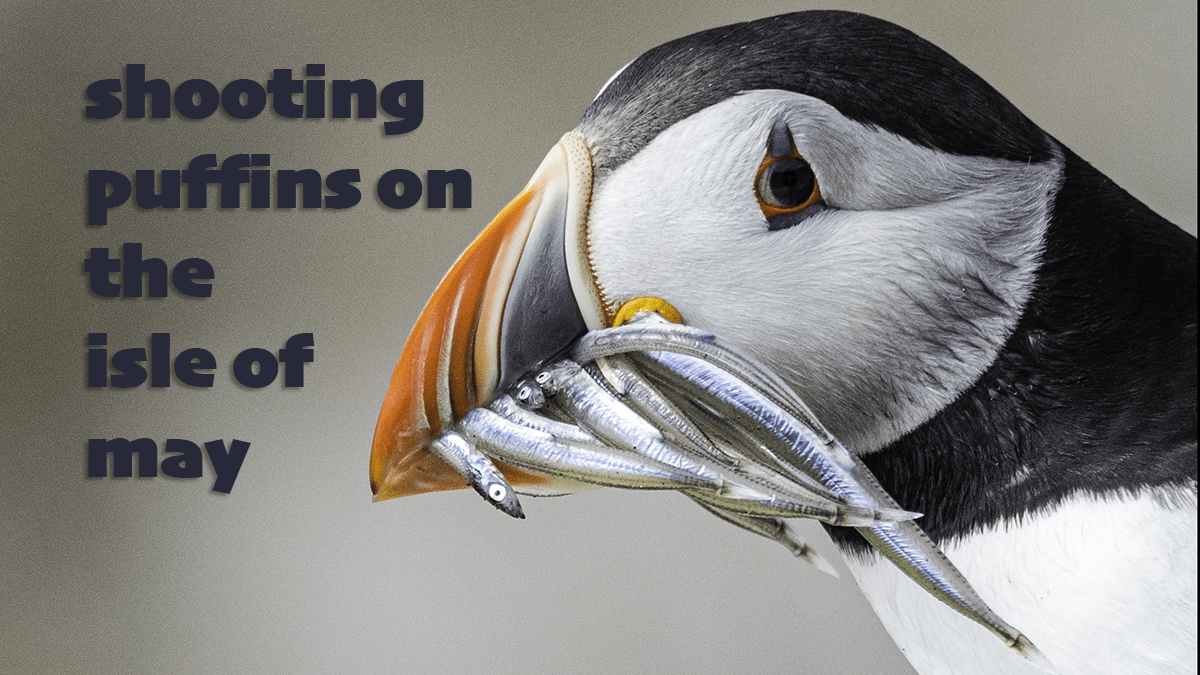
Last week I had the pleasure of a boat trip over to the Isle of May. The island sits in the middle of the Firth of Forth, midway between Anstruther in Fife and North Berwick to the south. There are over 200,000 seabirds on the island, but it’s the 40,000 puffins that attract boatloads of visitors in the summer months. I was visiting as part of a long-term project I am working on, but the trip also gave me a chance to put the Canon R6 auto-focus through its paces and try out some new tech in Adobe Lightroom.
Kit for the day
There is a 45-minute ferry trip with limited space on the boat to get over to the Isle of May. I needed to pack my photography gear as efficiently as possible while ensuring that I could cover all the shots I was looking to get. The puffins are rarely closer than 20 metres away, and they are about 30cm tall. A 70-200mm lens isn’t going to get close enough, so instead, I packed the Sigma 150-600mm f/5-6.3mm lens with a 1.4x convertor. I also wanted to photograph some of the landscape; there is an impressive lighthouse and a couple of interesting fog-horns. So I popped in the new 24-70mm RF f/4.0 and my 16-35mm f/4.0 EF lens. I wanted to minimise the swapping of lenses, so I travelled with the Sigma lens on my Canon R6 body and the 24-70mm on the R5. I did it this way as the R6 has a smaller file size (still an impressive 20Mb in RAW), so it writes quicker to the memory card. The puffins fly by at 55mph with their wings beating at 400 beats a minute – the last thing I want is the buffer to fill up as the bird gets close. All the gear fitted neatly into my Think Tank Photos Shape Shifter bag.
Aperture and Depth of Field
One of the decisions I took was swapping out the f/2.8 70-200mm lens for the Sigma 150-600mm f/5-6.3mm lens. Most of the time, I knew that I would be shooting at the 600mm end of the lens. Adding the 1.4x convertor takes another stop of light away from the biggest aperture on the lens, so my widest aperture available is f/9.0. Some people will tell you that you need to shoot with very wide open apertures to get that nice blurry effect behind a subject (it’s called bokeh). Not true, as you can see from the photograph below.
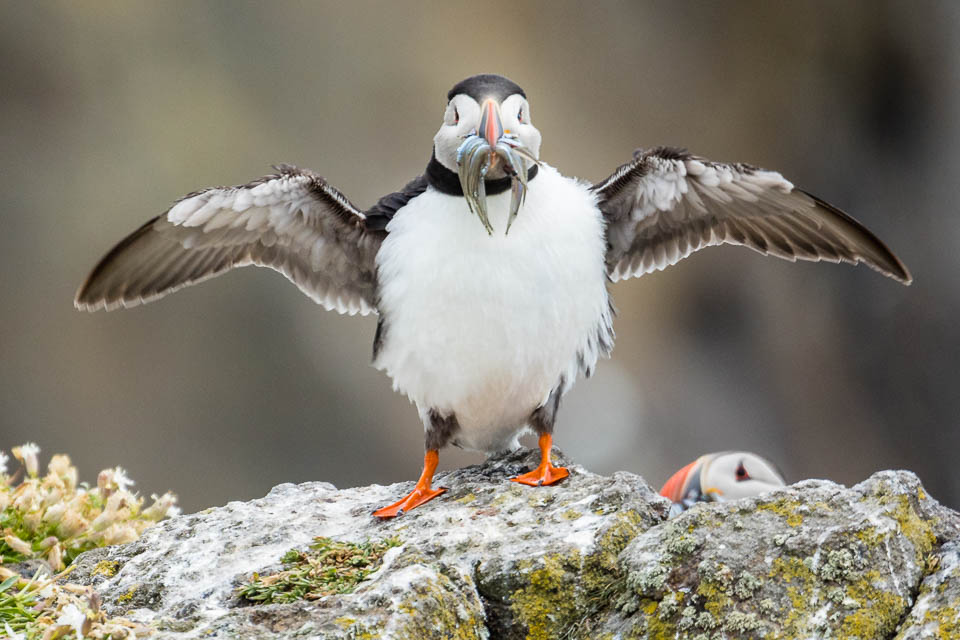
The shot uses a focal length of 840mm at f/9.0, and yet the background has been thrown out of focus. The whole issue of depth of field is much more complicated than changing apertures. I did a much longer post on this a few years ago, but essentially the amount of the photo that is acceptably sharp (that’s what depth of field means) is influenced by the focal length and how close we are to the subject well as the aperture. The longer the focal length is, the depth of field reduces. The closer we are to the subject also reduces the depth of field.
Canon Auto-focus
Last year, I invested in a couple of new camera bodies, the Canon R5 and R6. At launch, one of the key selling points was the new auto-focus system. For many years, camera manufacturers have had systems that track moving objects. They often worked well, although they did struggle when following something moving from clear backgrounds to busy ones. Canon has developed an auto-focus system that uses artificial intelligence to track the eyes of either people or animals.
One of the great locations on the island is the valley that leads to Bishop’s Cove. So many puffins nest on the 50m high cliffs, and they speed down the valley bringing beak-fulls of sand eels to feed their fledglings. The auto-focus system latched quickly onto the puffins as they entered the top of the valley. I was so impressed with the system keeping focus all the way toward me, despite these little creatures travelling at well over 50mph. I definitely had far more keeper images with the R6 than I ever did with the old 1DX MKII.
Enhancing a crop
Despite using a lens with a massive zoom, there were times when I simply couldn’t get close enough to the puffins to get the shot I had in my mind. A great example of this is a picture I wanted to take of a front-on shot of a puffin with its beak full of sand-eels. I did photograph the scene I was looking for, but even at a zoom of 840mm, the puffin’s head is only a tiny portion of the 5472 x 3648-pixel photograph.
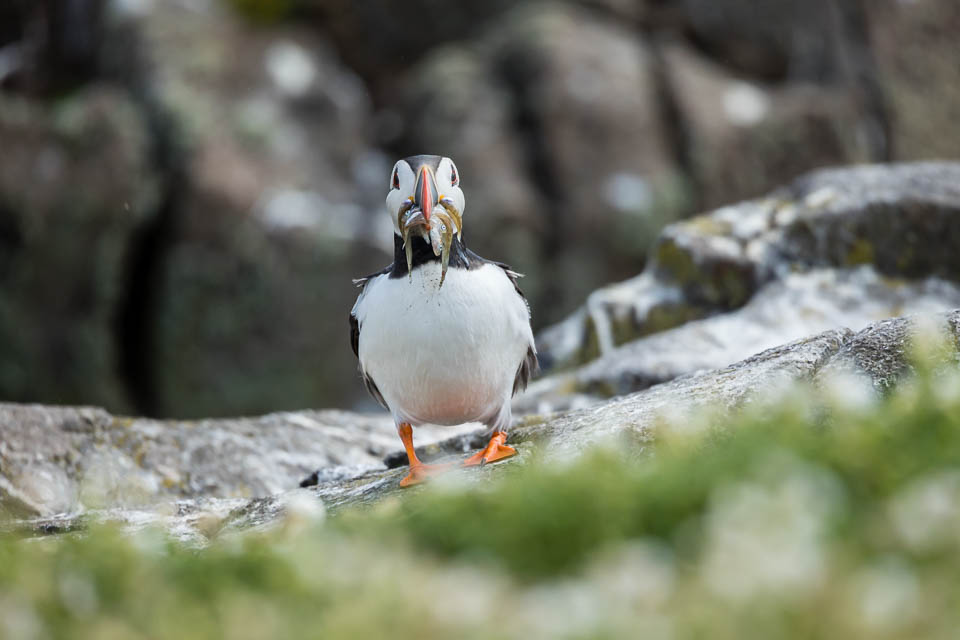
Using the crop tool in Lightroom, I could reduce the file size to 1593 x 1062-pixels. It gets the composition I wanted, but it has also reduced the quality of the image.

In the last week, Adobe has added new functionality to Lightroom that will help get a better result. To use it, right-click on the photograph and take the new option, Enhance. A box appears that allows you to define how the picture is going to be improved. Ticking the RAW Details box improves details and reduces artefacts in most raw files. Super Resolution doubles the image resolution, which means that you’ll be able to print or display the cropped image on large screens.
There’s a fair bit of processing that takes place to carry out both enhancements. It usually takes around 2 minutes for the new enhanced file to be ready. The final file looks a little sharper, particularly around the eyes, without adding any ghosting or noise. The file size has also been increased to 3186 x 2124 pixels. That should be enough pixels to print this picture at 300dpi at 15″ x 10″ – certainly big enough to make a lovely print on your wall.

Give us your feedback
There are many more photos from the visit to the Isle of May on my website at bit.ly/RDP_Puffins. If you’ve got any questions or comments, leave them below. In addition, you can sign up for the Edinburgh Photography Workshop monthly newsletter, where you’ll get regular updates on exciting things happening in photography and some great tips. Sign up by clicking here.
About the author
As well as running Edinburgh Photography Workshop, Rich Dyson is a professional photographer. His photographs are regularly used in newspapers such as The Times, Guardian and Daily Telegraph. He also had two solo exhibitions and featured in a members sponsored exhibition in the Scottish Parliament. You can see and buy his photography at richdysonphotography.com
![]()