July 24, 2018
Watermark your photographs
Stopping your pictures from being stolen – part 1

As you start to take better photographs your work is going to get noticed. I can remember the thrill of having my first photograph used on the BBC ‘Your Pictures’ website. However, at some stage, you may want to make some money from photography. Camera equipment isn’t cheap so if you can fund your hobby then all the better. This is when you may see the need to protect your photographs from theft. This is going to be a two-part blog with the first one looking at how to add a watermark to your photographs. Next week we’ll look at adding data behind the scenes to your pictures.
Creating a watermark
The first thing you need to think about is what your watermark is going to look like. You want to create a balance between something that will prevent theft and a watermark that will stop viewers from seeing your beautiful photograph. You also want to create a brand that people will start to recognise. To do this we are going to create a watermark that has a mixture of text and graphics.
We’ll start in Photoshop by creating a new document. Make the document large enough to create the design you are going to use for your watermark. Ensure that the Background Contents box is set to Transparent.

The next step isn’t going to be part of the end watermark, but it will help you to create one. The best watermarks use a lighter colour such as white or grey. However, as our background is transparent it is going to be very difficult to see. To make things easier we’ll create a layer of black over our transparent background.
Create a new layer by pressing Shift, Command and N (Shift, Ctrl and N on windows) and then press OK. You will see that there will be a new layer on the right-hand panel. Make sure Layer 2 is highlighted and then click the black and white circle on the layers panel and take the option ‘Solid Colour’. A dialog box will appear and the easiest way to choose black is to type ‘000000’ into the box with a hashtag, press OK and now you have a black layer.

Adding text
Next, we are going to add text to the watermark. Press the T key and this will select the Horizontal Type Tool. You can select the font, size, justification and colour on the options panel at the top of the screen. I have used white for this example as it tends to show up best as a watermark. If you need to change the size of the text you can highlight the words you want to change and then select a new font size. If you need to move the text press the cross shape at the top of the left-hand panel. The cursor will change so you can move the block of text around the screen. (Don’t forget to press the T key if you want to edit the text later). If you want to add the copyright symbol © just press the Alt & G key.

Adding graphics
Finally, we’ll add a graphic to our watermark. I am going to use my signature that I‘ll draw using a tablet. If you use your own graphic, then ensure that any parts you want to be see-through are transparent. To create the signature press B to select the brush tool and ensure the foreground colour is set to white – I also reduced the opacity to 35% so it was slightly lighter than the text.

We’ve nearly finished the watermark and just need to delete the black layer so that our text and graphics will be visible on top of the transparent layer. On the layers panel click on the eye shape next to the Color Fill 1 layer and it will disappear from the main screen.
The last step is to save the file ready for us to add the watermark later in Lightroom. Do this by changing the file type to PNG and select the file name and location. We’ve now finished in Photoshop and have the watermark that we can use later.
Adding a watermark
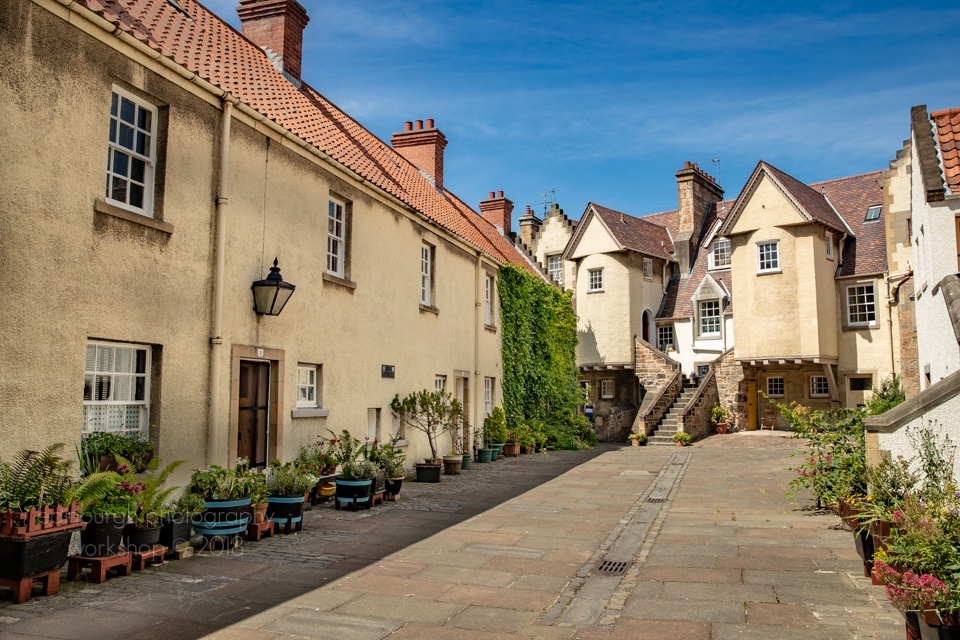
Now we’ve got a beautiful watermark we need to add it to a photograph. I’m going to use one of the locations that we visit on the Switch to Manual workshop.
In Lightroom, right click on the photograph you want to add your first watermark to and select the option Export. The dialog box below will appear. We are going to create an export pre-set that will allow you to easily add a watermark to your pictures in the future. The best Export Option for pre-sets is ‘Choose folder later’ so you can decide each time where you want to save the photograph with the watermark added. You can also set the image type and file sizes in this dialog box.

A little lower down the Export box is the Watermarking section. Click on the drop-down box and select Edit Watermarks. Even though our watermark is a combination of text and graphics we have actually created a graphic file when saved it as a PNG file. Select the Watermark Style Graphic in the top right corner and then in the Image Options box select your new watermark file.
You can change the opacity, size and location of the watermark in the Watermark Effects options. The settings on the screenshot below work quite well for this watermark. The four sections you can change are;
Opacity – How see-through the watermark will be. It’s best to have it opaque so that the watermark doesn’t detract from you photograph.
Size – You can set the size of the watermark. An ideal size is somewhere between 25% – 30% of the image.
Inset – You can choose how far from the edges you want the watermark to appear.
Anchor – You can position your watermark in any of the 9 positions.
It’s worth noting that once set, these options will work for any file regardless of whether it is landscape or portrait orientation.
The final step is to save the watermark settings by clicking on the drop-down box in the top left. Take the option Save Current Settings as a New Preset and give your preset a name. Click on OK, then Done and you will see that the export box has your new preset added. Press Export and save the file to the location you want, and you now have a photograph with your watermark added.
Coming up
Next week we are going to look at a different way of protecting your images using meta-data. You can also subscribe to our newsletter so that you’ll receive updates with new blog posts as well as competitions and other features.