July 24, 2019
Two camera bag strategy
An ideal solution to protecting your cameras by using two bags
Since I started using DSLR’s with different lenses, I have spent a small fortune on camera bags. There are so many manufacturers all offering different sizes and configurations. For the last 18 months, I have been using a two camera bag solution. During the last year and a half, I have hiked up mountains, followed politicians in hectic campaigns and flown nearly halfway around the world on planes. I’ve found that this solution protects my gear and keeps me mobile in these differing circumstances.
In the past, I had tried to find one bag that would cover every type of usage. If I was chasing politicians through a crowd, a bag that was robust enough to sit in a plane luggage rack stopped me squeezing through the gaps in the crowd. Alternatively, a small, light bag would provide little protection for a budget airline luggage rack that had other passengers squeezing in suitcases and bags of duty-free.
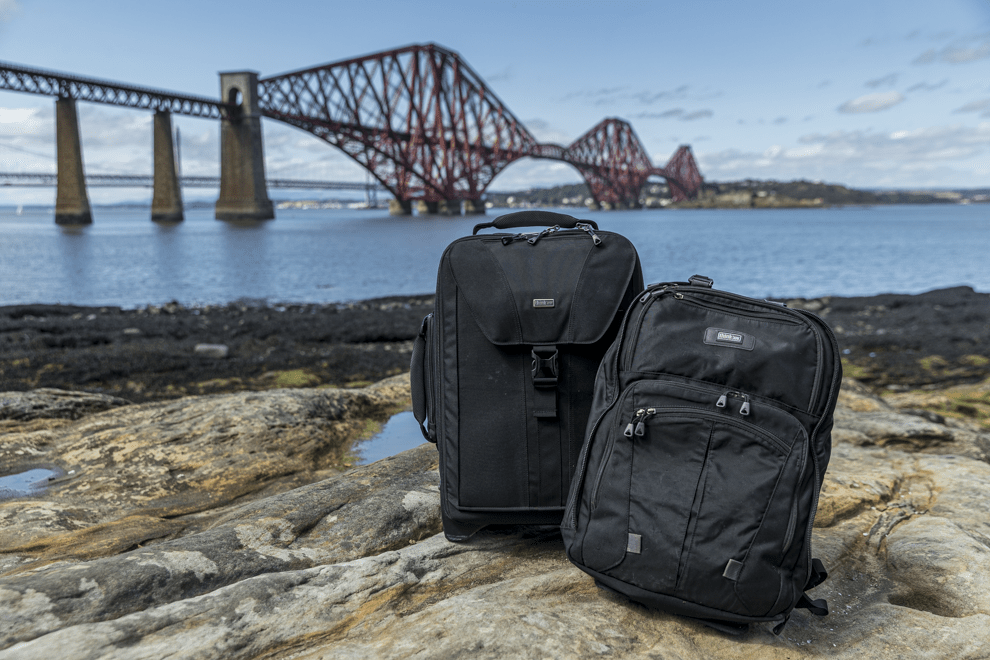
Before I reveal which bags I use and why I like them, I am going to make it clear that I’m not paid by the manufacturer. The bags I use were purchased from online suppliers, not the manufacturer. I haven’t been asked to review the bags by the manufacturer. This is all my opinion based on 18 months of very happy use. The two bags, I protect my gear with are both from Think Tank Photography and are the Shape Shifter 17 v2.0 and the Airport Takeoff v2.0.
Camera Bag 1 – The Shape Shifter
The Shape Shifter bag is my day to day bag when I am out on the street. When I am running the Switch to Manual workshops, I need a bag that can hold my camera, a couple of lenses, a laptop with a charger and a couple of card readers. I also need to be able to easily move through the crowds of tourists on the Royal Mile.
The Shape Shifter bag is perfect for this scenario as well as when I am working on press jobs. The bag is designed to hold two camera bodies with battery grips on and the triumvirate of lenses used by most photo-journalists. The 70-200mm, a 24-70mm and a 16-35mm. In addition, there is room for a 17” laptop and there’s plenty of pockets to store card readers, chargers and even a flashgun or two!
The two benefits of this bag are its lightweight construction and its ability to shrink down to almost nothing! The bag is made from 600D polyester which is heavy-duty and very durable. It is then treated with water-repellent coating and has high-quality zips. This keeps my camera gear dry in the rain and the bag is extremely light, just 2.1kgs before the bag is filled with camera gear. The real win for this bag though is when my gear is out of the bag and being used. Most camera bags retain their shape making them bulky even when empty. The Shape Shifter gets its name from the extra zip around the outside of the bag. When closed the bag is squeezed to a depth of just 8cm. Great for squeezing through crowds.

Camera Bag 2 – The Airport Takeoff
The second bag in my strategy is the Airport Takeoff v2.0. As well as using it when I am travelling on planes, trains and, yes, even automobiles, I like it when I am working at a single location with clients. The bag is designed so you can move dividers around to transport whatever gear you could need. On last years’ trip to Namibia, I carried two Canon 1DX camera bodies, a 150-600mm Sigma Lens, a 70-200mm lens, a 24-70mm lens and an 11-24mm lens. There was also a flashgun, a 1.4x and 2x convertor, various chargers and cables and my laptop. This bag should make a guest appearance as a TARDIS on Dr Who!
With all that weight though, it’s going to be a heavy bag. Correct, and that’s why it comes with two superbly robust wheels. Fully laden this bag glides effortlessly over most surfaces and takes the load off your shoulders. However, if you are in an airport, there are going to be times when you need to climb stairs. Hidden away in the back of the bag are a couple of shoulder straps. On the few occasions that you can’t roll the bag around, take the strain on your shoulders and you can take the bag anywhere.

Two Bag Combo
I knew that this two bag combo would work when I travelled to Namibia last year. I needed to be able to carry my equipment on three flights. When I arrived in Namibia though, I needed to be able to carry my gear up sand dunes, squeeze into the front seat of a land cruiser and travel as light as I could. The Airport Takeoff was my travelling bag, all my gear nice and secure in a bag that can travel as carry-on. (Admittedly, the weight of the bag and gear didn’t quite meet the 10kg max. As long as it looks light and isn’t too bulky, I’ve yet to have my bag weighed at the gate). The Shape Shifter zipped up and slipped into my soft suitcase ready to move into action when I arrived.
My final reason for using the Think Tank bags is their brilliant customer service. During one of my travels, I misplaced the waist strap for my Shape Shifter bag. I dropped them a mail and asked where I could get one from to which I had a reply telling me that one was in the post for me! Brilliant service and tops off some great camera bags.
If there are any comments or questions, please drop me a mail. You can also sign up for the Edinburgh Photography Workshop monthly newsletter where you’ll get regular updates on interesting things happening in photography and some great tips. Sign up by clicking here.