June 30, 2018
No GPS, No Problem
If your camera doesn’t have GPS you can still track where you’ve snapped
We are approaching the holiday season, and wouldn’t it be great to see on a map where you have taken your photos? Adobe Lightroom has a handy module that does just this from the GPS co-ordinates tucked away in the metadata of your photographs. However, not all cameras record GPS coordinates and those that do can drain your battery really quickly. There is an alternative and cheap solution though, using your mobile phone.
Geotag Photos Pro allows you to record the coordinates as you travel. You can then export a data file to your computer and merge it with your photographs to give you a map of your holiday pictures. The smart thing about the app is that they don’t constantly track the GPS data but allow you to decide how often you want it to check on your position. This means there isn’t a massive drain on your phone battery.
Once you have added the app to your phone you need to ensure that the time on your mobile phone and camera are the same. The app gives you a handy reminder whenever you switch it on.
Setting up the App
Click on settings at the bottom of the app screen and you can decide here how often you want the data to be recorded.
Minimal position change
This setting will allow you to decide the minimum distance you will need to have moved before another position is recorded. The lower the setting the more battery you will use on your phone. I set it to 10m and had no issue with the battery on my phone lasting a full day.
GPS location using
If you want to record really accurate positions, then take the option GPS+GSM but this will use more battery.
Notifications
You can decide to be told if the phone loses its GPS position or if the time-zone changes. They don’t use much battery life so why not have them switched on?
Units
A simple switch to use either Metric or Imperial measurements.
Automatic trip upload
We’ll see later that it is possible to automatically send your data to a cloud-based service such as Dropbox. This setting determines if you want it to be sent automatically using only wi-fi or also using your mobile data.
GPS fix in China
This is only needed if you are taking photographs in China. The government in the country has decided the GPS data should be encrypted. The makers of the app have ‘fixed’ the encryption so it still gets recorded.
Map type
This has no impact on the battery life but determines how you will see the data displayed on your phone.
Cloud Services
On the cloud services tab, you can click on the Link with new service and add either Dropbox, iCloud Drive or Google Drive so that your data files are automatically pushed for you to use later.
Recording your GPS position
When you are ready to start taking photographs head to the Record tab of the app and click the + symbol on the top right-hand corner. You’ll be asked to give your trip a name and then press Done.
On the main screen, you can press where it says Logging interval and decide how often the data is going to be recorded. I have it set to 1 minute but remember it will also take into account the ‘minimal position change’ we set up earlier.
Click the Start button and your GPS position recording will begin. When you have finished shooting for the day, press the Stop button and your data has been recorded.
Viewing your GPS data
Clicking on the History tab at the bottom of the app you can view all of the trips you have recorded on the app. Touching the map preview you can see the route you’ve recorded on a map – remember you can change the map view on the settings tab. Touching the three ellipses opens up another menu where you are able to Share your trip. If you haven’t set up the automatic upload, then this is another way of getting the data onto your computer.
GPS data in your photographs
Now we have collected the data and transferred it to the computer we can add it to photographs inside of Lightroom.

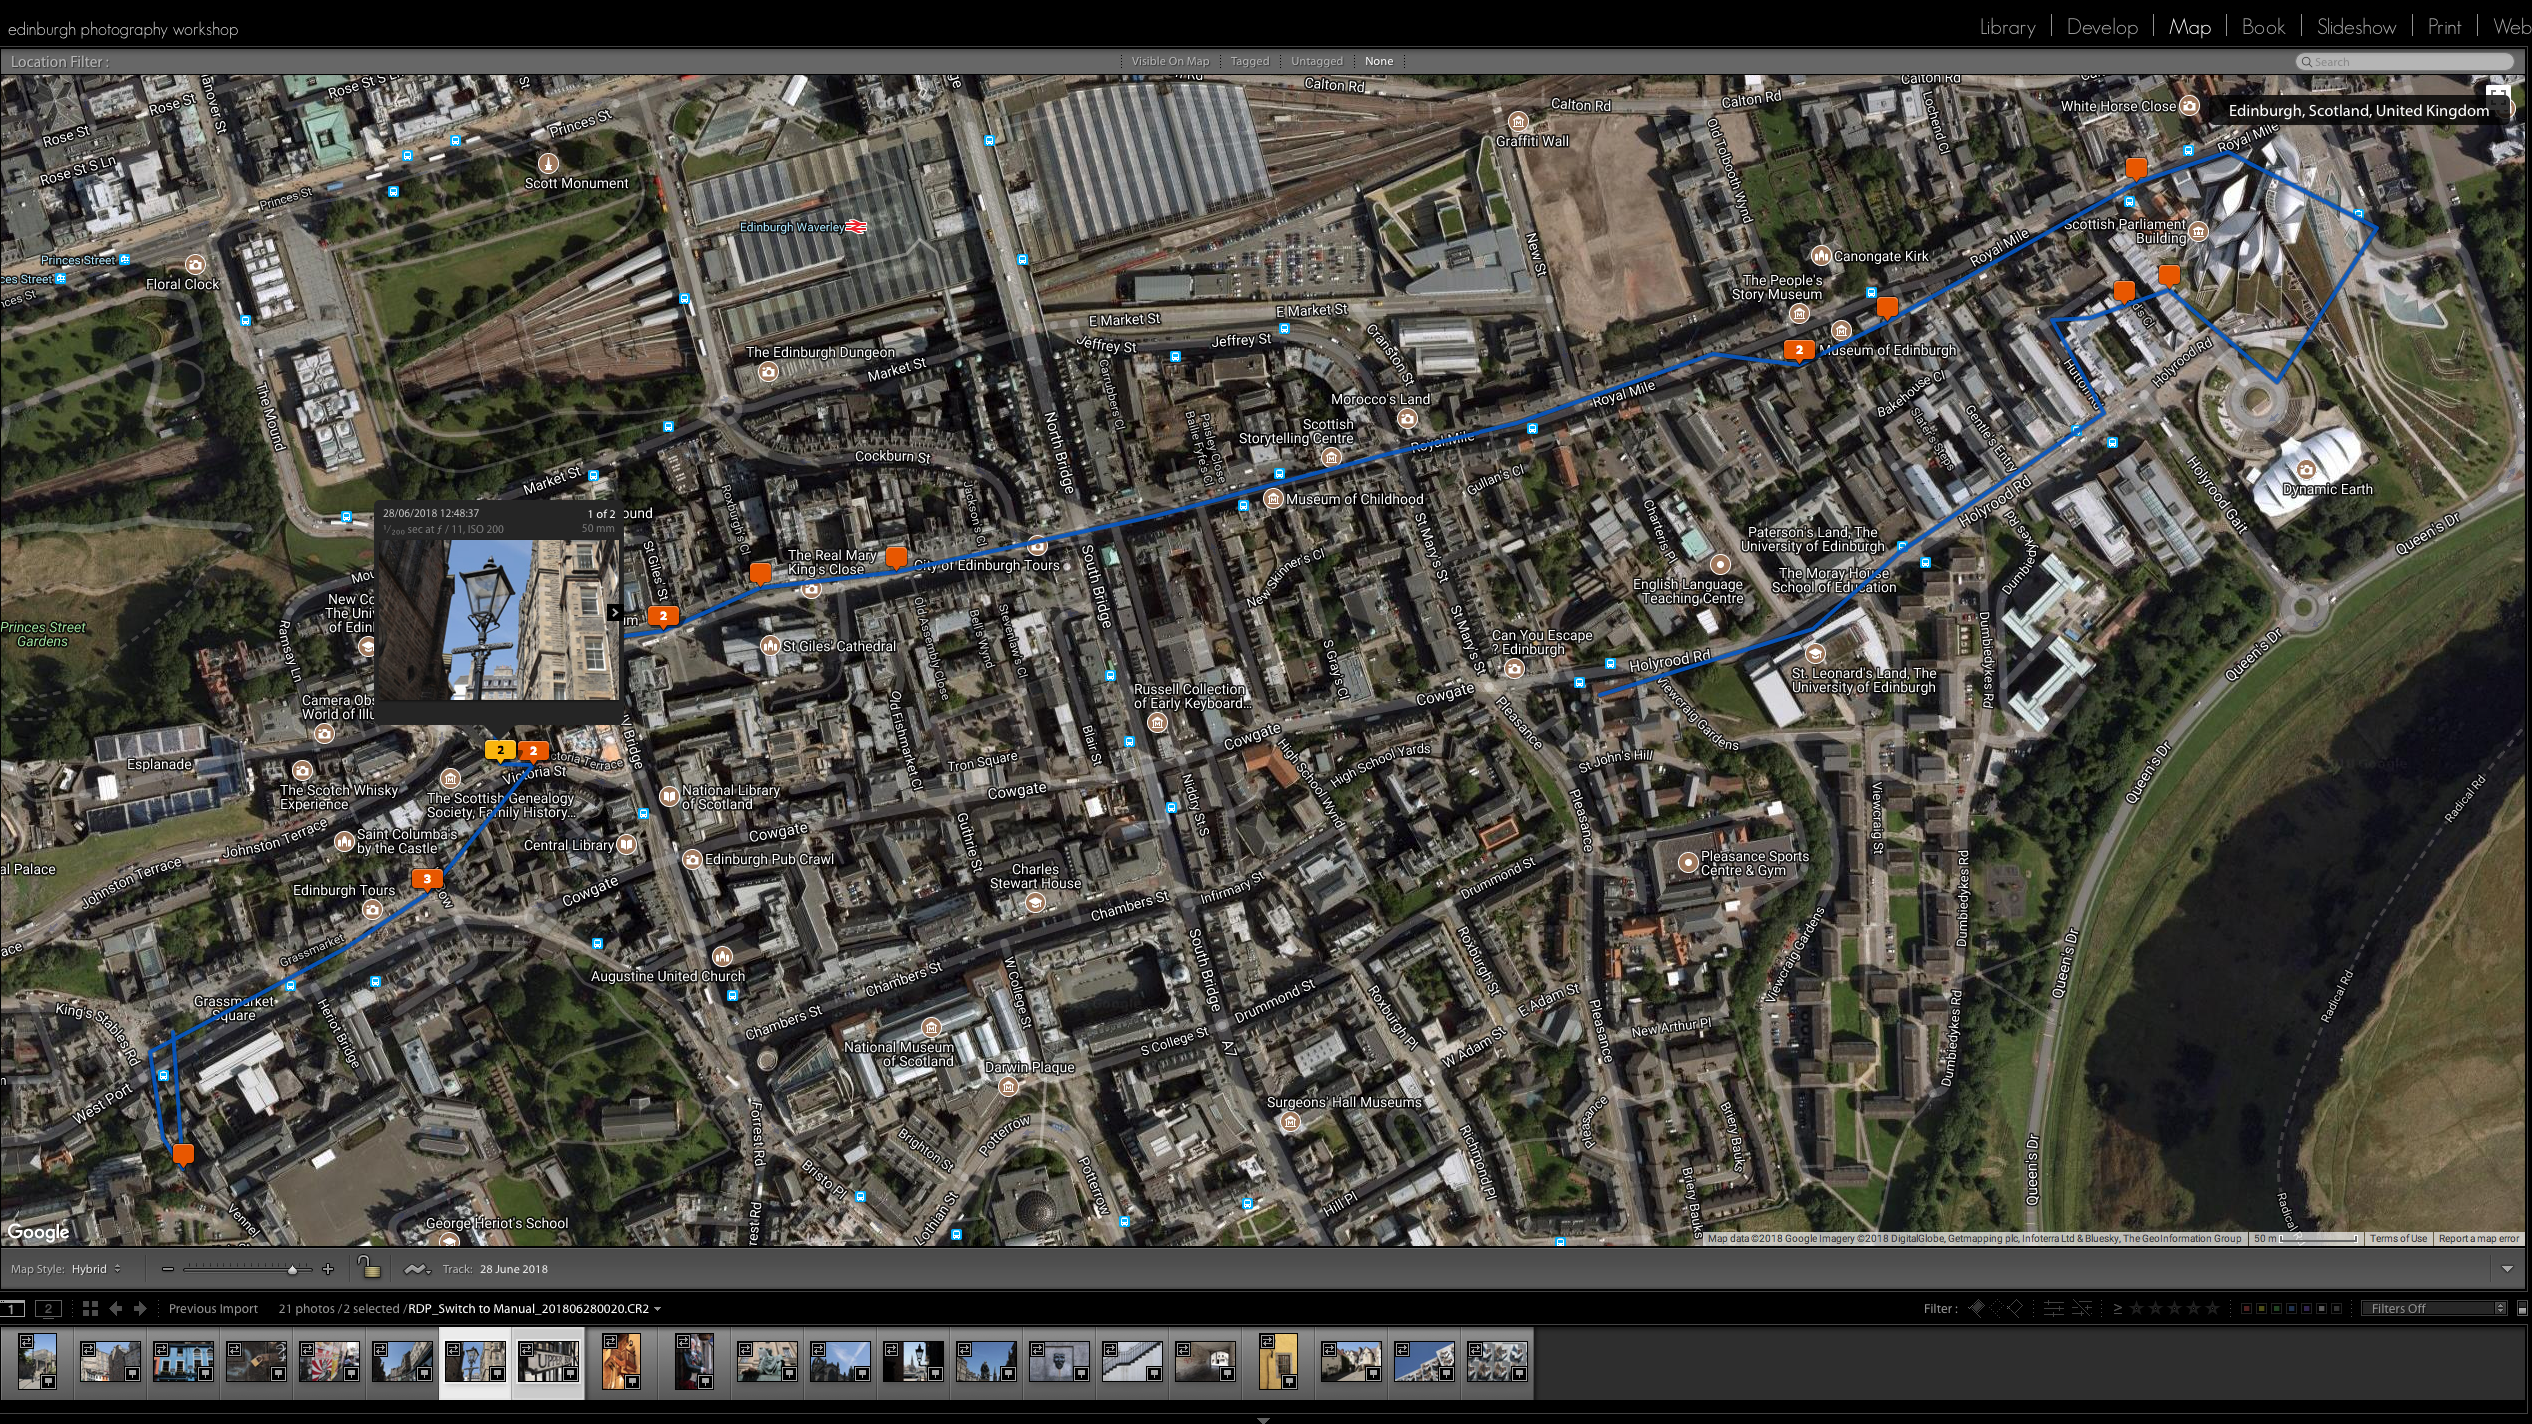
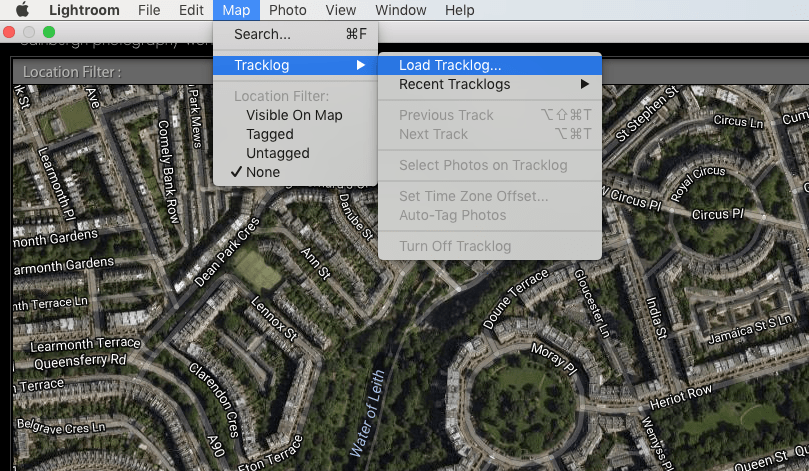
Click on the Map module at the top of the Lightroom screen (or click alt+cmd+3). Then click on the Map menu at the top of the screen and navigate to Tracklog > Load Tracklog. Navigate to the file you have transferred to the computer and press Choose.
Highlight the photographs taken whilst recording the GPS settings and click on the Map menu again. This time navigate to Tracklog > Auto-tag Photos and you’ll now see the position of the photographs on the map in Lightroom.

The photographs from this blog were taken during a Switch to Manual Workshop. It’s a great way to get to understand how to use your camera.