August 15, 2018
ND Filter choice – where does it stop?
Why do I need more than one filter?
I’ve had an interesting question this week from someone attending a landscape workshop. Good filters cost a lot of money, particularly when you use the quality brands such as Lee or Nisi. I’d recommended that they should look to buy a kit which included a 2 or 3 stop ND filter as well as a 10 stop ND filter. They quite rightly questioned why they couldn’t just buy one and so that triggered this week’s blog.
What are these stops?
First of all, it’s good to understand what we mean when photographers talk about a stop. As with most things in photography the term stop relates to light. A full stop is either the halving or doubling of light. For example, an aperture of f8 has half the amount of light entering the lens than an aperture of f5.6 so the gap between these two apertures is one stop. The smaller aperture (f8) is half the size of the larger one (f5.6).
The ISO and shutter speed stops are much easier to calculate. An ISO of 100 has half the amount of light recorded on the sensor as an ISO of 200. A shutter speed of 1/100th of a second has half as much light hitting the sensor as a shutter speed of 1/50th of a second.
So how does that relate to an ND filter?
ND (Neutral Density) filters are principally helping to reduce the amount of light coming in through the lens. So, let’s assume your correct exposure is 1/100th of a second without any filters in front of the lens. If you were to add a two-stop filter and all the conditions were exactly the same, then the shutter speed required to get the same exposure (i.e. the same amount of light hitting the sensor) would be 1/25th of a second. We can calculate this by halving the shutter speed each stop – the first stop would take the shutter speed from 1/100th to 1/50th and the second stop would go from 1/50th to 1/25th.
Why would I want to slow the shutter speed?
Landscape photographers are the main (but not only) users of ND filters. I have a series of examples below which show the same scene taken with a variety of ND filters from the bare lens through to 10 stops. The conditions on this particular day at Granton Harbour near Edinburgh were changing really quickly so it wasn’t possible to keep the lighting conditions the same. However, I ensured that the light meter was always reading the same value for each of these images.
This is the base image without any filters being added to enhance the exposure. The camera settings for all the following photographs are f11 with an ISO of 100 and then the shutter speeds will vary as filters are added. The starting image has a shutter speed of 1/25th of a second.
We’ve now added a two-stop filter which has reduced the shutter speed to 1/6th of a second. There is a slight change in how we see the waves but the difference is relatively marginal.
The ND filter has now been swapped to a 3 stop filter which has reduced the shutter speed again to 0.4 seconds. The maths say that the shutter speed should have been 0.3 seconds but the difference can be accounted for with a slight change in the conditions as the sun went behind a thicker cloud. We can now start to see the water blurring more and starting to create a more milky effect.
We are now starting to see a real difference in the water movement with the 6 Stop ND filter added. The water has become much more smooth but can you see how the fisherman at the end of the pier has blurred. In the 3.2 seconds that the exposure took he must have moved.
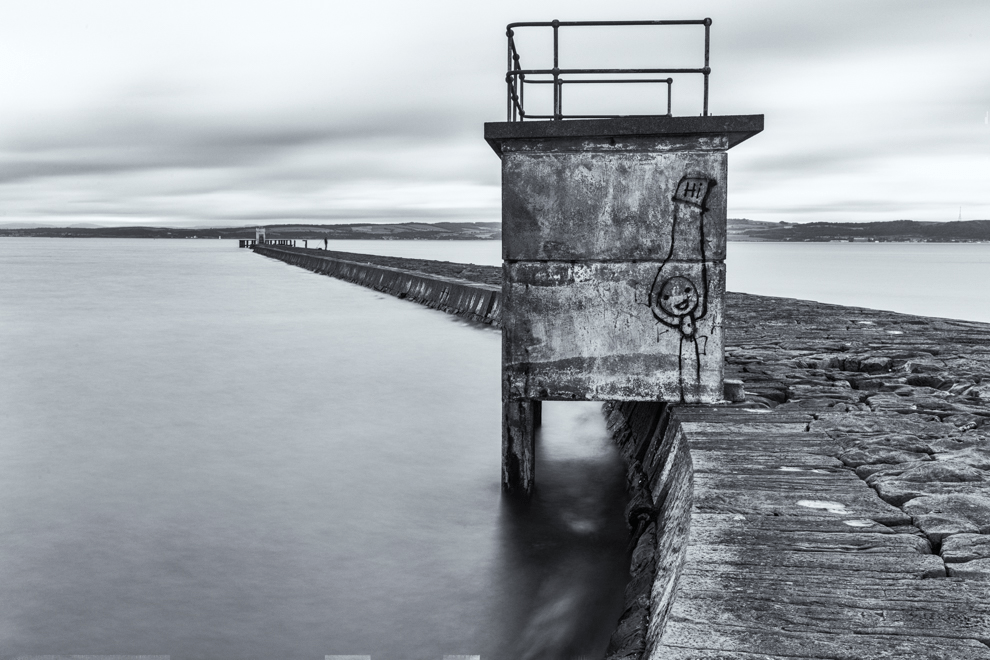
Our final image uses a 10 stop filter and as a result, gives us an exposure time of 51 seconds. The water has become glass-like with all the wave movement blurred by the slow shutter speed. We can see the transition from no filter to a 10-Stop filter below by using the slider. You will see that the colour balance has changed as higher ND filters are added – this is something I can cover on a later blog with ways to correct it.
You will see that the lower ND filter stops that were used give us lots of detail in the waves. The highest ND filter stop (10 stops) gives us really smooth water and in this case is probably the most pleasing result. Look at the impact the 10-stop filter has had on the clouds. They have also blurred so there is little detail visible.
I’ll just buy a 10-stop filter then
I always have four ND filters in my case to give me the option of different effects depending on the scene.
If the water movement was a fast waterfall instead of fairly slow waves, then the result would be very different. The 10-stop filter in this kind of light would give us a harsh white line as the water had blurred so much. Instead it would probably be better to use a 3 or 6 stop filter, so we can see more of the movement in the waterfall and create the milky effect we often see.
The use of filters is one of the topics we practice in great detail during the Landscapes and Seascapes workshop which runs once a month between September and March each year.