May 26, 2021
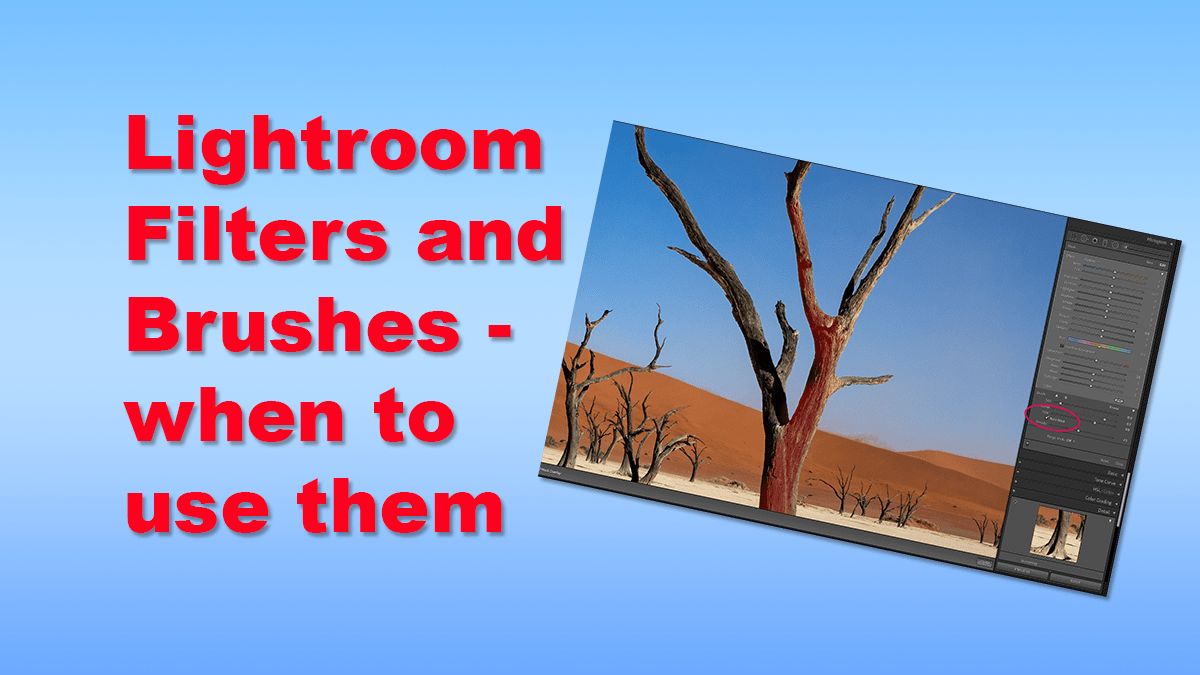
Lightroom Filters, Brushes and Masks
There are a set of tools to apply adjustments to your photos in Lightroom, but when's the right time to use the Lightroom Filters and masks?
I offer a one-on-one video workshop on Lightroom. Sometimes they run in quite a structured way, and they can be very freestyle on other occasions. The former can be pretty fun as we explore some of the different features. One of the sessions this week ran this way, and we got onto the subject of Lightroom Filters, Brushes and Masks. I haven’t covered the use of these tools in a blog, so this week we will look at the three available tools and when is the right time to use them.
Where are the Lightroom Filters and Brushes?
The digital darkroom in Adobe Lightroom is in the Develop Module. The Develop module is where we carry out any changes to our photographs. The three Lightroom filters and brushes are at the top of the panel on the right-hand side of the screen, just below the Histogram. We’ll look at the three filters and brushes today: the Graduated Filter, Radial Filter and Adjustment Brush.
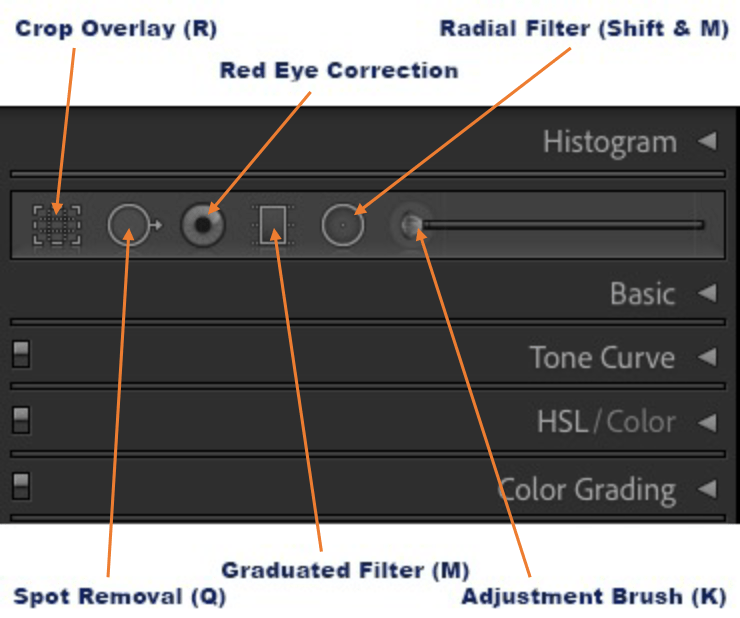
Graduated Filter
The first of the three filters work similarly to the glass graduated filters that I’ve written about quite a few times. However, it can be slightly more potent than a glass filter in some ways, but it also has a limitation.
Before we look at the power of the graduated filter, I want to be clear why this filter isn’t a replacement for my expensive Kase filters. The purpose of a glass graduated filter is to balance the light that the dynamic range of the camera can’t capture. They work particularly well at the start and end of the day when the sky is much brighter than the ground. When we edit in Lightroom, we are manipulating the data captured in the camera. If we have captured a blown-out sky in-camera, then adding a graduated filter can’t recover data lost at the time of capture.
To add the Lightroom filter version, click on the Graduated Filter tool to activate it; alternatively, press the letter M. Click and hold the left mouse button on the photo where you’d like to apply the filter. Drag your mouse to cover the area you want to filter to effect. The wider the size selected, the more smooth the graduation. You can see the extent to which the filter will apply by checking the box “Show Selected Mask Overlay” under the photograph.
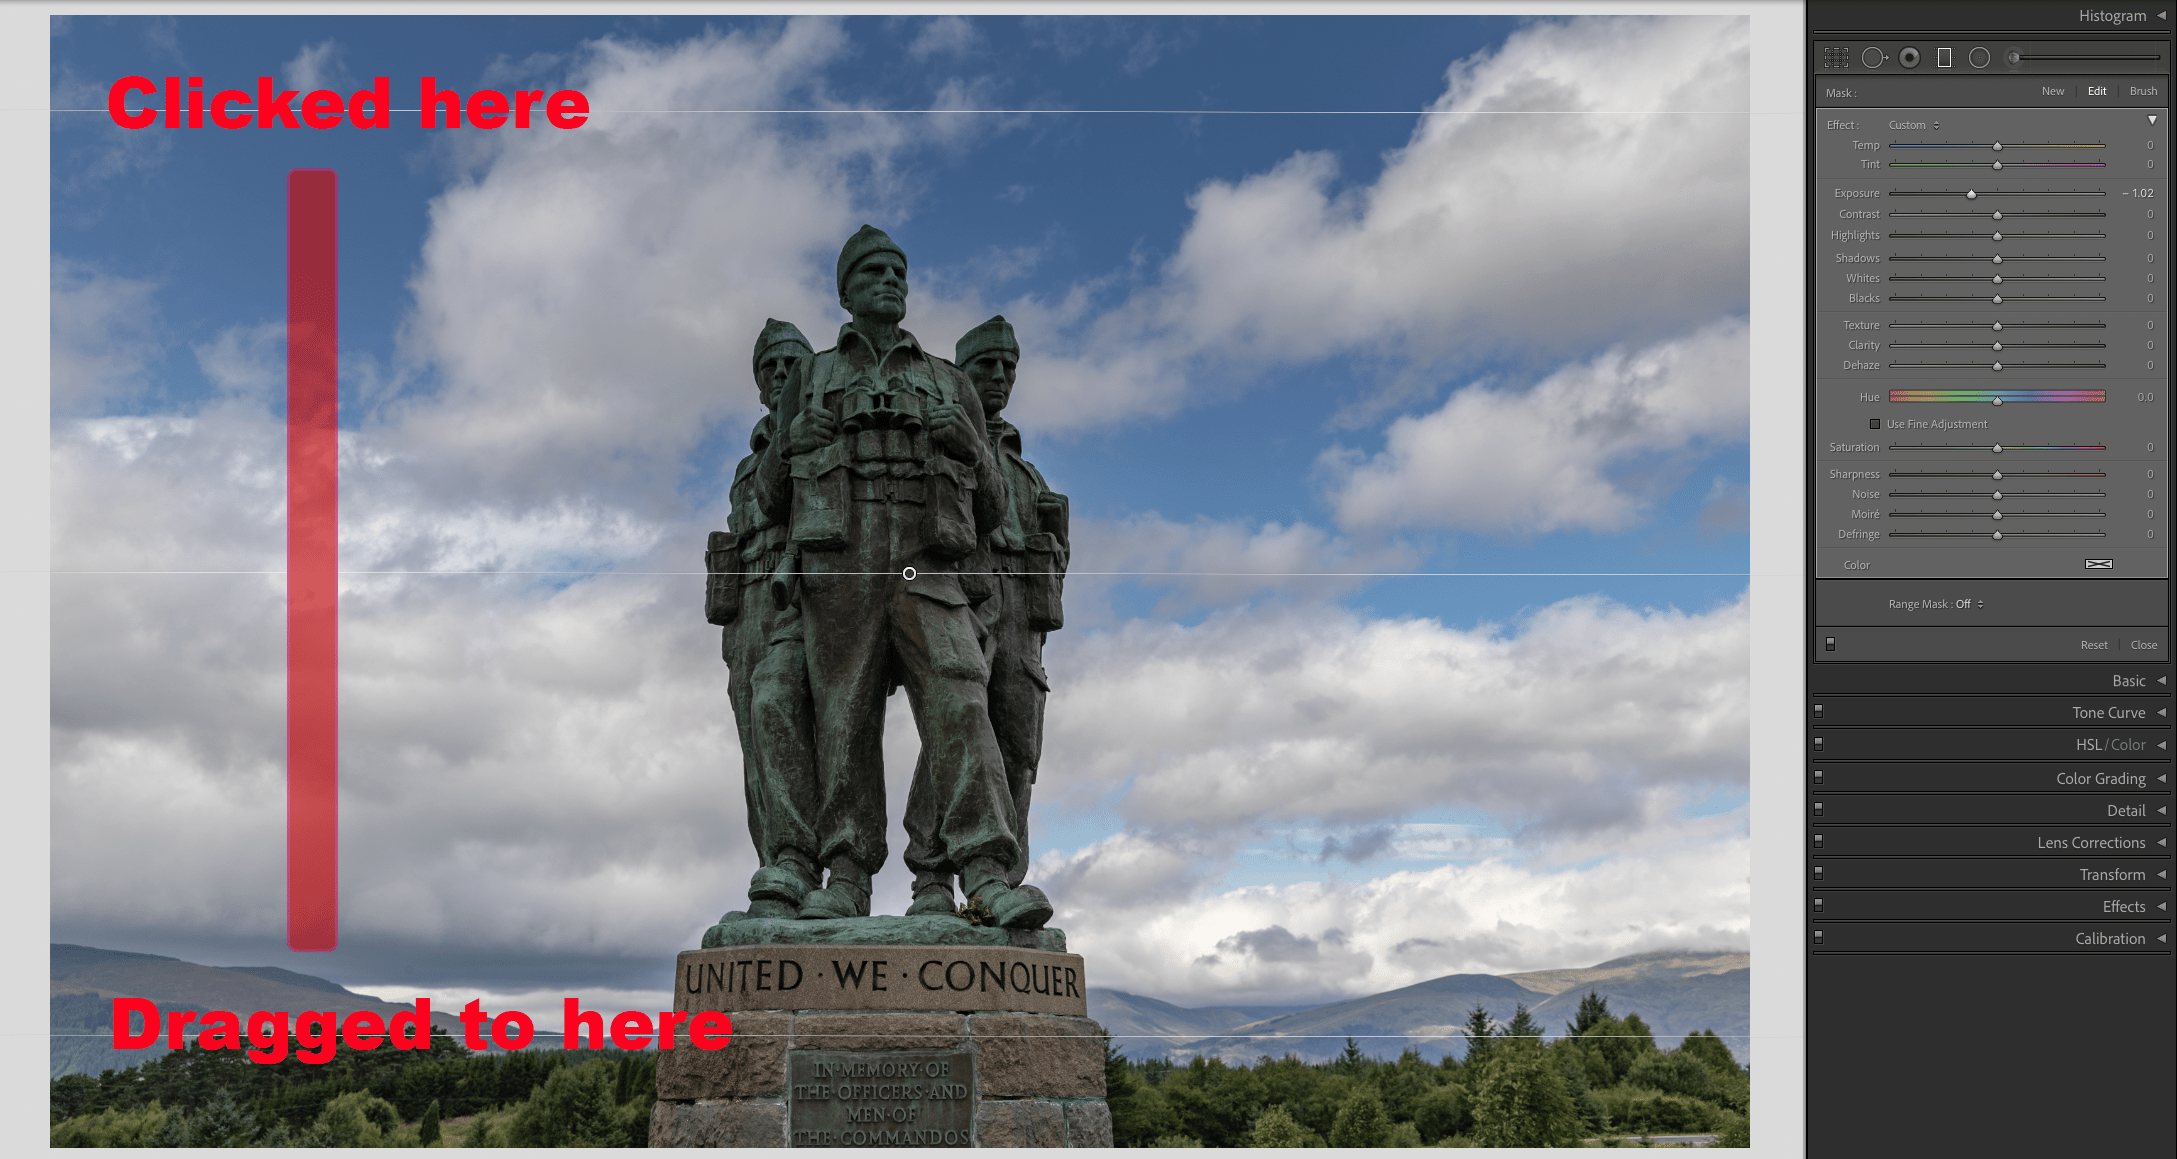
When the filter is applied, a new menu opens on the right-hand side of the screen. It is similar to the sliders you’ll be used to but will only apply to the area the filter is affecting. In this instance, I have applied a reduction of 1-stop of light to the exposure. The filter will apply to all the area and has also darkened the statues in the picture. The benefit of a Lightroom filter over a glass filter is that we can use a mask to only impact areas of a particular luminosity.
Luminosity Masking
The luminosity mask is available in all three of the filters and works in the same way. At the bottom of the slider menu is a dropdown box set to ‘Off’ by default. Selecting the option ‘Luminance’ expands the menu slightly more. It’s a good idea to select the tick box to ‘Show Luminance Mask’, which changes the photograph to black and white with some red areas. The areas in red are where the filter is taking effect.
The statues are darker than the sky, so we want to exclude the darker elements of the picture from the filter’s effect. Drag the left-hand range slider indicator toward the right, and the red cast starts to uncover the statue. Luminosity masking is a compelling way to apply a graduated effect over only parts of the image.

Radial Filter
The next Lightroom Filter is called the Radial Filter, and it has many similarities to the last brush we’ll look at later. The Radial Filter is most used by portrait and wedding photographers. We set the area the filter will work over by creating an ellipse shape. You can see this makes it great for selecting faces and then making changes such as softening skin.
To apply the Radial Filter, either click on the button on the toolbar or use the keystroke Shift and M. Next, left-click and hold the mouse where the centre of the filter is going to be applied and then drag up/down and side-to-side to create the shape of the ellipse required.
As with the Graduated Filter, you can now apply any sliders on the right-hand panel to the area covered. In this example, I’ve used a value of -100 on the clarity slider, making the models’ skin look smoother.

We can subtract or add areas for the filter to take effect over. Just above the sliders are three options; New, Edit and Brush. Taking the last of the three, we can now paint in or paint out the areas covered. As standard, it will add areas to the mask. Holding the alt key on a Mac or Option key on windows will subtract from the mask.
You can apply as many masks to an image as you like by taking the New option and changing the applicable sliders.
Adjustment Brush
The final tool works in precisely the same way as the previous two filters. However, this time we can paint in the areas that we’d like the effect to work. Select the tool by clicking on it on the screen or press the letter K.
We can now apply the filter by using the mouse and holding the left button to paint in. If you make a mistake, use the alt or option keys to paint out the areas selected. There is also a clever way to ensure that you only impact a subject and not the areas around it. An excellent way to use the Adjustment Brush is to change an area of an irregularly shaped image. Let’s say I want to apply more texture to the trees in the image below. The long-option would be to spend ages using the adjustment brush to paint in and out all the elements. We can speed the process up by clicking one button – the Auto Mask Button circled below.

The Auto-mask button identifies where the edges of subjects and keeps the filter application inside the area. Using the brushes, you can make the size bigger or smaller using the [ and ] keys. You can also apply a feather to the area being selected by pressing the shift button simultaneously using the two square-bracket keys.
These three Lightroom filters and brushes give lots of flexibility to making changes to photographs. In my personal opinion, I always take care not to over-use tools. Just because it is possible to over-saturate and over-texture elements to an image doesn’t mean that that photo will look better for it.
Give us your feedback
If you’ve got any questions or comments, leave them below. You can sign up for the Edinburgh Photography Workshop monthly newsletter, where you’ll get regular updates on exciting things happening in photography and some great tips. Sign up by clicking here.
About the author
As well as running Edinburgh Photography Workshop, Rich Dyson is a professional photographer. His photographs are regularly used in newspapers such as The Times, Guardian and Daily Telegraph. He also had two solo exhibitions and featured in a members sponsored exhibition in the Scottish Parliament. You can see and buy his photography at richdysonphotography.com
![]()