April 1, 2020
Controlling the shadow
Understanding how light works can allow you to control the intensity of shadow in your portraits
In the 17th century, artists such as Rembrandt and Caravaggio revolutionised portraiture. Their development was to give depth to the paintings through the use of light and shadow. Photographers have continued this fine art tradition by using artificial or natural light to create portraits with depth. This week we are going to look at the placement of light and how it affects shadow detail.
Creating shadow detail
Before we introduce technical aspects of photography let’s think how a shadow is created. We essentially need three elements. A light source, a subject and a surface for the shadow to land on. On a sunny day, we have all three of these elements as we walk around.
In the middle of the day, the sun shines onto our bodies and it creates quite a sharp shadow with a definite edge. As the day progresses we see the shadow get longer and less defined. This is because of the first influence on the quality of light – the size of the light source. In the middle of the day, the sun appears smaller. A smaller light source will create a more defined shadow. As the sun dips toward the horizon at the end of the day, it appears larger. A larger light source will create a softer shadow.
There is a second influence on the quality of shadow. This time get a torch and hold it close to a subject such as a cup in front of a wall. The shadow will be soft as it wraps around the subject. Now start to move the torch away from the cup and you’ll see that the shadow starts to sharpen. The closer the light source the softer the shadow and it will sharpen as the light source moves away.
With these two examples, we can see that by adjusting the size and distance of the light source we can control the intensity of the shadow. Now let’s look at how we can use this information to create different portraits with just a single light source.
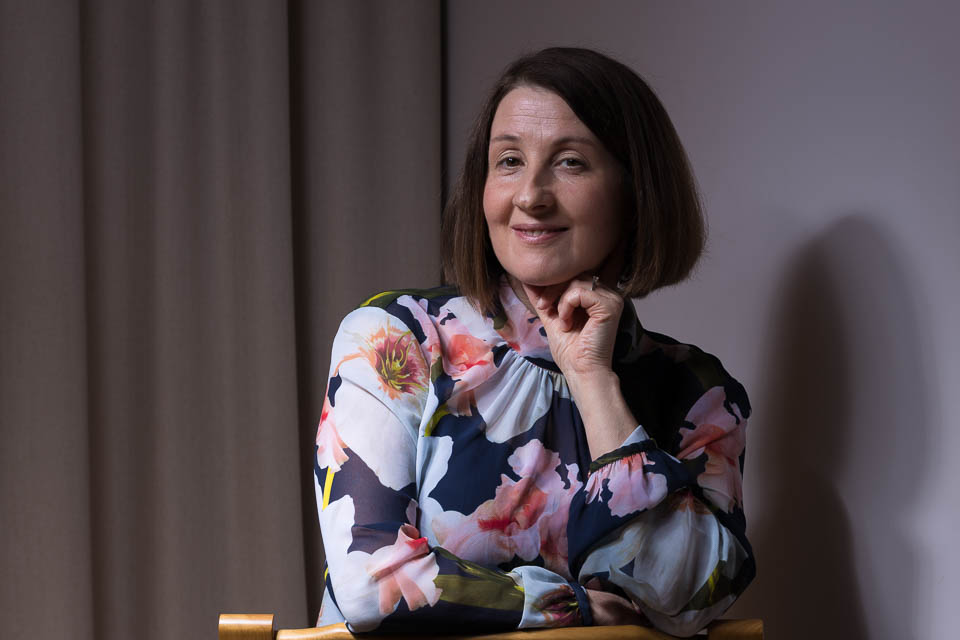
Soft shadow portrait
We’ll start by creating a portrait with shadows with a soft edge. To get these gentle shadows we need to make the light source as large as possible. We also want to place the light source as close to the subject as we can. The tool we can use to increase the size of the light source is either a soft-box or an umbrella. These spread the light over a greater area than if we had a bare light being fired toward the subject.

The light has been placed above the subject pointing downwards at around 45 degrees. I placed the soft-box as close as possible to the subject without it appearing in the shot. Everything we have done in this set up has given us a really nice soft shadow. This kind of lighting set-up is really flattering as it softens everything.
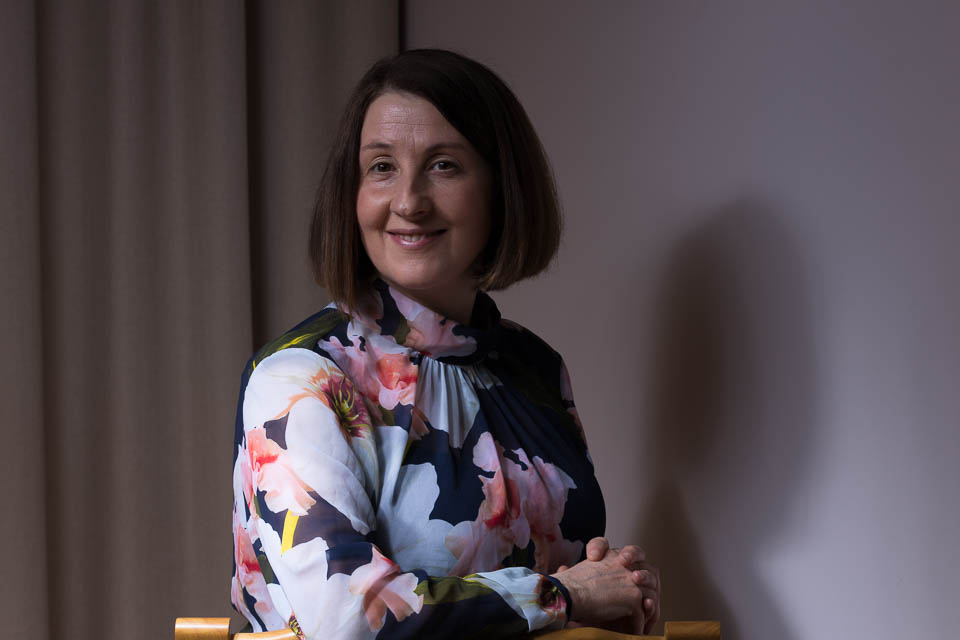
Medium soft portrait
Next, we will start to add some harshness to the shadows. To do this we are going to move the soft-box further away from the subject. There is a technical aspect to be aware of as we start to move the lighting source. It’s called the Inverse Proportion Rule. This means that if we double the distance the lighting source is from the subject then we have to double the amount of light being emitted from the source.

The first shot had the flash set at half power. As we have moved the softbox twice the distance away from the subject, I have increased the power to full. To try and get the same direction of shadow I raised the soft-box upwards. By moving the source backwards we have added a little more definition to the shadow edge.
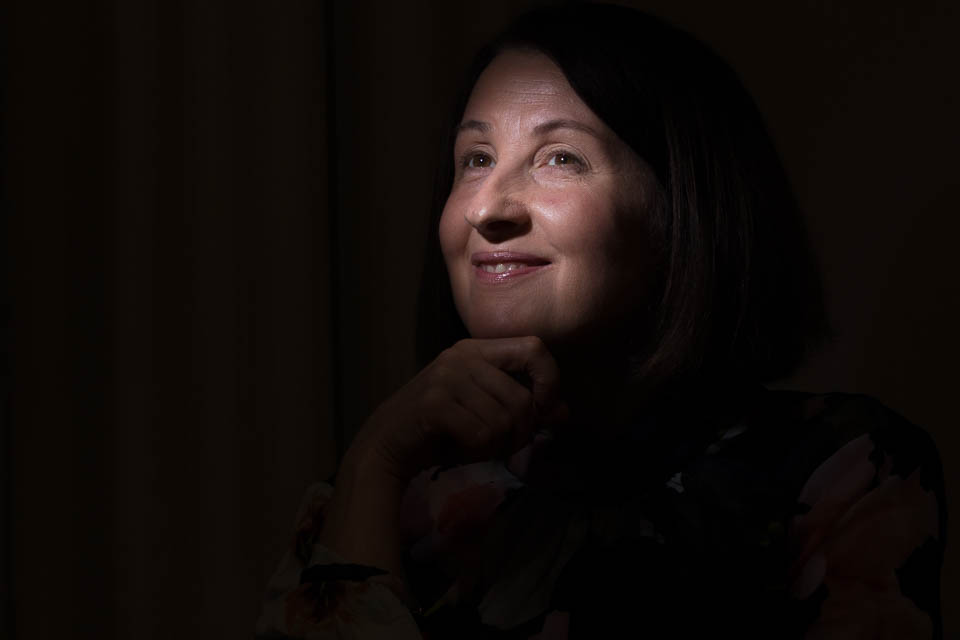
Medium-hard portrait
To add a little more definition to the shadow we are going to make the lighting source smaller. This time, I am going to add a Rogue 3 in 1 Grid. This reduces the spread of light which will sharpen the edges of the shadow. I’m also going to move the flash to the original position so that it keeps a little bit of softness in the edges.

The result of this set up can be used for a film noir style portrait. We’ve got some really nice definition around the cheekbones and jawline.
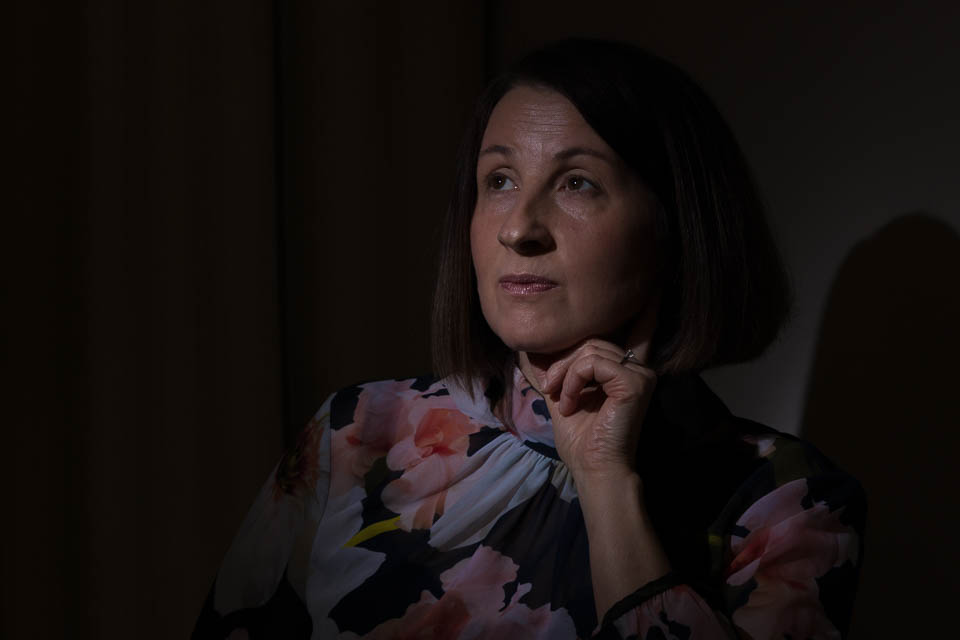
Hard shadow portrait
Our final set-up is going to give the harshest shadow by moving the light source further away from the subject and using the grid light. Remember, we will need to increase the amount of light from the flash using the inverse proportion rule.

This set-up is going to give really harsh edges. You can see this clearly in the shadow on the wall which has a very defined line.
Coronavirus shut-down
It’s looking like we are going to have an extended period of confinement so it would be great to have suggestions for blog-posts that you would like to see. Don’t forget, I have set up a Virtual Classroom on the Edinburgh Photography Workshop website. You can book a personal one hour webinar to help you with any aspect of your photography including camera advice, Photoshop and Lightroom tips or portfolio reviews.
If you’d like to buy one of my limited edition prints, they are available at richdysonphotography.com
Give us your feedback
If you’ve got any questions or comments, leave them below. You can sign up for the Edinburgh Photography Workshop monthly newsletter where you’ll get regular updates on interesting things happening in photography and some great tips. Sign up by clicking here.