March 25, 2020
Border your photos for printing
Create a professional-looking border in one click in Lightroom
It’s great fun taking photographs. I find it even better when others can enjoy your pictures too. Social media is a great way of sharing but I really like to see a photograph printed, framed and hanging on a wall. When I am producing my limited edition prints, I like to add a border around the image so it gives space to write in an edition number and sign the print.
Within Adobe Lightroom it is possible to add a border in the Print module. However, the border sizes are restricted to being a defined number in either centimetres, inches, millimetres, points or picas. This isn’t great when you may be producing photographs of different dimensions and won’t give a consistent result.
Border Sizes
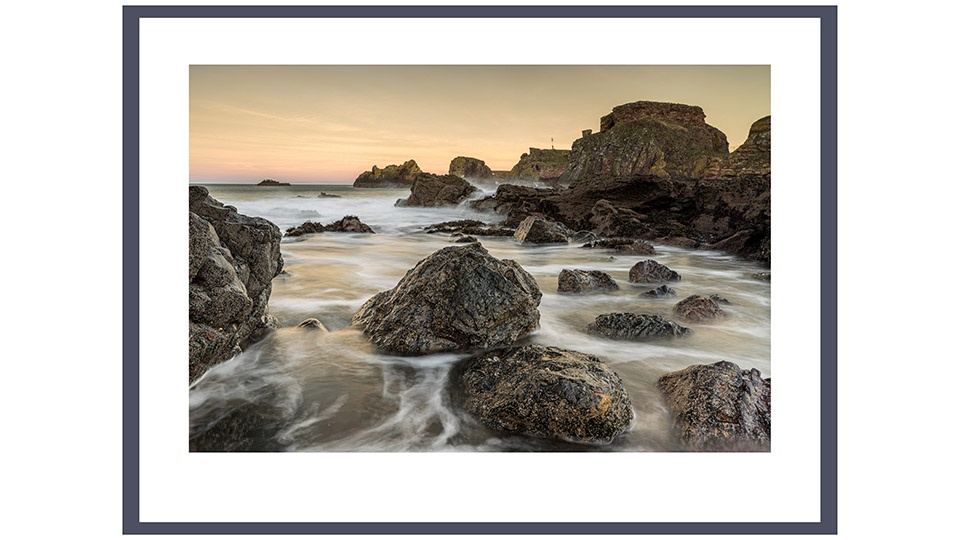
I like to use a rule of thumb that a friend of mine, Martin Bailey, uses when printing. The principle is that the photograph takes up 80% of the print. The two sides take up 10% of the width. The top of the border takes up 7% and the bottom border 13% of the height. By using these dimensions, there is space at the bottom of the border to add a description, a signature and an edition number. I like to write these in by hand to give a far more personal touch. You can see the plan we are going to work to below.

Creating a custom border
Whilst we will be able to add the border direct from Lightroom, we are going to create it initially in Photoshop. To do this we are going to record an automated set of events that will add a border and then save the file in a folder. In Photoshop this is called an Action.
The first thing you need to do is to make the Actions folder visible in Photoshop. To do this open any photograph in Photoshop and then press the Option or Alt key with F9. You will see the Actions folder on the right-hand side of the screen (circled in red below).

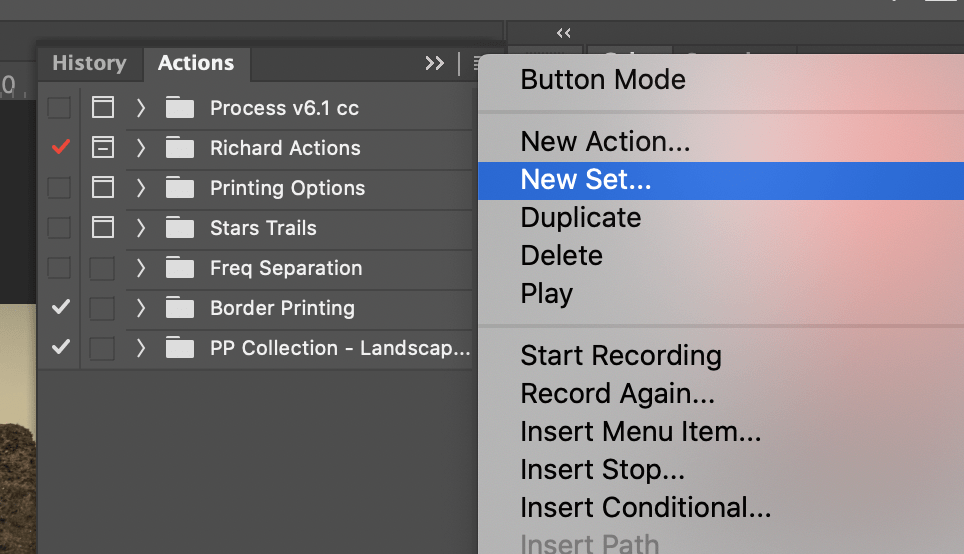
We are going to create a couple of actions. One for a landscape orientation photograph and another for a portrait orientation. To keep things nice and tidy we’ll create an Action Set to store all our actions in. Click on the three lines on the right of the Actions Panel and take the option New Set… Type in a Name for your Action Set in the dialog box that pops up (e.g. EPW Border Blog Actions) and click OK. You can also press the Folder icon at the bottom of the Actions Panel.
Create a new Action by clicking the three lines and taking the option New Action (or click the + sign at the bottom of the panel. Give your action a name such as Add landscape border and ensure the Set dropdown box is the one you have just created. Click Record.
Every keystroke we do in Photoshop is now going to be recorded and we can replay it back over and over again in the future. The first thing we are going to do is add the side borders. Click on the Image menu at the top and take the option Canvas Size.

Add a side border
You will see a pop-up box appear. There are a couple of things you may need to change. First of all, change the units measurement to Percent by clicking on the boxes to the right of either Height and Width. Changing one will also change the other. Ensure the checkbox next to the word Relative doesn’t have a tick and finally change the Canvas extension colour to White (or whatever colour you would prefer your border to be. We will set the side border size by changing the value in the Width box to 117% and press OK. We now have a border down the sides of the photograph.

Add a top border
Next, we are going to add the border at the top of the image. Again, open the Canvas Size box but this time we are going to change the height value to 112%. This time you need to tell Photoshop where to place the additional border. You do this by clicking on the bottom row of the Anchor Grid which should leave the display as below. Press OK and the top border is added.

Add a bottom border and save
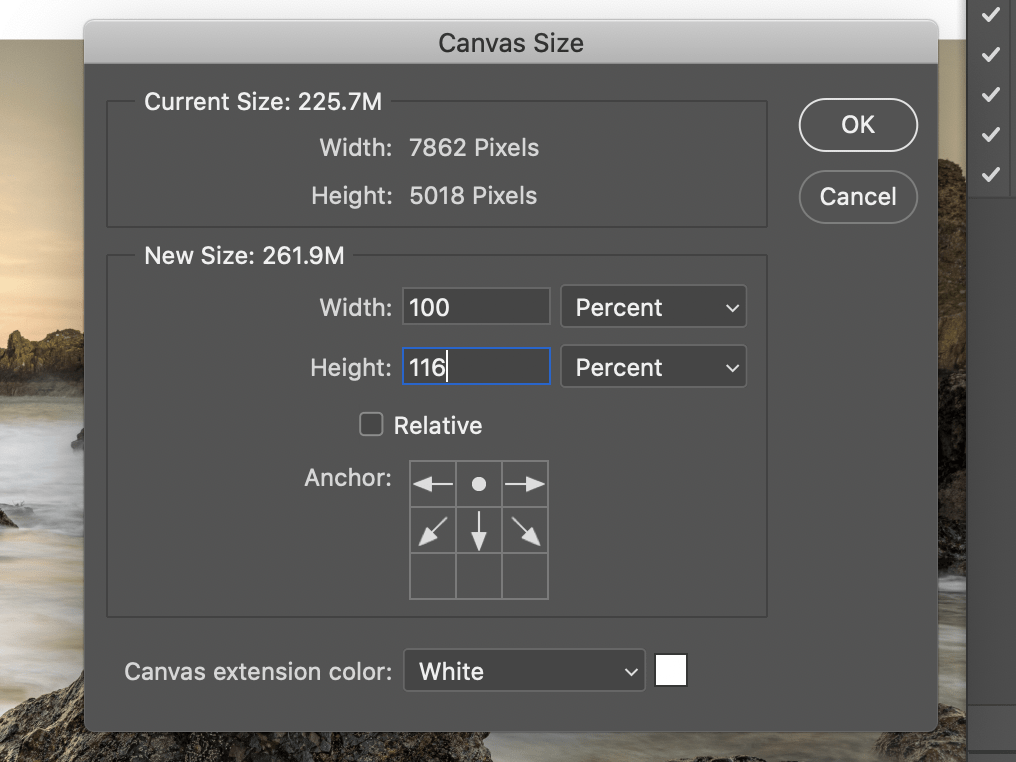
Now we are going to add the bottom border in a similar way. However, this time set the height to 116% and click on the top row of the Anchor Grid. That’s it we now have nicely spaced borders all the way around the picture.
We’re not yet finished creating the action. The final thing we need to do is to set where the edited images are going to be saved. Take the option File and Save As and locate the folder where you would like the border images to be saved then press Save. In the next dialog box that pops up, set the Quality to 12 and press OK.
Now we have finished creating the Action we need to stop the recording. At the bottom of the Action Panel click on the square ‘stop’ button. You’ve now created the action for the Landscape orientation border.

Do the same steps to create the portrait border. However, this time we will use the value of 125% for the width, 108% for the top border and 112% for the bottom border. This will leave you with two separate actions. You can see the various steps for each action below.

Creating a droplet
With these two actions, you could edit the photographs in Lightroom and run the action manually which would do the job. I like to be a little more efficient and make it possible to create a border by only working in Lightroom. To do this we are going to create something called a Droplet. This is a piece of code that you can run outside of Photoshop that will run an action. Don’t worry though, you don’t need to have any techie coding skills.
Before we go any further you’ll need to find the location of your Lightroom Catalogue. Go into Catalog Settings in Lightroom and click on the General tab. The location of your Catalog is displayed on the top line. Make a note of it for the next step.

Go back into Photoshop and in the File menu take the Automate Option and choose Create Droplet…

Click on the Choose box on the left-hand side of the dialog box that has popped up so that we can set the location where we’ll save the Droplet. Navigate to the location where the Lightroom Catalog is saved. Drill down by clicking on Lightroom Settings and then Export Actions. Rename your action in the Save As box and then click on Save.

You’ll be returned to the Create Droplet dialog box. In the Play section select the Set and Action for the landscape border. Check the two boxes ‘Suppress File Open Options Dialogs” and “Suppress Color Profile Warnings”. Make sure the Errors drop-down is set to Stop for Errors. In the destination section, select Folder as the destination and navigate to the location you set for the end images to be saved in earlier. Check the box next to “Override Action Save As Commands and then click OK. Do the same thing for the portrait border action. Well done! You’ve created two programs that you can now use to trigger Photoshop

Creating an export pre-set.
The final stage is to create an export pre-set which will mean that we can easily add borders in the future from Lightroom. Right-click on any photograph. Take the option Export and then Export again as shown below

The Export dialog box will pop-up. Change the Export To at the top to Hard Drive. In the Export Location section set Export To: to Specific Folder and the click on the Choose box. I created a folder called EPW Framed Prints Staging Folder. This is where the photograph will be placed before the border is added by the Photoshop Droplet.
In the File Settings set the Image Format to JPEG. Quality should be set to 100. Colour Space to sRGB.
In the Output Sharpening section tick the Sharpen For: box and change to the type of paper that you would usually print on. I prefer to print on Matte paper as it is less reflective when hung in natural light. I set the amount to Standard but you can experiment and chose what works best for your taste.
In the Post-Processing section select the dropdown box and select the Landscape Border Droplet that we created earlier.
Click on Add in the bottom left. Give your pre-set a name such as Add Landscape Border and if you prefer, create a folder for your border.

Repeat this section for the Portrait Orientation pre-set remembering to change the Droplet in the Post-Processing section to the correct Droplet. Once completed and you can see the two pre-sets click on Done.
Using the pre-set
Whenever you want to print a photograph with a border in the future it’s now a very easy process. Right-click on the photograph (or photographs) that you’d like to add a border to. Remember to only choose Landscape or Portrait orientation photographs when selecting multiple images. Click on the appropriate pre-set you set up earlier. Lightroom will output the file to the staging folder and then automatically open Photoshop and save the photograph in the final folder. If you want to keep your hard-drive nice and tidy then you can now delete any photographs in the staging folder.

Coronavirus shut-down
Over the next few weeks, it will be getting slightly harder to keep producing a weekly blog as the shut-down in the UK tightens. I have just set up a Virtual Classroom on the Edinburgh Photography Workshop website. You can book a personal one hour webinar to help you with any aspect of your photography including camera advice, Photoshop and Lightroom tips or portfolio reviews.
If you’d like to buy one of my limited edition prints, they are available at richdysonphotography.com
Give us your feedback
If you’ve got any questions or comments, leave them below. You can sign up for the Edinburgh Photography Workshop monthly newsletter where you’ll get regular updates on interesting things happening in photography and some great tips. Sign up by clicking here.
![]()