May 29, 2019
Sync modes for flash photography
Changing the sync modes on your flash can give creative results
Using artificial light, such as a flash gun, can be really intimidating but with a little bit of understanding how a strobe works you can get great results. One of the most important tools is the button labelled Sync. Before we go into the uses for these Sync Modes we need to get to grips with how using a strobe light affects your photos.
The first mind-blowing revelation with flash photography is that motion isn’t frozen by the shutter speed. How a subject is frozen is determined by the speed of your light. Even with a very long shutter speed of a couple of seconds, the motion will be frozen at the point your flash is triggered.
The second important fact to know is that your flash has a maximum speed that it can fire at with one pulse of light. This is what is known as the sync speed. Typically it will be somewhere between 1/125th of a second and 1/250th of a second. The manual for your flash will tell you what this speed is. When you first switch on your flash if you shoot faster than the sync speed there will be a black line across the photograph. This is actually the shutter of your camera making its way across the image.
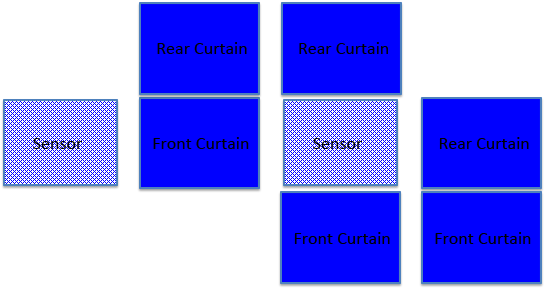
The last thing you need to know is how a shutter works in your camera. You can see the four stages below. Images are captured on the sensor of your camera. In front of the sensor are two elements called a front curtain and a rear curtain. When you press the shutter button the front curtain drops down and exposes the sensor to light for as long as the shutter speed is set for. At the end of the exposure time, the rear curtain drops down and covers up the sensor.
With this bit of knowledge, we can use the sync modes to create some effective images by determining when and how the flash fires.
Front Curtain Sync Mode
If you don’t know about the sync modes available on your camera then this will be the default set-up. The diagram below shows how the action is going to be frozen. Just after the front curtain has dropped down to expose the sensor to light the flash is fired. Any motion of the subject would be frozen at this point by the flash.

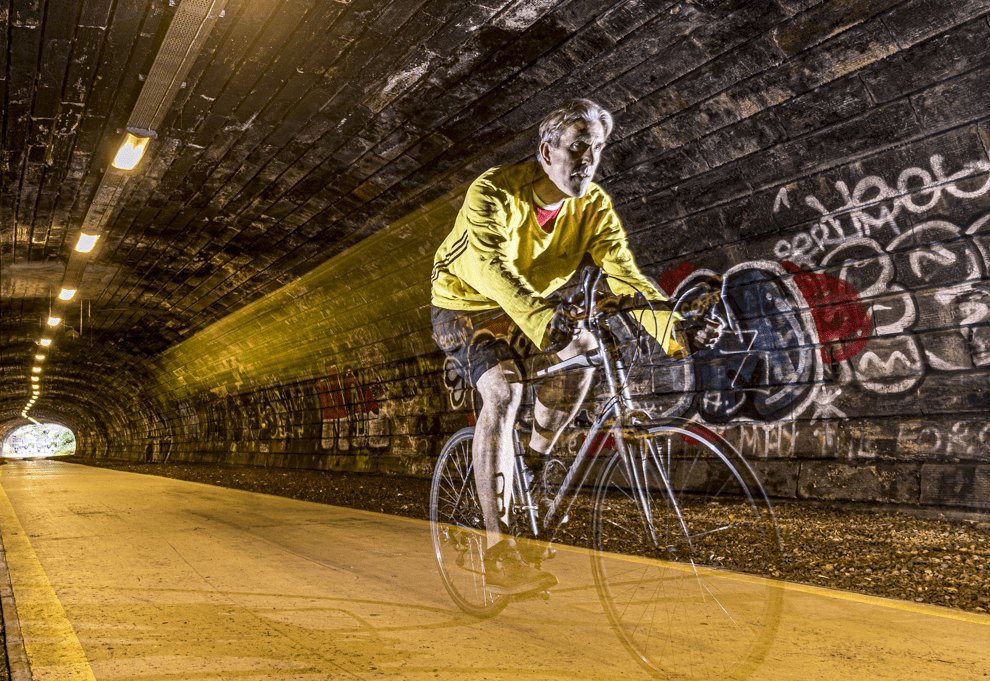
If the subject is standing still, this sync mode works really well and it’s the one I would use for most of my indoor portraits. However, if the subject is moving quickly but I am using a slow shutter speed due to the amount of available light then it produces a strange effect. In the image below, the cyclist is riding past the camera. The camera triggers the flash as the front curtain drops but the exposure continues capturing the movement of the cyclist creating the light trail in front of the frozen part of the image. It would be much better if we could capture the light trail of the movement with the frozen element at the end of the trail.
Rear Curtain Sync Mode
Switching your sync mode to rear curtain changes the point where the flash is going to fire from the start of the exposure to just before the rear curtain is going to cover the sensor again. You can see this in the diagram below.

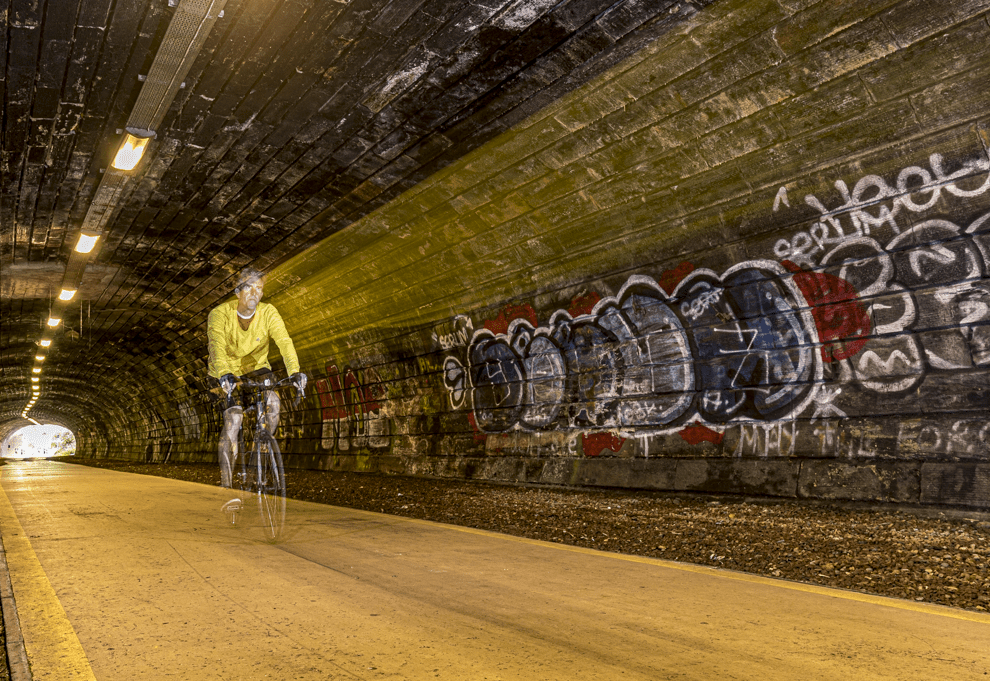
We are now going to open the shutter at the same point as the cyclist rides towards us. This creates the light trail caused by the motion of the bike. Now we have the flash set to rear curtain sync you can see that the frozen element happens as the cyclist is close to us. It looks like their speed going past has been accentuated by the trail happening behind them.
High-Speed Sync Mode
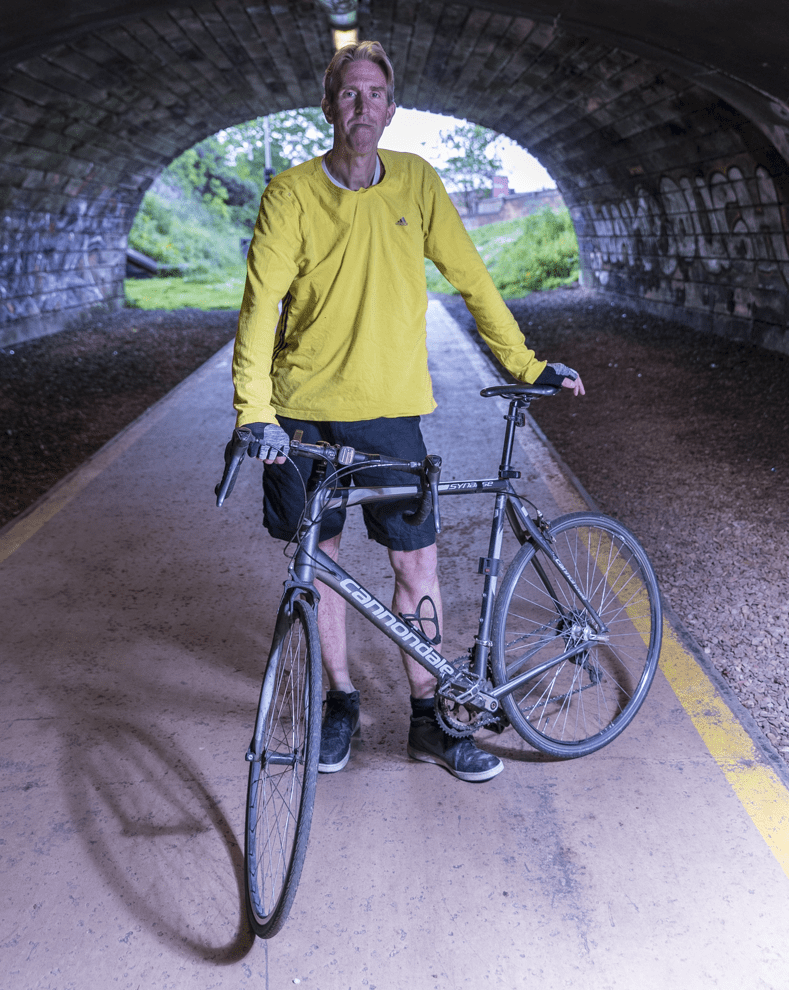
There is a third sync mode available on your flash which is great for portraits. This time we are going to shoot the cyclist posing at the end of the tunnel with the bright light behind him. I want to shoot with a large aperture to get a nice blurry background. If I set the exposure to still see the detail behind the subject the shutter speed needs to be much faster than the sync speed of the flash. This causes a problem as I definitely need flash to fill in the face of the rider but the shutter speed of 1/320th is going to mean the movement of the shutter will be captured by the flash.
By switching to High-Speed Sync we are going to be able to get around the sync speed of the flash gun. Instead of the flash firing once during the exposure, this time it is going to do a series of slightly less powerful flashes throughout the exposure. You can see the principle below.

We can set a fast shutter speed to get a well-exposed background with a shallow depth of field. However, we can also get enough light onto the subjects face so that they are also correctly exposed.
Hopefully, this short tutorial has helped you get a better understanding of the sync modes available in flash photography. If you have any questions or comments please send us a message. You can also subscribe to our monthly newsletter so you receive some additional members-only content in your mailbox at the start of each month.