June 9, 2021
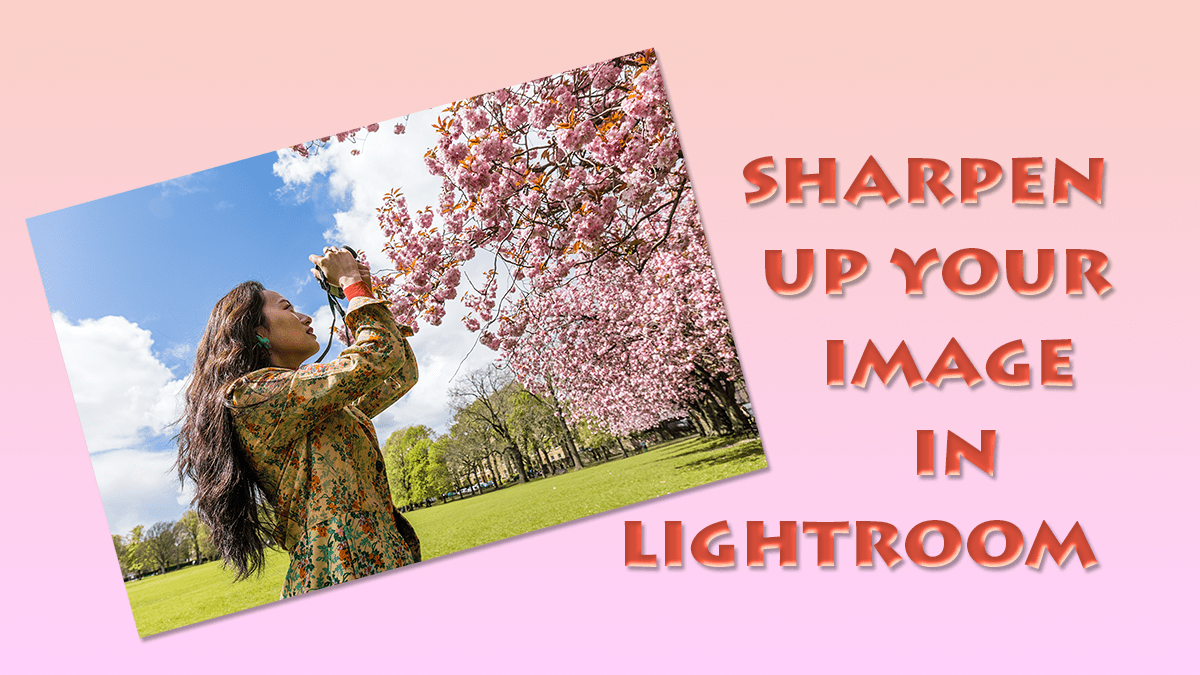
Sharpen up your image
Using the sharpen tool in Adobe Lightroom can give your images the edge. How you should and shouldn’t use this great tool
This week, we will look at an often misused tool in Adobe Lightroom, the Sharpening slider. Before we dip into the sharpen tool, let’s look at what it doesn’t do. It’s not a rescue for a lousy picture. If your photograph is out of focus, then sharpening isn’t going to fix it. Like most (if not all) things in Lightroom, it is designed to enhance well-taken photos and not recover poor ones.
Now we have that out of the way, let’s look at what the sharpening tool does. Moving the sharpen slider to the right increases the contrast between edges. It will make one side of an edge slightly darker and the other side lighter. Over-sharpening an image can make it look like there is extra noise in the photograph. It can also introduce a halo effect when there is already significant contrast in the picture.
How do the Sharpen sliders work?
There are four different sliders in Lightroom that change how much sharpening is applied. Sharpening controls the amount of contrast used in the photograph; the lower the value, the less contrast. For example, if you shoot in RAW, then Lightroom will automatically apply a value of 40, whereas when you import a JPEG file, there is no sharpening applied. It is because part of a camera’s compression process when creating a JPEG file adds some sharpening. To see the effect, use the 100% view on the Navigator window and move the slider to the maximum, 150.
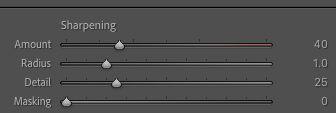
The second control is Radius. The lowest level available is 0.5 and increases to 3.0. These values relate to the thickness of the edge in pixels where the contrast is applied. Again, it is more likely that you’ll see a halo effect appear as the radius value increases, so take care to use it sparingly.
Next down, we have the Detail slider. It works on a range of 0 to 100 and controls the amount of sharpening applied to the details in your photos. The effect is only applied on larger areas if you use a low number, and increasing the value will also apply sharpening on smaller edges. Pushing the value closer to 100 can introduce noise to the photograph, so again, use it with care.
The final control, and probably the most powerful, is the Masking slider which controls where the sharpening effect is applied. With the slider set to 0, the effect applies to the entire image. Raising it to 100 only sharpens the stronger edges in the picture. In the next section, we’ll look at how this can help only sharpen the parts of the image that will benefit from it.
Sharpening in practice
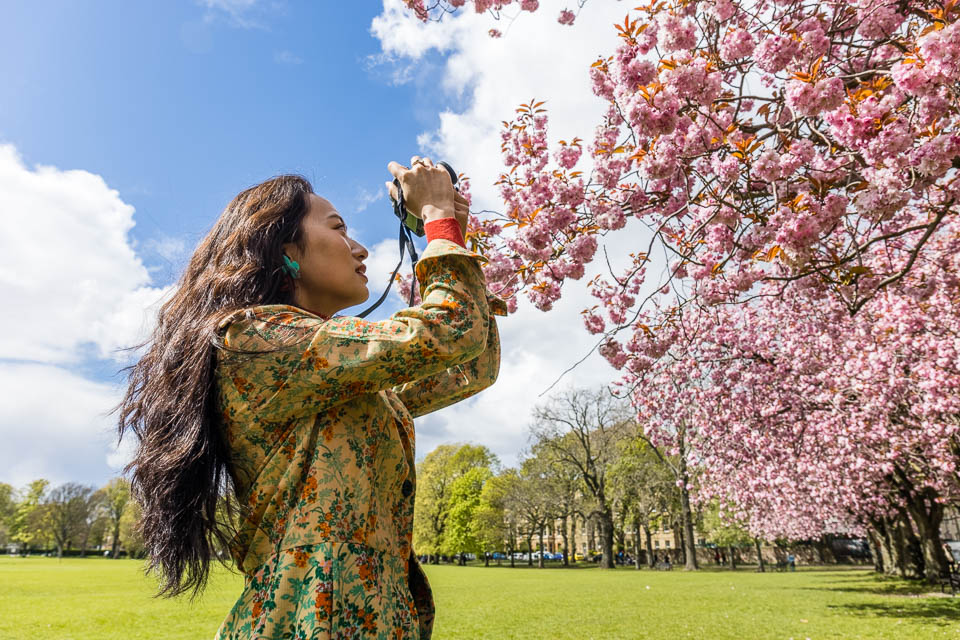
I am going to use a photograph I took recently in Edinburgh’s Meadows area. The lady taking a picture of the cherry blossom is in a particularly sharp-looking jacket, so I thought it was ideal for a post all about sharpening. The first shot below is the image with the standard RAW file sharpening applied – the default values are Sharpening +40, Radius +1, and Detail +25.
Before we do a good job of sharpening, let’s look at a bad one. I have moved the top three sliders to their maximum values. I have then zoomed in to the picture at 100%, so you see how the shot would look if you printed it at the native size. I am sure you’ll agree that it’s pretty awful! Despite being shot at ISO 100, there is tons of noise. Also, if you look at the woman’s chin, there is a prominent halo around her skin. It’s definitely not the kind of picture I would want to show someone, but it is often what an inexperienced editor might do.
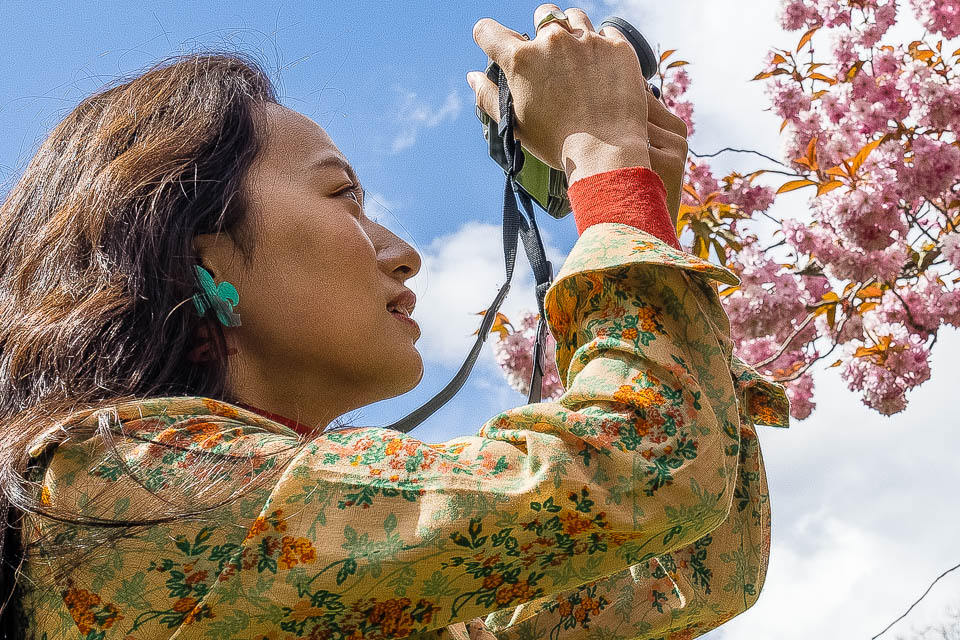
To use the sharpen slider well, we only want to increase the contrast around relatively large edges. However, the sharpening we apply also needs to be subtle enough to make the subject stand out without creating halos or noise. The Masking slider is the tool that’s going to help us achieve this.
Hold the option key on a mac (or alt key in Windows) and then slide the Masking Slider to the right. The photograph changes to black and white. The areas in white have the sharpening effect applied to them; the areas in black are left untouched. In the example photo, setting the Masking slider to 95 only affects the edge of the woman’s face, coat and some of the cherry blossoms.
I can now slide the Sharpening slider all the way up to 150 as I know that I am only sharpening the edges that I want to have more contrast. I can now view the photograph at 100% and apply the correct amount of Radius and Detail to sharpen the picture without causing a halo effect or adding noise. Of course, the right amount of sharpening is always going to be a matter of personal opinion. The settings I have used in the end are Sharpening +150, Radius +1.3, Detail +17, and Masking +95. You can see the side-by-side images below – the original is on the left and corrected on the right.

As the Masking slider has stopped the woman’s skin from being sharpened, the default +40 value on the Sharpening slider isn’t applied. As a result, her skin looks much smoother (and I am sure that any woman would be happier with that!) There’s also a nice contrast now between the edge of her face and the sky.
Give us your feedback
If you’ve got any questions or comments, leave them below. In addition, you can sign up for the Edinburgh Photography Workshop monthly newsletter, where you’ll get regular updates on exciting things happening in photography and some great tips. Sign up by clicking here.
About the author
As well as running Edinburgh Photography Workshop, Rich Dyson is a professional photographer. His photographs are regularly used in newspapers such as The Times, Guardian and Daily Telegraph. He also had two solo exhibitions and featured in a members sponsored exhibition in the Scottish Parliament. You can see and buy his photography at richdysonphotography.com
![]()