July 17, 2019
Photography Stop explanation
Some of the language used in photography is confusing. What exactly is a stop?
In last week’s review of the Kase filter system, I talked about 3 and 6 stop filters. On the back of the post, I received a few questions about what a stop is. This week I am going to try and explain what a stop is and how you can use the knowledge to take better photographs.
Stop definition in photography
Before I was a full-time photographer, I worked in project management. I often got frustrated by people using technical terms without explaining in ‘Janet and John’ language what they meant. The use of the word stop is a good example of this in photography.
A stop is actually quite simple to describe. It is where the amount of light recorded on the sensor has either doubled or halved.
Shutter speed stop
As an example, if we have the shutter speed of our camera set to 1/100th of a second, a stop extra of light would happen by setting the speed to 1/50th. There is twice as much light being recorded by halving the shutter speed. Similarly, a stop less of light would be achieved by setting the shutter speed to 1/200th – the shutter speed value has doubled which means there is half as much light.
Most cameras are set up so that each time you turn the dial when changing the shutter it changes by 1/3rd of a stop. Typically, the values that you will see on your camera as below.

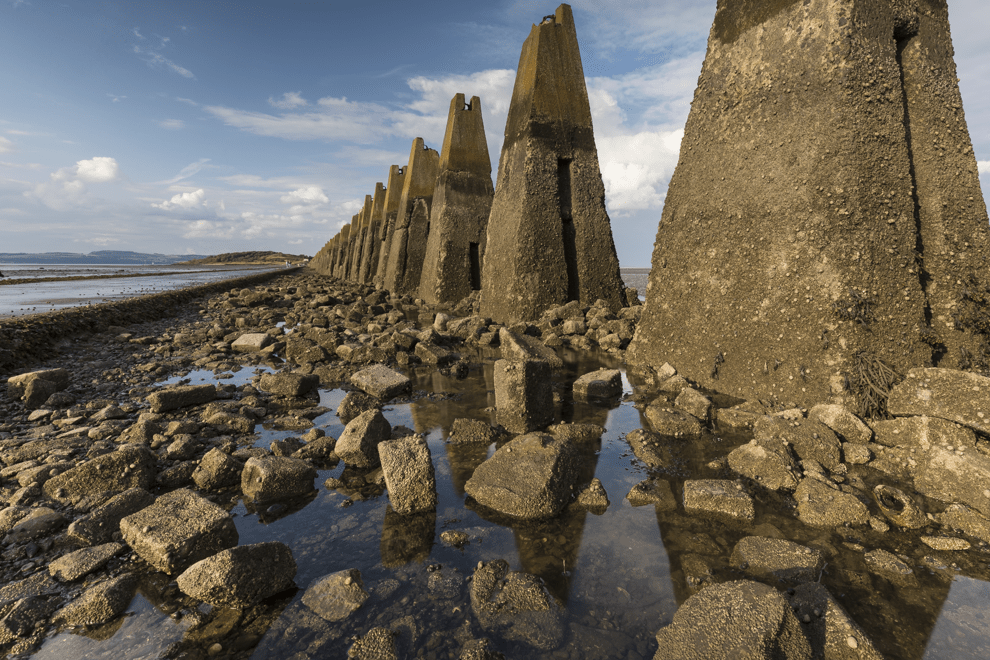
Using this diagram we can see how using, for example, a 6 stop ND filter would change the shutter speed. If our exposure without a filter attached was 1/25th of a second then when we take away six stops of light by attaching the filter, we would need to change the shutter speed to 2.5 seconds to achieve the same exposure. The image taken on the left didn’t have a filter attached. The one on the right has a 6 stop filter attached and the slower shutter speed has smoothed the water so there aren’t any ripples in the pools..
ISO stop
Just as we can define stops in shutter speeds, we can do the same with ISO values. It works in a very similar way to shutter speed. If we have an ISO of 400 and we double the value to 800, twice as much light will be recorded on the sensor. Similarly, moving the ISO from 400 to 200 would halve the light being recorded.
Some budget cameras will only allow full ISO stops to be selected, usually starting at 100 and increasing to 200, 400, 800, 1600 etc. Higher-end cameras will usually allow ISO values to be selected in 1/3rd stops, as shown below.

Aperture stop
Stop values relating to aperture are slightly more complicated. We have seen with both shutter speed and ISO that it is a fairly simple calculation to double or halve the amount of light. If you have looked at the aperture values on your camera, you will have seen that they don’t change in such a simplistic way.
Apertures are expressed as the letter f and a number. You may hear them referred to as the focal ratio, the f-ratio or most commonly the f-stop. The values are calculated by dividing the focal length of the lens by the diameter of the hole. However, on your camera, you can easily determine a stop of light by moving the aperture value 3 steps away from your starting point. For example, in the diagram below, if you start with an aperture of f/5.6, changing it to f/4.0 there will be twice as much light being recorded on the sensor. Similarly, moving the aperture from f/5.6 to f/8.0 there will be half as much light being recorded.

I hope this has cleared up how we use the term ‘stop’ in photography. If there are any comments or questions, please drop me a mail. You can also sign up for the Edinburgh Photography Workshop monthly newsletter where you’ll get regular updates on interesting things happening in photography and some great tips. Sign up by clicking here.