February 12, 2020
Fine Art Flower Photography
If you’re stuck inside you can keep being creative with a fine art processing technique. A capture to processing guide
Over the next few weeks, I’ll be looking at ways to take photographs when you are stuck inside. It could be the bad weather currently hitting the UK that keeps you indoors. In my case, it’s the result of an accident. For the next few weeks, I’m house-bound due to a broken ankle which occurred whilst taking photographs for a forthcoming book. (I’ll not bore you with the full story of walking half a mile off a deserted hill with the injury). One response to the injury could be to stop taking photographs for a few weeks. I am going to take this as an opportunity to develop some new techniques. This week I am going to start by shooting a small posy of flowers and creating a fine art image.
Shooting the flowers
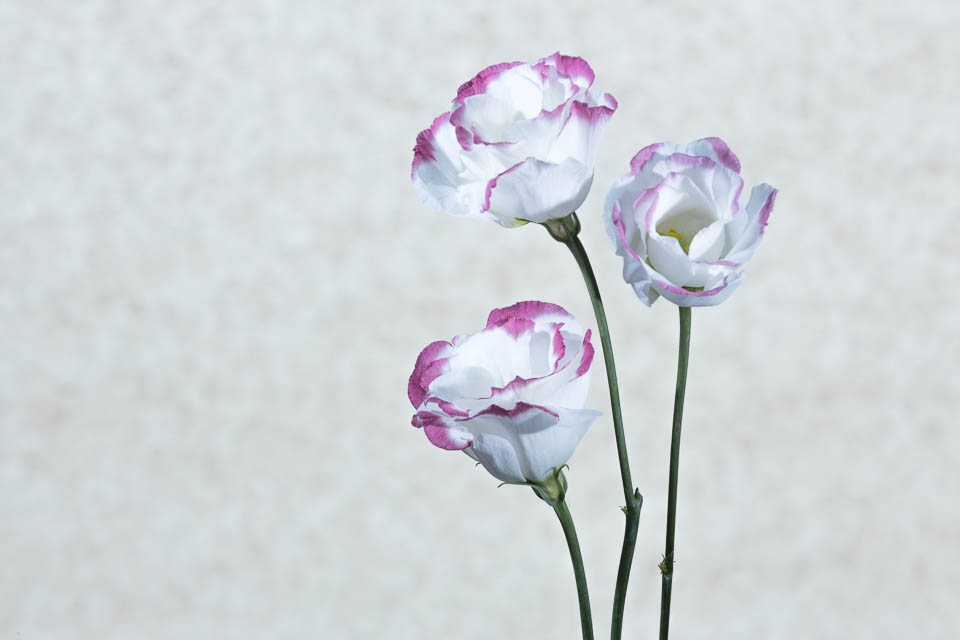
The first stage of the image creation is to photograph the flowers. I selected a small bunch of Lisianthus. The bunch I chose were nicely separated so that I could see all three flowers without them overlapping with each other. I also removed the leaves from the stalks to create a cleaner image. You’ll see that I chose to include three flowers in the photograph. Our brains tend to prefer an odd number of items in an image.
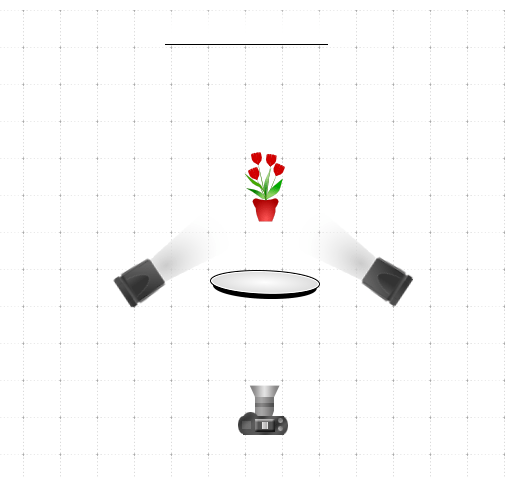
To create the image I set up a very simple studio set up which you could easily do. I have used two off-camera flashes set about 45 degrees from the flowers. There’s a Rogue Grid Diffuser added to the front of each strobe to prevent light-spill onto the background. I created a back-light effect by using the natural light coming through a window which is diffused by a piece of greaseproof paper. Finally, to help illuminate the bottom of the flowers, I used a white reflector underneath the flowers angled at around 45 degrees so I could shoot over the top of it.
The camera settings will vary depending on the light available in your room. However, as a guide, I shot with an aperture of f/16. This is because I was using a long lens (70-200mm) and standing relatively close to the flowers. These two things reduce the depth of field so using a small aperture allows the flower heads to be relatively sharp throughout as well as allowing a nice blur to the background.
The shutter speed is set to 1/20th of a second. I could use a fairly slow shutter speed when hand-holding the camera as motion is frozen by the light from flash as opposed to the shutter speed. When using flash photography, the shutter speed and ISO are going to change how much ambient light is included in the photograph. To get a pleasing background I also increased the ISO slightly to 200.
The flash strength is set to 1/32nd. Once you have set the aperture, shutter speed and ISO, you can use the flash strength to change the amount of light until you prevent over-exposing highlights. The resultant photograph out of the camera is quite pleasing. However, we are now going to process the shot to give a fine art feel.
Fine Art Editing in Lightroom
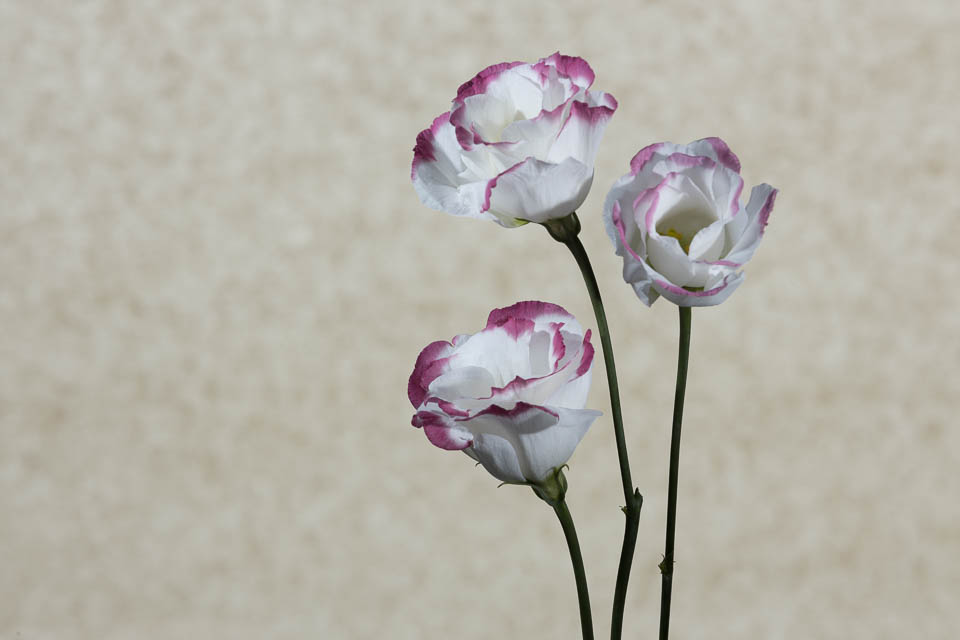
The colour tones in the image as shot are appealing, however, I want to create a more classic fine art look. To do this I am going to make a few simple edits in Adobe Lightroom. I am going to start by making the photograph appear a little cooler to take away the orange tones caused by the greaseproof paper.
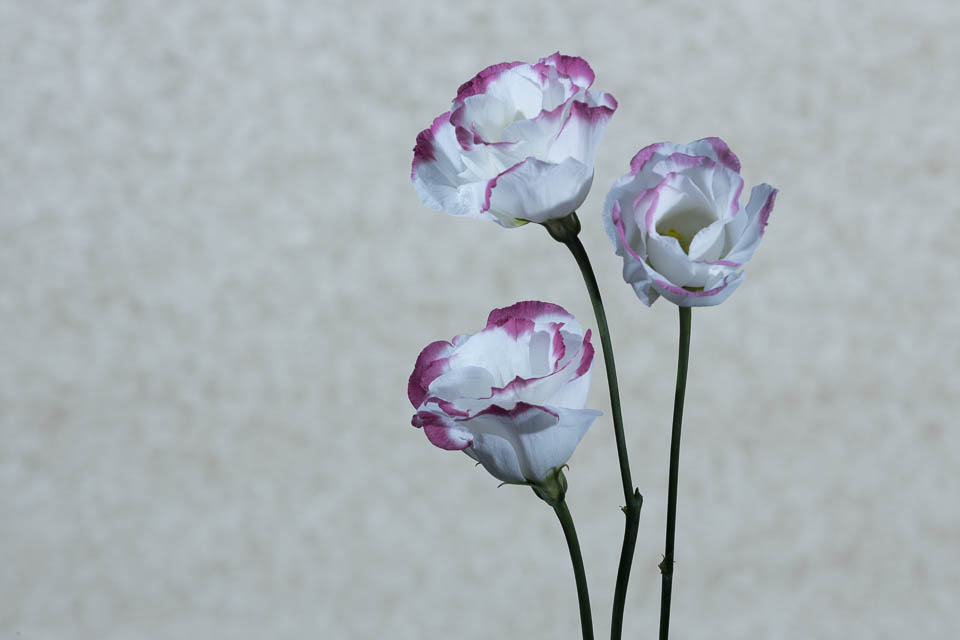
The next stage of the processing is to give a high key feel. To do this I adjust the highlights and whites without allowing them to blow out on the histogram. In this case, I have used +100 on highlights and +12 on the whites. I have also opened up the shadows slightly by increasing the value to +70 so that we lose some of the pattern caused by the greaseproof paper and also help to bring out the greens of the stems.
To give a vintage effect, we are going to slightly de-saturate the image. I still want to retain the delicate pinks on the petals as well as the greens in the stems so a value of around -40 works well.
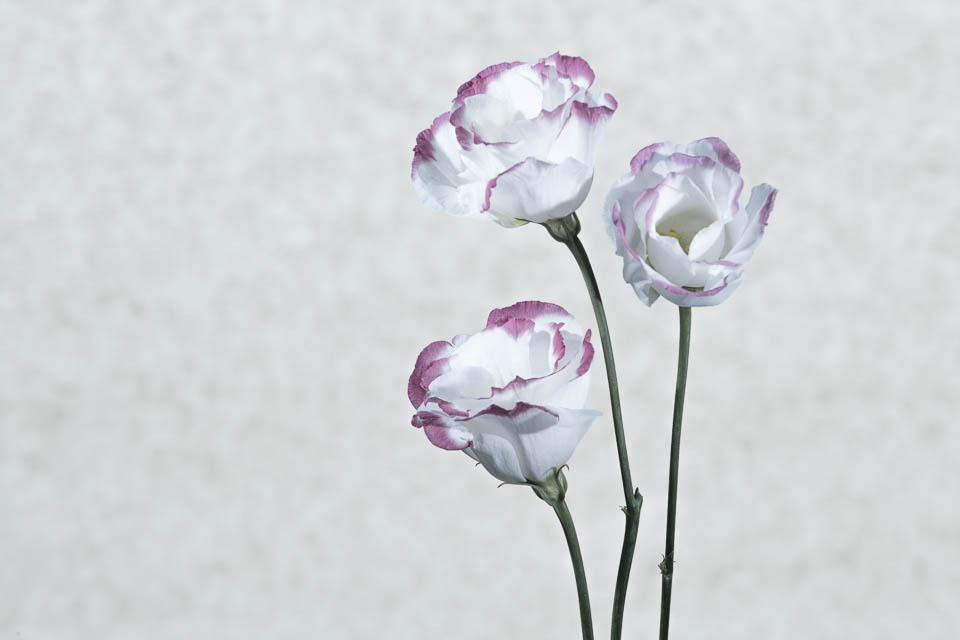
We are now going to push the dynamic range of the image a little more by applying a tone curve. I am always ensuring that any settings I use aren’t going to create any blown-out highlights. In the Tone Curve section in the Develop module I created an ‘S’ shape by applying +20 to highlights, +10 to lights, -10 to darks and -20 to shadows. This curve has really accentuated the delicate petals as well as giving detail in the stems of these little flowers.

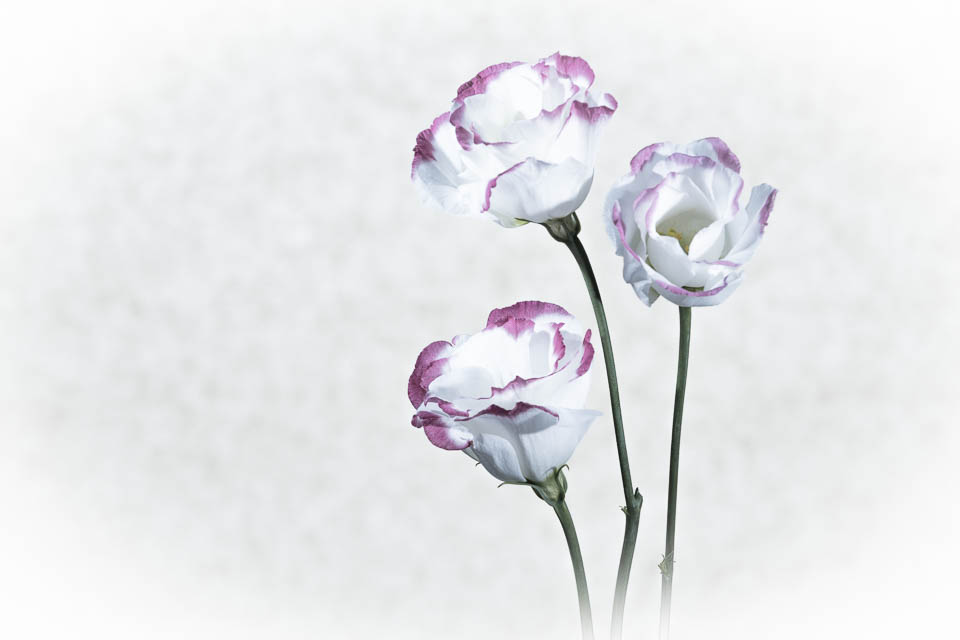
To finish the fine art feeling to this photograph I am going to add a light vignette. To do this we need to go into the Effects section in the Develop module. Again, I am going to protect the highlights my only adjusting the settings until the point where the over-exposed indicator on the histogram lights up. I have set a value of +41 on the Amount slider and I increased the feather value to 60 which gives the effect of the flowers gradually appearing from the bottom of the frame.
I am sure you’ll agree that this end result complements the delicate feeling of the Lisianthus. I have made this photograph and a similar processed portrait version available to buy as a limited-edition framed print.
Give us your feedback
If you’ve got any questions or comments, leave them below. You can sign up for the Edinburgh Photography Workshop monthly newsletter where you’ll get regular updates on interesting things happening in photography and some great tips. Sign up by clicking here.
![]()