July 12, 2018
Expose to the right
How to get better, sharper photos

This week we are going to look at quite a technical subject called expose to the right. When you master it, you can get your images looking better and sharper. It’s perfect for landscapes where you may be printing large scale but it’s also useful in any other type of photography.
Understand your histogram
Before we start looking at how to expose to the right we need to understand why. To do this we will need to understand the histogram you can see on the back of your camera or in your editing software.
The histogram shows how light has been distributed across the image. The far left-hand side of the histogram is pure black, and the far right-hand side is pure white. Between these two edges, we will have gradients of grey or colour that move from black to white. If we take a photograph which has a peak on either far edge, then the camera has not collected any detail on the sensor other than the pure black or white.
The gap between pure black and pure white will depend on your camera but typically it will be between 13-15 stops of light (a stop of light is either the doubling or halving of light). If we work on the dynamic range being 15 stops, the very brightest stop has twice the amount of data than the 14th. The 14th then has twice the amount of data than the 13th and so on. If we can push more data into the brighter areas of the histogram then we will overall have more data in the file. The result of this is a reduction in the amount of noise in your image and in some cases more sharpness.
What difference does it make?
Before we look at how to expose to the right let’s see what a difference it can make. These photographs are taken at the wonderful Royal Botanic Garden Edinburgh.
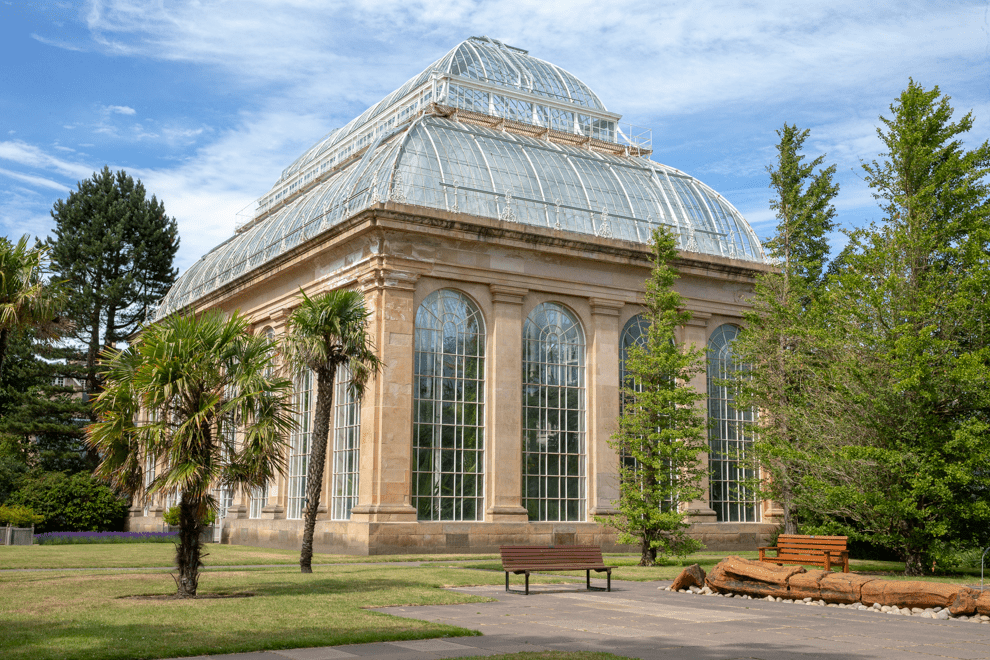
This first shot has been taken using an aperture of f/16 with a shutter speed of 1/50th of a second at ISO 100. The metering mode used was Evaluative (or pattern/matrix/multi depending on your camera make). The light meter was set to zero and it has achieved a good exposure with the dynamic range comfortably between the two edges of the histogram. You will see, however, that there is a small gap toward the right of the histogram.
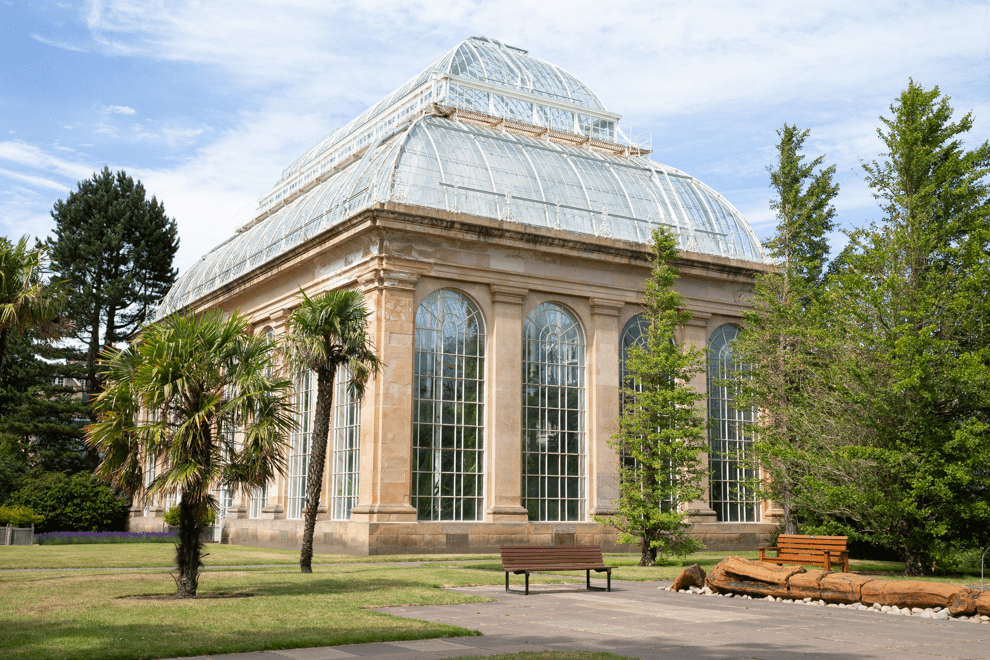
This second shot has been taken using the expose to the right method and has added 2/3rds of a stop of light to the image by slowing down the shutter speed to 1/30th of a second. All the other settings remained the same. The exposure is much brighter, but it still remains within the dynamic range of the histogram. The gap on the right has been filled in.
As the brightest part of the histogram holds more data then we can now look to see the difference between the two files. The ‘correct’ exposure has a file size of 26.16mb whereas the expose to the right version has increased to 27.67mb. We have increased the amount of data to play with by around 5%.
Where we really see the difference in this additional data is in the processed image. The raw files both need enhancement but as we have more data in the brighter areas of the image we are able to get better contrast and less noise as we process. To prove the point, the two images have been processed in the simplest method possible – pressing the Auto button in Lightroom. The image on the left is the ‘correct’ exposure and the one on the right is the expose to the right version. It’s clear to see that the second image is the better one with a lot more detail captured in the shadows and a greater depth .
How to expose to the right
There are two methods that you can use to take a photograph using the expose to the right method.
The first is quite easy if your camera displays a histogram either through the eye-piece or when you are using live view. Simply have the histogram visible and shift the exposure to the right until it is just touching the right-hand side. It is worth taking care to view an RGB histogram if you can as there may be conditions where one of the colours is over-exposing but doesn’t show up on the brightness histogram. If your camera doesn’t allow you to view the histogram whilst shooting, then you can also use a trial and error method of taking a shot then viewing the histogram in ‘play’ mode. Be careful when using this method as the histogram being displayed on the screen is for the jpeg compressed file that is being displayed and not the raw file you have shot. This means there may be more data to play with when you load it into your editing program.
The second method of exposing to the right is to use the Spot metering mode. When you use this mode, you will need to meter for the very brightest part of the image. The advantage of this method is that it will be more accurate than using the live view histogram. The disadvantage is that it relies on you to identify accurately what is the brightest part of the image.
If you’d like to get practical experience of using expose to the right, the Edinburgh Photography Workshop Seascape and Landscape session will give you lots of one to one opportunity with award-winning photographer, Rich Dyson. It runs once a month from September through to April.