September 4, 2019
Capture movement by panning
Using a slower shutter speed and panning can give a sense of movement
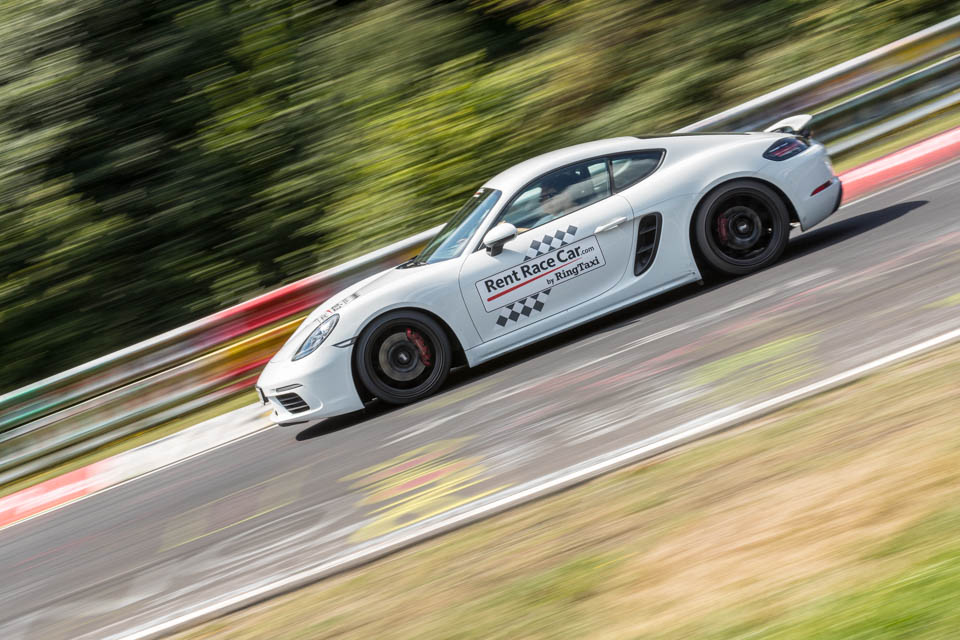
Last weekend, I was lucky enough to drive a lap around the Nordeschleife-Nurburgring race track in a fast car with Ring Taxi. You’ve probably seen photographs of race cars whizzing by with the background all blurry but the car pin sharp. If you remember the blog a few weeks ago on shutter speeds, this shouldn’t be possible. Motion is blurred by slow shutter speeds and frozen by fast shutter speeds. In the main picture above we have both and there hasn’t been any photoshop jiggery-pokery. To achieve images like this we use a technique called panning.
What is panning?
Panning requires you to set a reasonably slow shutter speed to blur the motion of the background. However, the motion of the car was frozen by moving the camera at the same speed as the car is passing by. It is one of the most difficult techniques to accomplish and you can guarantee that you’ll get more bad shots than good ones. However, with a bit of practice, you’ll soon be capturing great images just like the pros. I’ve attached a short video below showing me panning to give you a visualisation of the technique.
Setting up the camera
In order to pan successfully, there are one or two steps you need to take on your camera. You’ll need to set your shutter to shoot continuously so that as long as you keep your finger on the button it will keep taking pictures. Next, you’ll need to tell, your camera that it should track moving objects. In Canon cameras this is called AI-Servo, Nikon calls it 3D Focus tracking. Finally, you’ll need to set the autofocus area to the entire frame so that the camera can decide where to focus. Now you are ready for panning.
One of the limiting factors of cameras will be the lag from pressing the shutter to the camera taking the images. As well as shooting on my Canon 1DX MkII, I also shot a few frames on my Fuji XT-1. It was much more difficult to achieve good results on the Fuji as the lag was much longer. Another limiter is the number of frames that can be captured in a second. On the Canon, it’s 14 frames per second (fps) whilst on the Fuji, it is only 7 fps.
Camera Settings
There isn’t going to be a set of settings that will work for every occasion. The blurring is going to be as a result of your motion as you pan. A car travelling at over 100mph is going to need a faster shutter speed than a cyclist travelling at 40mph or a runner at 25mph. For these car shots, I found that a shutter speed of around 1/80th of a second was working well. When I first started shooting, I set the aperture at f/8.0 – whilst the background was nice and blurry, the car was losing sharpness as the depth of field wasn’t big enough. In the later shots when I got my best images, I reduced the aperture to f/18.0 and was getting a much better result. In both cases, I was balancing the exposure by using different ISO values. At f/8.0 the ISO was a lower value and then increased as I made the aperture size smaller. On very bright days you may even need to add an ND filter to achieve the correct exposure. You can see the differences in the two images below. The f/8.0 image is on the left.
You can have great fun using panning to add some creativity to your images. The technique will work with any moving objects from fast cars to birds and even to small children running around the park. Let your creativity run riot! You’ll see that I’ve now added a comments box at the bottom of this post. Let me know what you think and even share some of your attempts at panning.
You can also sign up for the Edinburgh Photography Workshop monthly newsletter where you’ll get regular updates on interesting things happening in photography and some great tips. Sign up by clicking here.